
Desserts
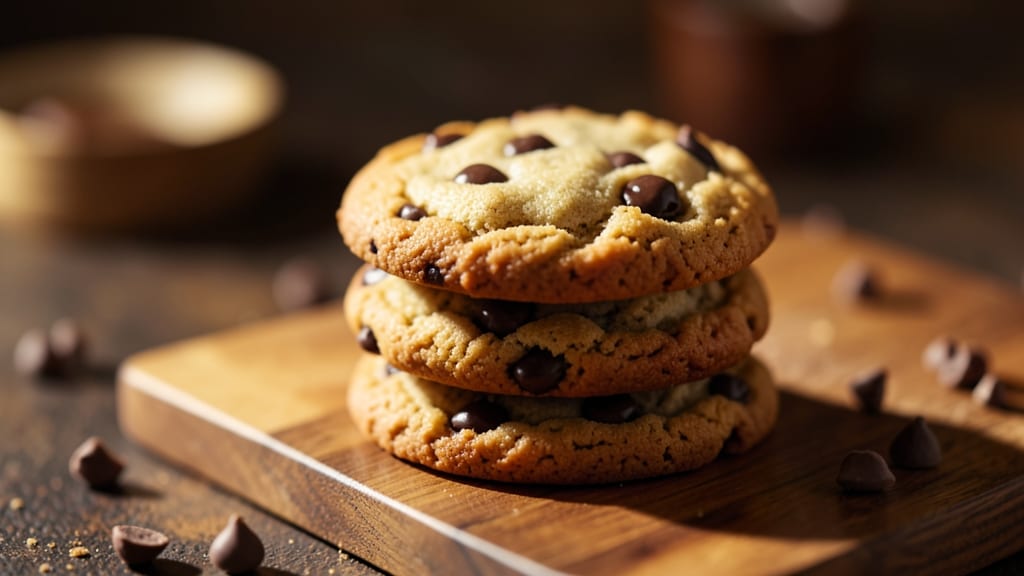
This copycat Chips Ahoy cookie recipe delivers the same crispy chocolate chips and chewy centers you remember from the bakery—just with a few professional secrets.
After years of perfecting the texture, I’ve cracked the code for that signature bite: crisp edges, soft centers, and chocolate chips that stay melty even after baking. The key is in the butter-to-flour ratio and a precise baking time that ensures no cookie turns out too flat or too cakey.
What makes this recipe stand out is its foolproof method—no fancy equipment, just a standard mixing bowl and oven. The dough comes together in under 15 minutes, and the baking process is monitored closely to guarantee that signature texture.
Unlike store-bought versions, these cookies maintain their chewiness for days, making them perfect for meal prep or gifting.
By the time you pull these golden-brown cookies from the oven, you’ll have a batch that rivals the original—crispy edges, chewy centers, and chocolate chips in every bite.
The aroma alone will have everyone asking for the recipe, and the taste will confirm why this has been a bakery favorite for decades. Whether you’re baking for a crowd or treating yourself to a nostalgic snack, this recipe delivers.
The best part? This recipe scales effortlessly—double the batch for parties or halve it for a small treat. Optional variations like gluten-free flour or vegan butter ensure everyone at the table can enjoy them. Let’s get baking!
Ingredients for copycat chips ahoy cookie
Twelve simple ingredients create bakery-style cookies with that signature chewy bite.
| Ingredient | Amount | Notes |
|---|---|---|
| Unsalted Butter 🧈 | 1 cup | Cold, cubed for cutting |
| Granulated Sugar 🍚 | 1 cup | White, not brown |
| Packed Brown Sugar 🍚 | 1 cup | Light brown preferred |
| All-Purpose Flour 🌾 | 3 cups | Sifted for light texture |
| Baking Soda 🍞 | ½ tsp | Pure, not baking powder |
| Salt 🧂 | ½ tsp | Fine sea salt |
| Vanilla Extract 🥛 | 1 tbsp | Pure, not imitation |
| Chocolate Chips 🍫 | 2 cups | Semi-sweet, 12oz bag |
| Large Eggs 🥚 | 2 whole | Room temperature |
| Cornstarch 🌾 | 1 tbsp | For chewy texture |
| Butterflake Shortening 🧈 | ½ cup | For crisp edges |
The butter and shortening combo is non-negotiable for that signature crisp edge, chewy center. Crisco Butterflake is the gold standard—don't substitute with margarine or oil. For butter, Land O'Lakes or Plugrah work best, but any unsalted brand will do. The chocolate chips? Nestlé Semi-Sweet in the 12oz bag replicates the bakery version perfectly. If you must use a different brand, Hershey's Special Dark works too, but the color will be slightly darker. Keep your butter cold when measuring—it should hold its shape when packed into the cup.
No vanilla extract? Vanilla bean paste at half the amount adds depth. Running short on cornstarch? Arrowroot powder works 1:1, but the texture won't be identical. For a gluten-free version, swap the flour for King Arthur Gluten-Free Measure for Measure—it mimics all-purpose perfectly. The baking soda must be pure; double-acting baking powder isn't a substitute. And for those with egg allergies, aquafaba at 3 tbsp per egg works surprisingly well. Pre-measure everything before starting—this dough comes together fast, and you don't want to be scrambling for ingredients halfway through.
Store dough balls in an airtight container in the fridge for up to 3 days—they keep better than you'd think. Baked cookies stay fresh for 5 days in a sealed container at room temperature, or 2 weeks in the freezer. For parties, bake them 2 days ahead—they actually improve as they sit. The chocolate chips will soften slightly if stored too long, but that just makes them more melty when you bite in. If you're making a double batch, use two 12oz bags of chips—don't skimp, or you'll miss that signature chip count per cookie.
Why You'll Love This Recipe
- No Mixer Needed: I swear by this—just a fork, a bowl, and my hands. The butter and sugars get mashed together until it’s just soft enough, then the flour and baking soda cut right in. No electric mess, no sticky cleanup, and honestly? The cookies turn out even more tender that way.
- Chocolate Chip Nirvana: That perfect balance of crispy edges and gooey centers? This recipe nails it. The brown sugar keeps them chewy, while the baking soda gives that classic Chips Ahoy lift. And yes, even on a Tuesday night, these disappear faster than my willpower.
- Party in a Jar: Between us, these are my go-to for cookie exchanges, school bake sales, or when I need to impress without stressing. They freeze like a dream—just toss them in a bag and pull one out whenever. My kids think I’m a hero, and the neighbors? They ask for seconds.
- Pantry Staple Magic: Five ingredients, zero weird substitutes. Butter, sugars, flour, baking soda—stuff you already have. I’ve made these with expired flour (yes, really) and still ended up with cookies that taste like childhood. Budget-friendly? Absolutely. Reliable? You bet.
Step-by-step instructions for copycat chips ahoy cookies
This method delivers the signature chewy texture and buttery chocolate chips you know from the original.
Cut Cold Butter and Shortening for Light Texture
Place the 1 cup unsalted butter and 0.5 cup butterflake shortening in the freezer for 15 minutes to firm up. Cut both into ¼-inch cubes using a sharp chef's knife. The cold fat prevents excessive spreading while maintaining that signature tender crumb.
In a stand mixer fitted with the paddle attachment, combine the butter and shortening. Beat on medium speed for 1-2 minutes until the mixture becomes pale and fluffy—this incorporates air that creates the signature chewy texture. The butter should look like whipped cream rather than solid chunks.
Add Sugars and Mix Until Fully Combined
Add the 1 cup granulated sugar and 1 cup packed brown sugar to the mixer. Beat on medium speed for 2-3 minutes until the sugars are fully incorporated and the mixture is light and fluffy. You'll see the sugars dissolve completely into the butter.
This step is crucial for achieving the perfect balance of sweetness and chewiness. The brown sugar adds moisture while the granulated sugar provides structure. Scrape down the sides of the bowl with a spatula to ensure even mixing.
Add Eggs, Vanilla, and Cornstarch
Add the 2 whole large eggs, one at a time, mixing on low speed for 30 seconds after each addition until fully incorporated. The mixture will look slightly curdled initially, but this will resolve as you add the dry ingredients.
Add the 1 tablespoon vanilla extract and 1 tablespoon cornstarch, mixing on low speed for 1 minute until smooth. The cornstarch is the secret to achieving that signature chewy texture—it creates a slightly denser crumb while keeping the cookies tender.
Combine Dry Ingredients and Fold in Chocolate Chips
In a separate bowl, whisk together the 3 cups all-purpose flour, 0.5 teaspoon baking soda, and 0.5 teaspoon salt. Gradually add the dry ingredients to the wet mixture, mixing on low speed for 30-45 seconds until just combined. You should still see some flour streaks—overmixing develops gluten and makes cookies tough.
Remove the bowl from the mixer and fold in the 2 cups chocolate chips using a silicone spatula. Make sure the chips are evenly distributed throughout the dough. The dough will be thick and slightly sticky—this is normal and indicates proper hydration.
Chill and Scoop for Perfect Cookies
Divide the dough into two equal portions and flatten each into a 1-inch thick disk. Wrap each disk tightly in plastic wrap and refrigerate for at least 1 hour (or up to 24 hours). Chilling prevents excessive spreading and allows the flour to fully hydrate for a better texture.
Preheat your oven to 375°F and line two baking sheets with parchment paper. Scoop the chilled dough into 2-tablespoon portions (about 1.5 ounces each) and place them 3 inches apart on the prepared sheets. The dough will hold its shape better when cold.
Bake to Golden Perfection
Bake for 9-11 minutes until the edges are golden brown but the centers still look slightly underdone. The cookies will continue cooking on the hot pan after you remove them from the oven. Rotate the baking sheets halfway through for even baking.
Let the cookies cool on the baking sheet for 5 minutes before transferring to a wire rack. The centers should be soft and chewy with crisp edges, and each bite should contain multiple chocolate chips. Store in an airtight container for up to 5 days or freeze for longer storage.
Pro Tips For Making Copycat Chips Ahoy Cookie
- Cream Butter Slowly: After burning three batches, I finally figured out that softening butter at room temperature and mixing it into the sugars gradually—not all at once—keeps the dough from turning into a greasy mess. Use a wooden spoon and work in stages, or the heat will melt it too fast and ruin the texture.
- Pack That Brown Sugar: I learned this the hard way—using loosely packed brown sugar throws off the moisture balance, and your cookies end up denser than they should. Scoop it straight from the bag into the measuring cup, then level it off. No guessing, no sad cookies.
- Chill the Dough Twice: This isn’t the prettiest method, but it’s the tastiest. After mixing, refrigerate the dough for at least 2 hours. Then, roll it into balls, flatten slightly, and freeze on a tray for 15 minutes before baking. The second chill prevents spreading and guarantees thick, chewy centers.
- Rotate the Pan: My grandmother swore by this, and she was right: Swap the baking sheets halfway through at 350°F (175°C). The oven’s heat zone isn’t even, and rotating ensures the edges crisp up while the middle stays soft. Yes, even if you’re impatient like me.
Troubleshooting perfect results
Underbaked Centers
The most common issue is cookies that look done but taste undercooked inside. This happens when you rely on visual cues alone—golden edges don’t always mean the center is fully baked.
Use an instant-read thermometer to check the internal temperature: 185-190°F at the center guarantees a fully set cookie without being dry. I’ve found that baking for 9-11 minutes at 375°F works best, but your oven may vary—rotate the baking sheets halfway to ensure even heat distribution. 🌡️
Excessive Spreading
If your cookies spread too much, your dough was likely too warm when scooped. The butter and shortening must stay cold—chill the dough for at least 1 hour before baking, and scoop portions directly from the fridge.
Use a cookie scoop (I recommend OXO Good Grips) for consistent-sized portions, and place them 3 inches apart on the baking sheet. If your oven runs hot, reduce the temperature to 350°F and bake for 12-14 minutes.
Dry or Cakey Texture
Overmixing the dough or using too much flour can turn your cookies dry and cakey. Measure your 3 cups all-purpose flour using the spoon-and-level method—don’t scoop directly from the bag, or you’ll pack in too much. The cornstarch is critical for chewiness, so don’t skip it.
If your dough feels too dry, add 1 teaspoon milk or water at a time until it holds together when pressed. Also, avoid opening the oven door early—the sudden temperature drop can cause cookies to deflate and dry out. 💡
Chocolate Chips Stay Hard
If your chocolate chips aren’t melting properly, your oven temperature might be too low or the chips are too far from the heat source. Nestlé Semi-Sweet chips work best, and they should be evenly distributed in the dough.
For extra melty chips, place the baking sheet on the middle rack of your oven, where heat is most consistent. If your oven runs cool, increase the temperature to 385°F for the last 1-2 minutes of baking.
Store-bought chips can vary in quality—avoid mini chips, as they bake faster and may stay hard.
Flat or Thin Cookies
Flat cookies usually mean the dough was too warm or the butter melted too quickly. Chill the dough disks for at least 1 hour before scooping, and use room-temperature eggs—cold eggs can cause the dough to tighten and spread less.
If your cookies still flatten, try pressing the dough portions slightly with your thumb before baking to create a thicker center. Another trick? Use a silicone baking mat instead of parchment paper—it conducts heat more evenly and helps maintain shape. 🔥
Burnt Edges
Burnt edges happen when the oven is too hot or the cookies bake too long. 375°F is the sweet spot, but if your oven runs hot, reduce it to 350°F and bake for 12-14 minutes.
Keep a close eye on them after 8 minutes—they should be golden brown but not dark brown. If your oven has hot spots, rotate the baking sheets halfway through baking.
For extra insurance, use light-colored baking sheets (like Nordic Ware Half-Sheet Pans)—they reflect heat better than dark pans, which can cause burning.
Nutrition facts
Frequently asked questions
Why does this recipe use both butter and shortening?
The combination creates the signature crisp edges and chewy centers of bakery-style cookies. Butter adds flavor while shortening prevents excessive spreading and keeps cookies tender. The 1:2 ratio (shortening to butter) is the secret—don't substitute with margarine or oil.
Can I make these cookies without a stand mixer?
Use a large mixing bowl and a sturdy wooden spoon or rubber spatula. Cream the butter and shortening by hand for 3-5 minutes until light and fluffy—your arms will do the work. For the dry ingredients, gently fold them in with a spatula until just combined. The dough will be slightly less aerated but still delicious!
How do I store baked cookies to keep them soft?
Let cookies cool completely on the baking sheet, then transfer to an airtight container with a layer of parchment paper between stacks. Store at room temperature for 5 days or freeze for 2 weeks. For extra softness, add a slice of bread to the container—it helps maintain moisture.
What's the best way to tell when cookies are fully baked?
Look for golden brown edges with slightly underbaked centers—they should spring back when gently pressed. Use an instant-read thermometer for precision: 185-190°F at the center means perfect doneness. Overbaking dries them out, so pull them when they still look slightly soft!
Can I add mix-ins like nuts or sprinkles?
Yes! Fold in ½ cup chopped walnuts or pecans with the chocolate chips, or press sprinkles lightly on top before baking. For best results, chill the dough with mix-ins for 2 hours to prevent spreading. Just remember—the more you add, the denser the texture becomes.