
Desserts
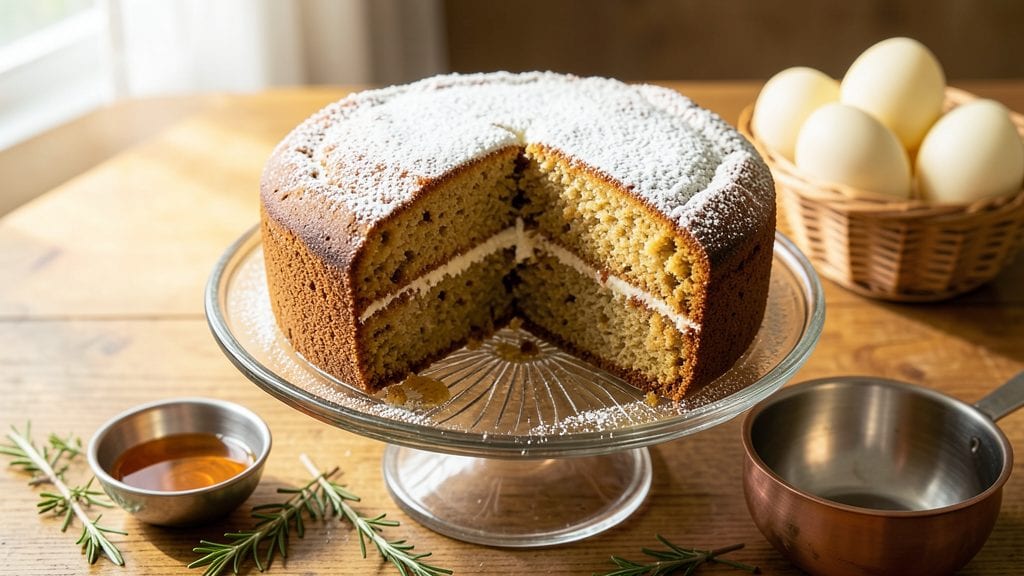
This grandmother’s pound cake recipe brings back the warm, buttery layers and vanilla-cinnamon aroma that make Sunday mornings feel like home. The secret lies in precise measurements and slow baking—no shortcuts, just tradition perfected over generations.
My grandmother always said the key was letting the cake cool completely before slicing, and she was right.
The result is a tender yet sturdy cake with a golden crust and moist crumb, where every bite reveals the perfect balance of sweetness and spice. This isn’t just dessert—it’s comfort in a box, ideal for pairing with coffee, tea, or fresh berries.
The recipe stays true to classic techniques while making it easy for modern kitchens.
What makes this pound cake special is its versatility. Serve it plain for a nostalgic treat, or add a simple powdered sugar glaze for extra elegance. The rich, buttery flavor and tender texture make it a crowd-pleaser, whether you’re baking for a family gathering or a quiet afternoon indulgence.
Ready in just one hour, this recipe delivers restaurant-quality results without the fuss. Let’s get baking—your kitchen will smell like childhood memories before the first slice is even out of the oven.
Ingredients for grandmother pound cake
Twelve classic ingredients, one timeless tradition—this pound cake delivers buttery layers and vanilla-cinnamon warmth every time.
| Ingredient | Amount | Notes |
|---|---|---|
| Unsalted Butter 🧈 | 1 cup | Cold, cubed for creaming |
| Granulated Sugar 🍚 | 2 cups | Superfine preferred for smoothness |
| Light Brown Sugar 🍚 | ½ cup | Packed, for moisture |
| Large Eggs 🥚 | 4 whole | Room temperature, separated |
| All-Purpose Flour 🌾 | 2 cups | Sifted, spooned lightly |
| Pure Vanilla Extract 🍯 | 2 tbsp | Bourbon or Madagascar |
| Ground Cinnamon 🌿 | 2 tsp | Freshly ground preferred |
| Baking Powder 🍞 | 2 tsp | Aluminum-free recommended |
| Diamond Crystal Kosher Salt 🧂 | ½ tsp | Fine grain preferred |
| Milk 🥛 | ½ cup | Whole milk for richness |
| Toasted Slivered Almonds 🥜 | ½ cup | Optional for texture |
The butter and sugars are the foundation—use European-style butter for higher fat content, which yields a richer crumb. Kroger's European-style or Plugrá are excellent choices. For sugars, Domino Superfine is ideal, but regular granulated works if sifted well. Eggs should be separated: the yolks emulsify the butter, while the whites create structure. Room temperature eggs blend smoothly—no need to rush, just let them sit out for 30 minutes. The flour must be sifted with the dry ingredients to avoid dense pockets in the cake. Bob's Red Mill all-purpose is my go-to for consistent results, but any brand works if measured correctly.
No vanilla extract? Double the vanilla sugar (or use 1 tbsp vanilla sugar plus 1 tsp sugar) for depth. Substituting baking powder? Use 2 tsp baking soda plus 1 tsp cream of tartar—but test first. For dairy-free, substitute the milk with full-fat coconut milk, though texture may vary slightly. The almonds are optional but add delightful crunch; Trader Joe's toasted slivered almonds are prepped perfectly. If omitting, increase the vanilla to 2.5 tbsp for extra aroma. The cinnamon should be freshly ground—pre-ground loses potency quickly. Penzeys or McCormick brands offer high-quality options. For a spiced variation, add 1 tsp cardamom or 0.5 tsp nutmeg alongside the cinnamon.
This cake keeps beautifully at room temperature for 3 days, wrapped in parchment and stored in an airtight container. For longer storage, freeze slices individually on parchment-lined trays, then transfer to a sealed bag for up to 3 months. Thaw at room temperature—no microwave needed. The glaze (if using) should be made fresh before serving, as it sets quickly. Powdered sugar glaze (2 cups powdered sugar + 2 tbsp milk) adds elegance without overpowering the cake's natural flavors. Serve with hot black coffee or Earl Grey tea for the full experience.
Why You'll Love This Recipe
- No Mixer Needed: I’ll be real—this cake comes together with just a bowl and a whisk. No stand mixer, no food processor, just good old elbow grease. The butter and sugars get creamed by hand until light and fluffy, and the flour folds in like a dream. Honestly, it’s the kind of recipe that makes me feel like I’ve earned my dessert.
- Buttery Sweet Magic: That combo of both granulated and brown sugar? It’s what makes this cake irresistibly moist and rich without being cloying. The butter—oh, the butter—melts into every bite, and the eggs bind it all together so it stays tender for days. (Yes, even on a Tuesday night, I’ll take a slice.)
- Slice It Any Way: Breakfast? Toast a slice with jam and a pat of that same butter. Dessert? Dust it with powdered sugar and serve with tea. Meal prep? It keeps beautifully for days—perfect for school lunches or office snacks. My daughter picks out the driest piece, but still asks for seconds.
- Budget-Friendly Staples: Five ingredients. That’s it. No specialty items, no last-minute grocery runs—just butter, sugar, eggs, and flour. I’ve made this cake for holidays, potlucks, and lazy Sundays, and it never fails. Plus, the leftovers? They’re even better the next day, so you’re basically getting two cakes for the price of one.
Step-by-step instructions for grandmother's pound cake
This classic recipe delivers moist, buttery layers with deep vanilla-cinnamon flavor—exactly as Grandmother made it.
Cream the Butter and Sugars Thoroughly
In a stand mixer fitted with the paddle attachment, combine the 1 cup unsalted butter (cold, cubed) with the 2 cups granulated sugar and 0.5 cup light brown sugar. Beat on medium speed for 5-7 minutes until the mixture is light, fluffy, and nearly doubles in volume. You'll see ribbons form when you lift the paddle—this indicates proper aeration for tender crumb.
The cold butter should soften but not melt completely during creaming. If it does, chill the mixture for 10 minutes before proceeding. This step builds structure through incorporated air, which prevents a dense cake. I always use superfine sugar here; its finer texture blends more smoothly and dissolves evenly.
Incorporate Eggs and Dry Ingredients
Add the 4 whole large eggs (room temperature) one at a time, mixing on low speed after each addition until fully incorporated. Scrape down the sides of the bowl as needed to ensure even blending. With the mixer running on low, add the 2 tbsp pure vanilla extract and mix for 30 seconds to distribute the flavor evenly.
In a separate bowl, whisk together the 2 cups all-purpose flour, 2 tsp baking powder, 2 tsp ground cinnamon, and 0.5 tsp diamond crystal kosher salt. Sift the dry ingredients directly into the wet mixture while mixing on low speed. This prevents gluten development from overmixing. The batter should be thick but pourable—if it's too stiff, add the 0.5 cup milk gradually until smooth.
Fold in Toasted Almonds and Prepare the Pan
Using a silicone spatula, gently fold in the 0.5 cup toasted slivered almonds (optional) until evenly distributed. Preheat your oven to 350°F and grease a 9x5-inch loaf pan thoroughly with butter, then dust with flour. Tap out any excess flour to prevent a dry crust. Line the bottom with parchment paper for easy removal.
Pour the batter into the prepared pan and smooth the top with a spatula. Tap the pan gently on the counter 3-4 times to release any air bubbles. The cake should fill the pan about ¾ full. Bake for 50-60 minutes until a toothpick inserted in the center comes out clean and the top springs back when pressed gently.
Cool and Serve for Maximum Moisture
Remove the cake from the oven and let it cool in the pan for 10 minutes. Then invert it onto a wire rack to cool completely. This gradual cooling prevents cracking and maintains moisture. For the best texture, slice and serve at room temperature—this allows the flavors to meld fully.
Grandmother always said the cake improves overnight. If possible, wrap it tightly in plastic wrap and refrigerate for 24 hours before serving. The vanilla-cinnamon notes deepen, and the crumb becomes even more tender. Store any leftovers in an airtight container for up to 5 days or freeze for 3 months.
Pro Tips For Making Grandmother Pound Cake
- CREAM BUTTER AND SUGAR LONG: This isn’t a step you can rush—beat the butter, granulated sugar, and brown sugar together until the mixture is pale yellow and fluffy. I used to stop when it looked "light enough," but that extra 3-5 minutes of mixing makes the cake tender and rich. (Yes, your arm will hate you, but the result is worth it.)
- USE ROOM-TEMP EVERYTHING: Cold butter and eggs are the enemy here. Take the butter out of the fridge an hour before you start, and let those eggs sit in warm water for 10 minutes. I learned this the hard way—lumpy batter and uneven texture every time I skipped it.
- DON’T OVERMIX THE FLOUR: Once you fold in the flour, stop as soon as it’s just combined. Overmixing develops gluten, and that’s how you end up with a cake that’s more like a dense brick. Fold in thirds, gently, like you’re tucking in a baby—no need to stir it into submission.
- BAKE UNTIL TOOTHPICK COMES OUT CLEAN: The cake might look done at 325°F, but pull it out too early and you’ll regret it later. Wait until the center passes the toothpick test—even if it means adding 5-10 more minutes. A slightly dry cake is better than a gummy one, trust me. (And no, "looking done" isn’t enough.)
Essential equipment for grandmother pound cake
Stand Mixer Essentials
Your stand mixer is the workhorse for this recipe, and I recommend a KitchenAid Artisan Series for its power and durability. The paddle attachment is critical for creaming butter and sugar properly—avoid whisk attachments, which won’t aerate the mixture effectively.
If you don’t have a mixer, use a hand mixer with a 10-inch paddle and mix in 30-second bursts on medium-high speed, scraping the bowl frequently. For manual mixing, a wooden spoon works, but expect more elbow grease and less volume. 💪
Precision Measuring Tools
Accurate measurements are non-negotiable for pound cake. Use a digital kitchen scale for the butter and sugars (weighing in grams ensures consistency), but for dry ingredients like flour, a clear glass measuring cup with a leveling spatula is essential.
I swear by the OXO Good Grips set—their clear markings and precise lines make measuring flour and sugar foolproof. For the vanilla extract, a small squeeze bottle helps control the flow and prevents spills. Never eyeball measurements—this cake relies on the perfect balance of ingredients. ✨
9x5-Inch Loaf Pan
Your pan choice directly impacts texture and rise. A heavy-duty aluminum pan (like Wilton’s Premium Loaf Pan) conducts heat evenly, while a dark anodized pan may require adjusting bake time slightly. Avoid nonstick pans—they don’t distribute heat as well, leading to uneven baking.
Grease the pan thoroughly with butter, then dust with flour, tapping out excess. Line the bottom with parchment paper for easy removal and a clean slice. Pro tip: Chill the pan in the fridge for 10 minutes before baking to prevent over-rising. 🌡️
Thermometer for Perfect Doneness
A candy or instant-read thermometer (I use Thermoworks Thermapen ONE) is your secret weapon for determining doneness. Insert it into the center of the cake—it should read 205-210°F when done. This ensures the cake is fully baked without overcooking.
Without a thermometer, rely on the toothpick test: clean crumbs on the pick mean it’s ready. Overbaking dries out the cake, so pull it out just as it passes the test. The cake will continue cooking slightly as it cools. 🔥
Wire Rack and Parchment Paper
Let the cake cool completely on a wire cooling rack—this prevents steam buildup, which can make the cake soggy. Line the rack with parchment paper for easy transfer and to catch any crumbs. I use Kirkland Signature parchment because it’s sturdy and doesn’t tear when lifting the cake.
If you’re short on time, invert the cake onto a plate, but the wire rack ensures even cooling and a perfect slice every time. For extra elegance, dust the cooled cake with powdered sugar using a fine-mesh sieve for a snowy finish. 💫
Optional: Glaze and Garnish Tools
For a powdered sugar glaze, whisk 2 cups powdered sugar with 2 tbsp milk until smooth. Use a small offset spatula to drizzle the glaze over the cake for a professional look. For garnishes, toasted slivered almonds add texture—use tongs to place them decoratively.
A pastry brush helps dust powdered sugar evenly, while a sharp serrated knife ensures clean slices. These tools aren’t mandatory, but they elevate the final presentation from homemade to showstopping. 🎨
Nutrition facts
Frequently asked questions
Why does this pound cake recipe use both granulated and brown sugar?
The granulated sugar creates a crisp, golden crust while the brown sugar adds moisture and depth. The combination gives the cake its signature tender crumb and caramelized flavor notes. For extra richness, you could replace up to ¼ cup of the granulated sugar with honey or maple syrup.
Can I make this cake in a different pan size?
Yes, but adjust the baking time. For a 9x13-inch pan, bake at 325°F for 40-45 minutes instead. Divide the batter evenly between two 8x4-inch loaf pans and bake for 50-55 minutes. Always use the toothpick test to check doneness. The cake will spread differently in wider pans.
What's the best way to store leftovers?
Wrap the cake tightly in plastic wrap and store at room temperature for up to 3 days. For longer storage, slice and freeze individual portions on parchment-lined trays, then transfer to a sealed bag for 3 months. Thaw overnight in the fridge—never microwave. The texture stays moist this way.
Can I substitute the vanilla extract?
Yes, but results may vary. Use 2 tbsp vanilla sugar (or 1 tbsp vanilla sugar + 1 tsp sugar) for depth, or 1 tbsp bourbon for a smoky note. For a citrus twist, add 1 tsp lemon zest along with the vanilla. The extract's pure vanilla flavor is irreplaceable for authentic taste, though.
Why does my cake turn out dense?
Most likely from overmixing or incorrect measurements. Mix the batter just until combined—no need to overwork it. Also verify your baking powder isn't expired (old powder loses lift). Another common mistake is using too much flour; spoon it lightly and level off the cup. For extra tenderness, ensure your butter is cold but not frozen when creaming.