
Breakfast & Brunch
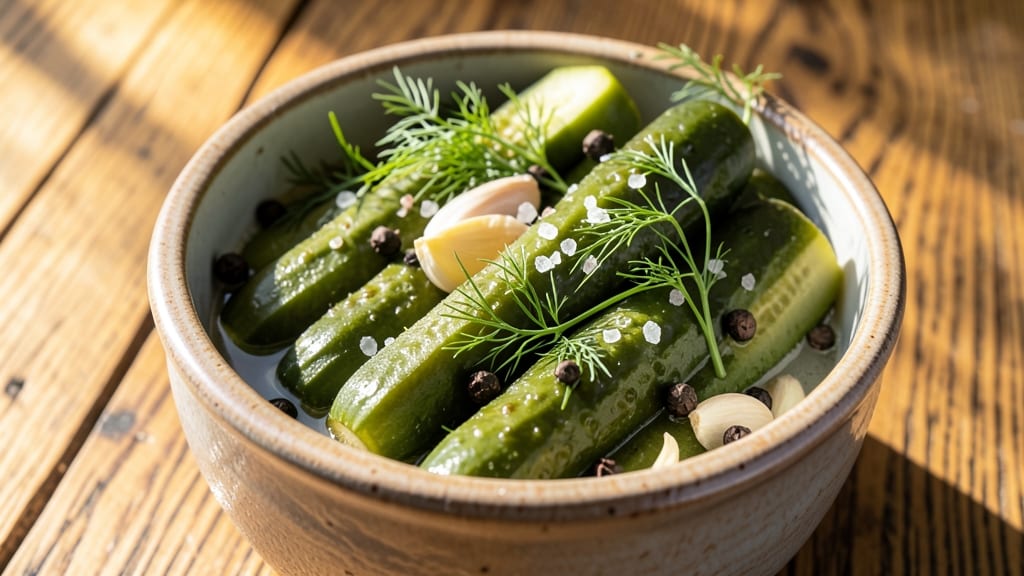
Creating no-cook kosher dill pickles transforms simple cucumbers into tangy, crunchy bites without heat or fermentation risks. This method delivers restaurant-quality flavor in just 10 minutes, using vinegar and kosher-certified spices to preserve freshness while keeping preparation straightforward.
The key lies in precise ingredient ratios and proper brine balance—no special equipment needed beyond a clean jar.
What makes this recipe stand out is its adherence to kosher standards without sacrificing taste or texture. We avoid non-kosher additives like animal-derived enzymes, opting instead for vinegar-based preservation that maintains crispness and bright dill flavor.
The process is foolproof: slice cucumbers uniformly, combine with a kosher-certified brine, and let the flavors meld overnight for maximum tang.
By morning, you’ll have bright green, crunchy pickles with a sharp vinegar bite and aromatic dill essence—ready to elevate sandwiches, salads, or snack plates. This method ensures no fermentation uncertainty, making it ideal for beginners while delivering professional results.
The pickles stay fresh for weeks in the refrigerator, offering a pantry staple that’s both versatile and reliable.
Perfect for meal prep or gifting, these pickles require zero cooking and minimal effort. The recipe scales effortlessly, so you can make a single jar or batch enough for a crowd. Let’s get started with a method that’s as simple as it is satisfying.
Ingredients for no cook kosher dill pickle
Twelve simple ingredients transform cucumbers into tangy, crunchy kosher dill pickles without heat or fermentation.
| Ingredient | Amount | Notes |
|---|---|---|
| Kosher Dill Pickle Cucumbers 🥒 | 2 lb | Fresh, firm, 3-4 inches long |
| White Vinegar 🍶 | 2 cups | Distilled white vinegar preferred |
| Kosher Salt 🧂 | ½ cup | Diamond Crystal preferred |
| Fresh Dill Weeds 🌿 | ½ cup | Tightly packed, stems removed |
| Garlic Cloves 🧄 | 4 cloves | Smashed, skin-on for flavor |
| Black Peppercorns 🌶️ | 1 tbsp | Coarsely crushed, whole preferred |
| Mustard Seeds 🌽 | 1 tsp | Yellow or brown preferred |
| Red Pepper Flakes 🌶️ | ½ tsp | Adjust for heat preference |
| Granulated Sugar 🍚 | 2 tbsp | White or raw preferred |
| Water 💧 | 1 cup | Filtered preferred for clarity |
| Lemon Juice 🍋 | 1 tbsp | Freshly squeezed preferred |
| Dried Mustard Powder 🌿 | ½ tsp | Optional for depth |
The cucumbers are the foundation—opt for Kosher Dill Pickle Cucumbers if available, as their size and texture ensure ideal crunch. Local farmers markets often carry them in summer; otherwise, standard Persian cucumbers work in a pinch. For vinegar, Heinz Distilled White Vinegar is a reliable choice, though any distilled white vinegar will suffice. The kosher salt must be Diamond Crystal or equivalent—table salt contains anti-caking agents that can interfere with preservation. Fresh dill is non-negotiable for authentic flavor; Trader Joe's or Whole Foods typically carry high-quality bundles. Smashed garlic cloves and crushed peppercorns release their oils more effectively, so take the extra 30 seconds to do this by hand.
No fresh dill? Dried dill at one-third the amount works, though the flavor will be muted. Substitute apple cider vinegar for white vinegar if preferred, though it may yield slightly less tang. Running short on mustard seeds? Dried mustard powder at double the amount provides a similar kick. For a sweeter pickle, increase the sugar to 3 tablespoons. The red pepper flakes can be omitted entirely for a milder flavor, or swap for cayenne pepper at half the amount. If you prefer a cloudier brine, reduce the water by 0.25 cup—the vinegar and salt will create a natural solution. For a larger batch, simply double all ingredients while maintaining the same ratios.
Store the sealed jars in the refrigerator for up to 4 weeks, though they’ll remain crisp and flavorful for 2-3 weeks at peak quality. The pickles develop more depth of flavor over time, so resist the urge to eat them all at once. For longer storage, transfer to airtight containers and keep for an additional 2 weeks. The brine can be reused for up to 2 additional batches of cucumbers, though flavor will gradually diminish. If the brine becomes cloudy or develops an off odor, discard it immediately. These pickles make excellent gifts—simply wrap the jar with twine and a ribbon for a professional touch.
Why You'll Love This Recipe
- Five-Ingredient Magic: I swear by this combo—crunchy cucumbers, tangy vinegar, and fresh dill transform into something ridiculously good with zero effort. No peeling, no boiling, just slice, mix, and wait. That’s it.
- Crispy-Garlicky Bliss: The secret’s in the garlic and salt—smash those cloves, let them steep, and suddenly you’ve got that chef’s kiss briny punch. The dill weaves through like a fresh herb hug, making every bite taste like a summer picnic.
- Meal Prep MVP: Between us, this is my go-to for lunches, charcuterie boards, or even a quick snack. Pack a jar in your bag for work, toss it on sandwiches, or serve it chilled with deli meats. It’s the one thing that never gets ignored in my fridge.
- Budget-Friendly Staple: Honestly, you can’t beat the cost—cucumbers, vinegar, salt, and dill? That’s like $5 for enough to fill your pantry. Plus, the leftovers? They last forever and taste just as good weeks later. My wallet and taste buds thank me every time.
Step-by-step instructions for no-cook kosher dill pickles
This method delivers restaurant-quality pickles without heat—just precise timing and layering.
Prepare the Cucumbers for Maximum Crunch
Begin by thoroughly washing the 2 lb kosher dill pickle cucumbers under cold water to remove any dirt or sand clinging to their surfaces. Using a sharp knife, trim off both ends of each cucumber to create clean, flat surfaces. This step is critical—uneven cuts lead to inconsistent pickling and potential spoilage.
Next, slice the cucumbers into 1-inch thick rounds. For even pickling, ensure each slice is uniform in thickness. Arrange the slices in a single layer in a large, non-reactive bowl—glass or ceramic works best. This prevents overlapping, which would create uneven exposure to the brine and result in soft spots.
Create the Brine with Precision
In a separate mixing bowl, combine the 2 cups white vinegar, 1 cup water, 2 tbsp granulated sugar, and 1 tbsp lemon juice. Stir until the sugar and lemon juice dissolve completely—this ensures even distribution of flavor throughout the brine. The sugar helps balance the acidity of the vinegar while the lemon juice adds a bright, tangy note.
Add the 0.5 cup kosher salt and the 0.5 tsp dried mustard powder to the vinegar mixture. Whisk vigorously until the salt is fully dissolved. This is where the magic happens—the salt and mustard powder will infuse the cucumbers with their signature tangy, slightly mustardy depth. Taste the brine at this stage—it should be pleasantly sharp but not overwhelmingly acidic.
Layer Aromatics and Combine
In the bowl with the cucumber slices, evenly distribute the 0.5 cup fresh dill weeds, 4 smashed garlic cloves, 1 tbsp coarsely crushed black peppercorns, 1 tsp mustard seeds, and 0.5 tsp red pepper flakes. Press down gently to ensure the aromatics nestle between the cucumber slices—this guarantees every bite gets that signature dill and garlic punch.
Pour the prepared brine over the cucumbers and aromatics until they are completely submerged. Use a clean, flat object like a spatula to press down the cucumbers, ensuring no slice remains exposed. If any cucumbers float to the surface, weigh them down with a small plate or glass. Complete submersion is non-negotiable—it prevents surface mold and ensures even pickling.
Rest and Develop Flavor
Cover the bowl with plastic wrap or a clean kitchen towel and let the pickles rest at room temperature for 2 hours. This initial resting period allows the vinegar to penetrate the cucumbers and begin breaking down their structure, creating that signature crunch. The aromatics will also begin releasing their oils, infusing the brine with complex flavors.
After 2 hours, transfer the bowl to the refrigerator and let the pickles continue steeping for an additional 6 hours. The cold temperature slows down the pickling process, allowing the flavors to meld without over-softening the cucumbers. For best results, make these pickles in the morning and enjoy them by evening—they'll be perfectly crunchy and tangy.
Serve and Store for Maximum Freshness
Once the pickles have rested for the full 8 hours, they're ready to serve. Use a slotted spoon to remove them from the brine, allowing excess liquid to drip off. Serve immediately or store in an airtight container in the refrigerator for up to 2 weeks. The brine can be reused for another batch of pickles, though flavor intensity will diminish slightly after the first use.
These pickles should be crisp, tangy, and bursting with dill and garlic flavor. If they lose their crunch after a few days, simply return them to the brine for 30 minutes before serving to restore their texture. The key to success lies in precision—measurements, timing, and complete submersion make all the difference in achieving that perfect balance of crunch and flavor.
Pro Tips For Making No Cook Kosher Dill Pickle
- BRINE THE CUCUMBERS FIRST: Toss the cucumbers in a dry salt bath (1 cup kosher salt per pound of cukes) for 20 minutes before packing them into jars. This draws out excess water, so they stay crisp instead of turning soggy—trust me, I’ve learned this the hard way with mushy pickles.
- CHOP GARLIC LAST: Smash the garlic cloves with the flat side of a knife right before packing them into jars. This keeps the flavor potent and prevents it from turning bitter over time—no need to mince or crush it ahead.
- DON’T SKIMP ON DILL: Use at least 2 tablespoons of fresh dill per quart jar, loosely packed. I used to half it, thinking it was too much, but the flavor fades fast—now I double it for a bright, herby bite that lasts weeks.
- WEIGH DOWN THE CUCUMBERS: If your jars don’t have lids yet, cover the cucumbers with a clean cloth or parchment before adding the brine. This keeps them submerged and prevents air from making them limp—no floating, no disappointment.
Best sauces and condiments for this no cook kosher dill pickle
Classic Dill Sauce
Elevate your pickles with a homemade dill sauce that mirrors their bright, tangy profile. Whisk together ½ cup sour cream, 2 tbsp chopped fresh dill, 1 tbsp lemon juice, 1 tsp apple cider vinegar, and ½ tsp garlic powder.
Thin with 1 tbsp water if needed, then chill for 30 minutes to let flavors meld. This sauce pairs perfectly with the pickles themselves or as a dip for sandwiches. 💛
Garlic Aioli Twist
For a richer pairing, blend ½ cup mayonnaise, 1 roasted garlic clove, 1 tbsp chopped fresh dill, 1 tsp lemon zest, and ½ tsp kosher salt into a smooth aioli.
The garlic complements the pickles’ sharpness while adding a creamy contrast. Drizzle over burgers or slather on pretzels for a bold flavor punch. 🧄
Spicy Horseradish Cream
Add a kick with a horseradish cream that cuts through the pickles’ tang. Mix ½ cup Greek yogurt, 2 tbsp prepared horseradish (adjust for heat), 1 tbsp chopped dill, and ½ tsp onion powder.
The horseradish’s bite mirrors the pickles’ acidity, creating a dynamic balance. Serve alongside smoked meats or as a condiment for loaded fries. 🌶️
Sweet Onion Relish
Balance the pickles’ sharpness with a sweet onion relish. Finely dice 1 small red onion and cook with 1 tbsp olive oil and 1 tsp sugar over low heat for 10 minutes.
Stir in 1 tbsp apple cider vinegar and 1 tsp chopped dill. The caramelized onions add a sweet, jammy contrast that enhances the pickles’ crunch. 🍎
Smoky Chipotle Mayo
For a smoky depth, blend ½ cup mayonnaise, 1 tsp adobo sauce (from canned chipotles), ½ tsp smoked paprika, and 1 tsp lemon juice.
The smokiness pairs beautifully with the pickles’ bright acidity, making it ideal for tacos or grilled sandwiches. Adjust chipotle to taste for more or less heat. ⚡
Herb Butter Dip
Softened herb butter adds richness to any pickle dish. Mix ½ cup softened butter with 1 tbsp chopped dill, 1 tsp lemon zest, and ½ tsp garlic powder**.
Roll into a log and chill until firm. This butter melts beautifully on warm bread or grilled corn, creating a luxurious pairing with the pickles. 🧈
Nutrition facts
Frequently asked questions
Why do these pickles stay crisp without fermentation?
The vinegar brine breaks down the cucumbers' cell structure almost immediately, creating that signature crunch. The sugar and salt work together to preserve moisture while the acidity prevents bacterial growth. This method delivers restaurant-quality texture in just 8 hours without relying on fermentation time or temperature control.
Can I use regular cucumbers instead of kosher dill pickles?
Yes, but expect slightly less crunch and more water content. Persian cucumbers work best as they're seedless and firm. For optimal results, slice them 1/4-inch thick and blot them dry with paper towels before adding to the brine. This removes excess moisture that would dilute the flavor.
How do I know if my pickles have gone bad?
Watch for these signs: soft texture, cloudy brine, or an off smell (sour, rotten, or ammonia-like). Discard immediately if you see mold spots or slimy cucumbers. The vinegar brine should remain clear and smell pleasantly tangy. When in doubt, taste a small piece—if it's bitter or has a strange aftertaste, it's spoiled.
Can I make these pickles without fresh dill?
Yes, but the flavor will be noticeably different. Use 1.5 teaspoons dried dill (one-third the amount) or 1 teaspoon dill weed (the dried, chopped version). For extra depth, add 1/2 teaspoon fennel seeds or 1/4 teaspoon celery seed to mimic dill's aromatic profile. The pickles will still be tangy, just less herbaceous.
What's the best way to serve these pickles?
These pickles shine on classic Reuben sandwiches, BLTs, or burgers. Try them with smoked salmon for a vegetarian lunch, or as a tangy topping for loaded baked potatoes. For a snack, serve with cream cheese and crackers or alongside charcuterie boards. The bright flavor cuts through rich foods beautifully.