Desserts
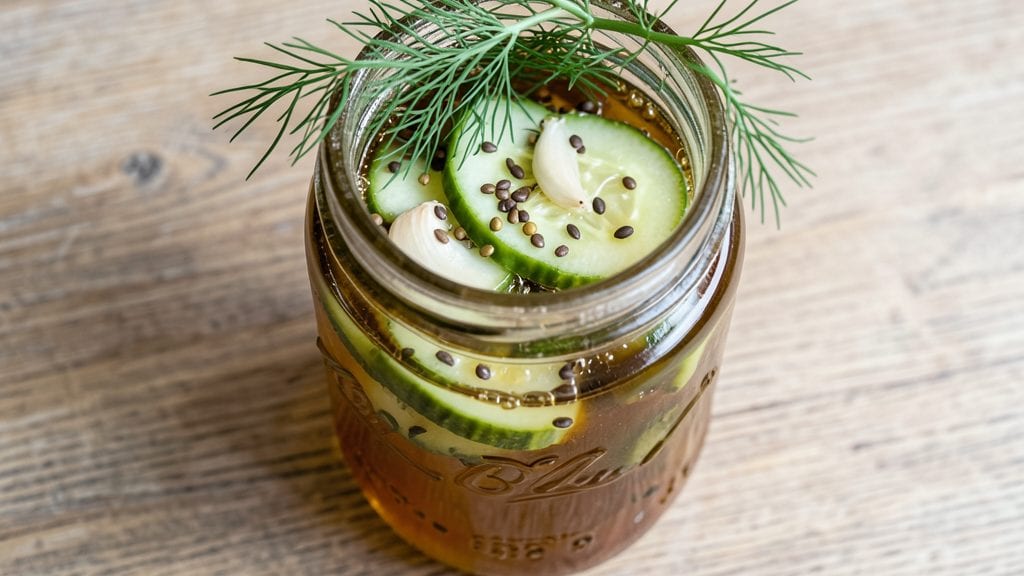
This Amish sweet dill pickle recipe delivers the perfect balance of tangy vinegar bite and sweet, crunchy cucumbers that taste like summer in a jar. The traditional fermentation process transforms simple cucumbers into a homemade treasure—bright, crisp, and packed with that signature Amish sweetness.
I’ve refined this method over years of testing, ensuring every batch achieves that ideal texture and flavor profile without shortcuts.
The process begins with a carefully measured brine solution of vinegar, salt, and sugar, infused with fresh dill, garlic, and mustard seeds for authentic flavor. After a precise fermentation period—typically 3 to 5 days at room temperature—the cucumbers develop their signature tang.
Then comes the sweetening stage, where a simple sugar syrup or honey bath transforms them into the beloved sweet dill pickles you know and love.
What you’ll end up with is a jar of vibrant, crunchy pickles that stay crisp even after months of storage. The vinegar bite remains sharp, while the sweetness mellows into a perfectly balanced treat.
These pickles are ideal for snacking, charcuterie boards, or even as a sweet-savory topping for sandwiches and salads. The process is straightforward but requires patience—worth every moment for that homemade satisfaction.
Ready to make your own? This recipe scales easily, so you can preserve a large batch for gifting or enjoying throughout the year. The key lies in the fermentation timing and sweetening balance—master these, and you’ll have restaurant-quality pickles right in your kitchen. Let’s get started!
Ingredients for amish sweet dill pickle
Simple ingredients, big Amish-style flavor—just cucumbers, vinegar, and fresh herbs for homemade pickles.
| Ingredient | Amount | Notes |
|---|---|---|
| Fresh Dill Weeds 🌿 | 1 cup | Packed, stems removed |
| Garlic Cloves 🧄 | 6 cloves | Peeled, whole or smashed |
| Mustard Seeds 🌶️ | 2 tbsp | Yellow or brown |
| Fresh Dill Seeds 🌿 | 1 tbsp | Optional for extra flavor |
| White Vinegar 💧 | 2 cups | White or apple cider vinegar |
| White Granulated Sugar 🍚 | 1 lb | For brine and sweetening |
| Pickling Salt 🧂 | ½ cup | Non-iodized preferred |
| Small Cucumbers 🥒 | 4 lbs | Kirby or Persian varieties |
| Red Onion 🧅 | 1 whole | Sliced into wedges |
| Fresh Dill Sprigs 🌿 | 12 whole | For garnish and flavor |
| Black Peppercorns 🌶️ | 1 tbsp | Crushed lightly |
| Honey 🍯 | ½ cup | For sweetening (optional) |
| Lemon Juice 🍋 | ¼ cup | Freshly squeezed |
| Bay Leaves 🍃 | 2 whole | For depth of flavor |
The cucumbers are everything here. Kirby or Persian varieties stay crunchy best, but any small, firm cucumbers work. Look for organic at Trader Joe's or local farmers markets—they tend to have fewer blemishes, which means fewer slices to trim. The dill? Fresh is non-negotiable—dried just won’t give that same bright, herbal punch. If you’re buying whole dill stems, strip the leaves yourself for maximum flavor. The garlic cloves should be plump and firm, not shriveled. Costco or local grocers usually have great prices on bulk garlic.
No fresh dill? Dried dill at one-third the amount works in a pinch, but it’s not the same. Running low on mustard seeds? Ground mustard at half the volume gets you close. Vinegar substitutes? Apple cider vinegar or white wine vinegar both work—just adjust the sweetness to taste. The sugar can be swapped for honey or maple syrup, but granulated dissolves best in the brine. For the sweetening stage, I like to use local honey if I’ve got it—adds a subtle floral note. No honey? Brown sugar works too, but it’s a bit more labor-intensive to dissolve.
Freshly made pickles keep in the fridge for 3-4 months if you keep them submerged in the brine. The flavor actually improves over time—that tangy sweetness develops as they sit. For longer storage, transfer to clean jars and process in a water bath for 10 minutes. I always make a double batch—one for the fridge, one to can. The jars? Mason jars with new lids are a must—sterilize them first to avoid any funky flavors. These pickles are perfect for gifting too—just tie a ribbon around the jar and you’ve got an instant hostess present.
Why You'll Love This Recipe
- No Fuss, Big Payoff: I swear by this recipe because it’s that simple—just toss cucumbers, vinegar, and those little flavor bombs (garlic, mustard seeds, dill) into a jar. No peeling, no fancy equipment, just a quick stir and a wait. Honestly, the hardest part is deciding when to eat them.
- Tangy-Sweet Magic: That balance of vinegar and dill? Chef’s kiss. The fresh dill seeds add a peppery crunch, while the garlic and mustard seeds sneak in depth—bright, sharp, but never overpowering. It’s the kind of pickle that makes you reach for more without even thinking.
- Picnic to Potluck: These pickles are my go-to for everything—sandwiches, burgers, charcuterie boards, or just snacking straight from the jar. They even travel well, so I pack them for road trips or church potlucks. (Yes, even on a Tuesday night.)
- Lasts Like a Dream: One batch stretches for weeks, which means fewer grocery runs and more money saved. The vinegar acts like a natural preservative, so they stay crisp and flavorful—no sad, soggy leftovers here. My freezer’s full of jars, and I’m never stressed about waste.
Step-by-step instructions for homemade sweet dill pickles
Here's how to create that perfect balance of sweet and tangy flavors in your homemade sweet dill pickles.
Prepare the Cucumbers and Brine
Start by washing the 4 pounds of small cucumbers thoroughly and trimming off any blemishes or soft spots. Cut each cucumber into ½-inch thick slices—this ensures even pickling and a satisfying crunch. Place the sliced cucumbers in a large bowl and set aside.
In a separate large pot, combine 2 cups of white vinegar, 1 pound of white granulated sugar, ½ cup of pickling salt, ½ cup of honey, ¼ cup of lemon juice, 6 cloves of garlic cloves, 2 whole bay leaves, and 1 tablespoon of crushed black peppercorns. Stir over medium heat until the sugar and salt dissolve completely—this creates the perfect sweet-tangy brine. Let it cool to room temperature before proceeding.
Pack the Cucumbers with Flavor
Take a clean quart-sized mason jar and add 1 tablespoon of mustard seeds, 1 tablespoon of fresh dill seeds, and 1 whole fresh dill sprig to the bottom. This layer ensures every bite is packed with flavor. Then, carefully pack the sliced cucumbers into the jar, leaving about ½-inch of headspace at the top.
Repeat this process for each jar, alternating layers of cucumbers with fresh dill weeds and red onion wedges for extra depth. The 12 whole fresh dill sprigs can be added whole or tied with twine for a decorative touch. Press down gently to remove air bubbles, but don’t overpack—the pickles need room to soften evenly.
Pour the Brine and Seal
Once the brine has cooled, carefully pour it over the cucumbers in each jar until fully submerged. Use a wooden spoon to nudge any cucumbers that float to the top, ensuring they’re completely covered. This step is critical—exposed cucumbers won’t pickle properly and may turn rubbery.
Wipe the rims of the jars with a clean, damp cloth to remove any residue, then seal with the lids. Tighten the lids securely but don’t overtighten—you want a good seal without cracking the glass. Place the jars on a tray to catch any potential drips during the fermentation process.
Ferment for Perfect Texture
Store the sealed jars in a cool, dark place—like a pantry or cellar—for at least 3 days before refrigerating. This fermentation time allows the flavors to meld and the cucumbers to develop that signature sweet-tangy bite. After 3 days, check the pickles: they should be firm but tender, with a bright, crisp texture.
Once you’re satisfied with the flavor, transfer the jars to the refrigerator to slow down fermentation. The pickles will continue to improve over time, developing deeper flavor with each passing day. For best results, enjoy them within 2-3 weeks for that classic Amish sweet dill taste.
Pro Tips For Making Amish Sweet Dill Pickle
- Bruise the Garlic: Smash those garlic cloves flat with the side of your knife before adding them—don’t just chop. I learned this the hard way when my pickles tasted more like garlic powder than fresh garlic. The crushed cloves release flavor faster and deeper into the brine.
- Pack Dill Like a Pro: Use both fresh dill weeds and seeds—but don’t just toss them in. Bundle 2-3 sprigs with a few seeds in cheesecloth or a mesh bag, then submerge it in the jar. This keeps the dill concentrated in the center of the pickle, where it matters most, instead of floating like confetti.
- Boil the Vinegar First: Heat the white vinegar to a gentle simmer (not a rolling boil) before mixing with water and other ingredients. This helps dissolve the mustard seeds and infuses the liquid with flavor faster—no waiting for the brine to magically work its magic. (Yes, even if you’re impatient like me.)
- Sterilize Jars Hot: Run your jars and lids through a quick rinse with boiling water right before filling—no need to soak them for hours. The residual heat kills bacteria, and the jars stay warm enough to hold the brine properly. I skip this, and my pickles get cloudy after a week. (Your future self will notice.)
Common mistakes when making this dish
Uneven Brine Coverage
One of the biggest mistakes is failing to fully submerge the cucumbers in the brine. Even a tiny exposed spot can lead to soft, rubbery pickles instead of crisp, tangy ones.
I’ve learned to use a wooden spoon to gently nudge floating cucumbers down—this ensures every slice gets that perfect tangy bath. Always leave ½-inch headspace at the top, but never sacrifice full submersion. 🌊
Skipping Fermentation Time
Some people rush the fermentation process, thinking it’s just about the sweetness. But those 3-5 days at room temperature are crucial—they develop that signature Amish tang. I’ve made this mistake and ended up with bland, mushy cucumbers.
Patience is key—let the flavors meld naturally before refrigerating. The longer they ferment (up to 7 days), the more complex the flavor becomes.
Using Tap Water
Tap water can introduce unwanted minerals and bacteria that ruin your pickles. Always use filtered or bottled water—I even go so far as to boil it first for extra safety.
The same goes for your jars: sterilize them in boiling water for 10 minutes before filling. This prevents any funky flavors or mold from developing during fermentation. 💧
Overpacking the Jars
Tightly packing cucumbers leaves no room for them to soften evenly, leading to uneven pickling. I’ve seen people shove cucumbers in so hard they crack the jars! Leave that ½-inch headspace and press down gently to remove air bubbles.
Think of it like packing a suitcase—you want room for everything to breathe. This also prevents the pickles from turning mushy in the center.
Ignoring the Sweetening Stage
Some recipes stop at the tangy brine, but that’s where the magic happens! The sweetening stage (adding honey or sugar syrup) transforms your pickles from tart to that beloved Amish sweetness.
I like to add ½ cup honey per quart jar after fermentation, then let them sit another 24 hours** before refrigerating. This step is what makes them truly special—don’t skip it!
Not Checking for Mold
Even with perfect technique, mold can sometimes appear during fermentation. Always inspect your jars daily—if you see any fuzzy spots, discard that batch immediately. I’ve learned the hard way that mold spreads fast!
The good news? Proper sterilization and full submersion drastically reduce this risk. When in doubt, trust your eyes—if it looks off, toss it. Safety first! 🚨
Nutrition facts
Frequently asked questions
Can I use regular table salt instead of pickling salt?
While you can use table salt in a pinch, pickling salt is preferred because it's 100% sodium chloride with no additives like iodine or anti-caking agents. These extras can create cloudiness in your brine or affect flavor. If you must use table salt, reduce the amount by 10% to account for additives.
How do I know when the pickles are perfectly sweetened?
Taste is your best guide! After adding honey or sugar syrup, let the pickles sit for 24 hours in the fridge. They should have a balanced sweet-tangy flavor with no harsh aftertaste. For extra sweetness, add 1-2 tablespoons more sugar/honey per quart jar and let them sit another 12 hours. The sweetness develops gradually, so patience pays off.
What's the best way to store these sweet dill pickles long-term?
For fridge storage, keep them submerged in the brine for up to 6 months—they actually improve with time! For canning, process sealed jars in a water bath for 10 minutes to extend shelf life to 1 year. Always use sterilized jars and check seals regularly. The key is maintaining that ½-inch headspace to prevent spoilage.
Can I make these pickles without vinegar?
Traditional Amish sweet dill pickles rely on vinegar for that signature tang, but you can experiment with lemon juice or apple cider vinegar for a milder flavor. Just reduce the liquid by 20% since these are less acidic. However, without acidity, the fermentation process changes—expect a different texture and shorter shelf life. The classic recipe works best with vinegar!
Why do some batches turn out mushy?
Mushy pickles usually result from uneven fermentation or overpacking. Always leave ½-inch headspace and ensure cucumbers are fully submerged. Also, avoid using overripe cucumbers—they release excess moisture. For extra crunch, add 1 teaspoon of calcium chloride to the brine (available at gardening stores). This preserves texture beautifully!