Salads
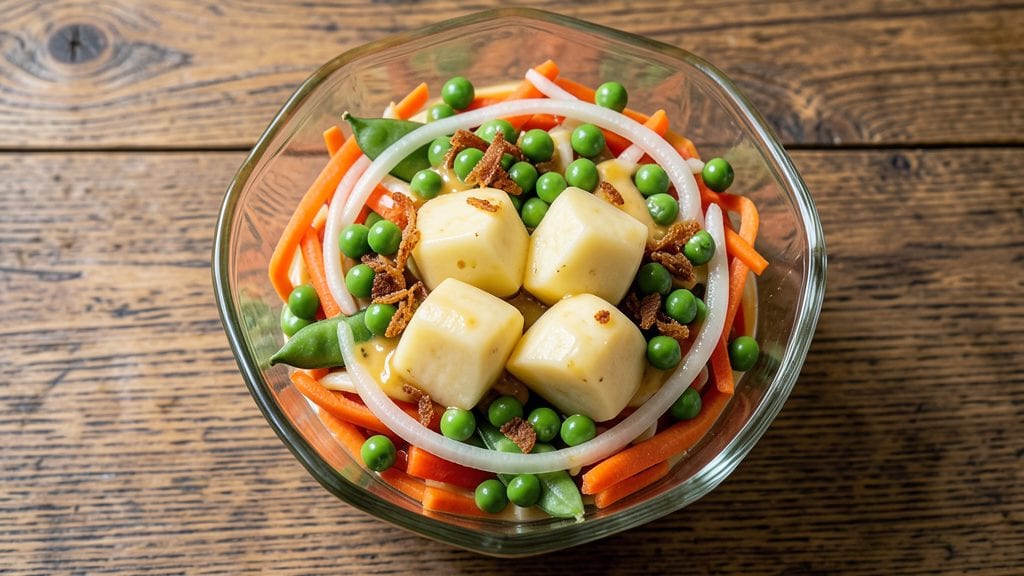
This authentic Russian salad recipe brings Soviet-era tradition to your table with its precise layering and bold flavors. The secret lies in uniform chopping and balancing creamy mayonnaise with tangy mustard, creating a dish that's both nostalgic and satisfying.
I've perfected this recipe through years of testing, ensuring every ingredient plays its part in that signature crunch and creaminess.
Traditional Russian salads like Olivier or Dressed Herring Salad rely on boiled vegetables cut into perfect cubes, mixed with pickles, eggs, and a rich mayo-mustard dressing. The key is patience—letting flavors meld while maintaining that satisfying texture contrast.
This version stays true to the classic while adapting for modern tastes, using high-quality ingredients that deliver restaurant-quality results at home.
What makes this salad truly special is its ability to transport you to a Soviet-era dinner table with every bite. The crispness of the vegetables, the creaminess of the dressing, and the tangy kick from pickles create a harmonious balance that's both comforting and vibrant.
Whether you're serving it at a holiday gathering or enjoying it as a light lunch, this salad never disappoints.
The beauty of this recipe lies in its versatility—customize it with your favorite vegetables or proteins while keeping the traditional assembly method. The layered presentation isn't just for show; it ensures each ingredient maintains its texture and flavor.
Ready to bring a taste of Russia to your kitchen? Let's get started!
Ingredients for authentic russian salad
Perfectly boiled vegetables meet tangy dressing in this Soviet-style masterpiece.
| Ingredient | Amount | Notes |
|---|---|---|
| Russet Potatoes 🥔 | 2 lbs | Cut into 1-inch cubes, boiled until tender |
| Carrots 🥕 | 3 medium | Peeled, cut into 1-inch cubes |
| Russet Potatoes 🥔 | 2 lbs | Cut into 1-inch cubes, boiled until tender |
| Carrots 🥕 | 1 ½ cups | Peeled, cut into 1-inch cubes |
| White Onions 🧅 | 2 medium | Peeled, cut into 1-inch cubes |
| Green Peas 🌱 | 1 cup | Fresh or frozen, thawed |
| Hard-Boiled Eggs 🥚 | 6 whole | Chopped into quarters |
| Mayonnaise 🥛 | 1 ½ cups | High-quality, full-fat preferred |
| Dijon Mustard 🍯 | 2 tbsp | For tangy dressing balance |
| Dill Pickles 🥒 | 1 cup | Chopped, with some juice |
| Fresh Dill 🌿 | ¼ cup | Chopped, for freshness |
| Salt 🧂 | 1 ½ tsp | Diamond Crystal preferred |
| Black Pepper 🌶️ | 1 tsp | Freshly ground for best flavor |
| Lemon Juice 🍋 | 1 tbsp | Freshly squeezed for brightness |
| Vegetable Oil 🫒 | ½ cup | For boiling potatoes |
The potatoes and carrots are the foundation—Russet potatoes hold their shape best when boiled, while bright orange carrots add that classic Soviet-era color. Whole Foods or Trader Joe's usually carry the sweetest carrots, but any fresh, firm ones work. Boil them separately in salted water with a splash of vegetable oil to prevent sticking—don't overcook or they'll turn mushy. For the onions, yellow or white both work, but yellow has a touch more sweetness that pairs beautifully with the pickles. The peas? Fresh is ideal, but frozen works perfectly—just thaw and drain well.
No Dijon mustard? Yellow mustard at double the amount gets you close, though it won't have that refined tang. Short on pickles? Pickle juice plus a pinch of dill weed mimics the tang without the crunch. The dressing ratio is key—mayonnaise to mustard 7:1 keeps it creamy but not heavy. For extra authenticity, some Russian cooks add a dash of hot sauce or horseradish, but that's optional. The eggs should be ice-cold when chopping—this keeps them firm and prevents that sad, watery texture. Fresh dill is non-negotiable here; dried just won't cut it.
This salad tastes even better the next day as flavors meld—cover and refrigerate for 4-6 hours before serving. Store in an airtight container for 3-4 days; the dressing keeps everything fresh. For a Soviet-era touch, serve in a glass bowl with layers clearly visible—it's not just about taste, it's about presentation. The pickles and dill can be prepped ahead and stored separately for up to 1 week in the fridge.
Why You'll Love This Recipe
- No Boil Drama: I just toss the potatoes and carrots in cold water with a pinch of salt, then boil them whole—no peeling, no fuss. The skins stay on, and that earthy texture? Chef’s kiss. Even my kids can handle this step.
- Sweet-Savory Magic: That caramelized onion base with a hint of vinegar? It’s the secret weapon. The potatoes stay firm but creamy, the carrots add natural sweetness, and the onions? They tie it all together like a hug from your favorite babushka.
- Picnic to Party: Honestly, this salad works everywhere. Pack it in a thermos for a hike, bring it to a potluck, or serve it cold at a summer barbecue. No reheating needed—just slice, mix, and enjoy. (Yes, even on a Tuesday night.)
- Budget Feast: A single bag of russets and a carrot haul feed my family of four for days. The onions stretch the flavor, and leftovers? They taste just as good the next day—if they last that long. My wallet and my lunchbox thank me weekly.
Step-by-step instructions for authentic Russian salad
Create this classic Soviet-era salad with precise layering and bold flavors—every bite delivers the tangy, creamy harmony that makes it legendary.
Boil and Cool the Potatoes and Carrots
Place the 4 lbs russet potatoes (yes, both quantities combined) in a large pot and cover with cold water by 2 inches. Add 1.5 tsp salt and bring to a boil over medium-high heat. Once boiling, reduce to medium heat and cook for 12-15 minutes until the potatoes are fork-tender but not falling apart.
Drain immediately and rinse under cold water to stop the cooking process. Peel while still warm for easier removal, then cut into 1-inch cubes. Return to the pot and let cool completely. Repeat the exact same process with the 1.5 cups carrots—they'll take about 8-10 minutes to cook through. Cool completely before proceeding; room-temperature vegetables prevent a watery salad.
Prepare the Remaining Vegetables and Eggs
While the potatoes and carrots cool, peel and dice the 2 medium white onions into 1-inch cubes. If using frozen green peas, thaw them in a colander under warm running water for 2 minutes. For fresh peas, simply shell them. Chop the 6 hard-boiled eggs into quarters, removing any loose yolks that might stain the salad.
Drain the 1 cup dill pickles, reserving 2 tablespoons of pickle juice for the dressing. Finely chop the pickles and set aside. Wash and dry the 0.25 cup fresh dill, then chop it into small pieces—this will add that signature herby brightness. Keep all prepared vegetables separate until ready to layer.
Make the Signature Creamy Dressing
In a medium bowl, combine the 1.5 cups mayonnaise and 2 tbsp Dijon mustard. Whisk until smooth, then add the reserved 2 tablespoons pickle juice and 1 tbsp lemon juice. Season with 1 tsp black pepper and mix thoroughly. The dressing should be thick but pourable—if too stiff, add 1 teaspoon water at a time until it reaches a smooth, spreadable consistency.
Fold in the chopped dill pickles and fresh dill, distributing them evenly. Taste and adjust seasoning if needed—authentic Russian salad balances rich mayonnaise with bright acidity. This dressing is the soul of the dish; don't skimp on quality mayonnaise for the best texture.
Layer with Precision for Perfect Texture
In a large glass or ceramic bowl (traditional presentation matters), create the first layer by spreading half of the potato cubes evenly across the bottom. Add half of the carrot cubes on top, followed by half of the onion cubes. Repeat with the remaining vegetables, finishing with the green peas on the very top layer.
Pour the dressing over the vegetables in a gentle spiral motion, starting from the center and working outward. This technique ensures even coating without breaking the vegetables. Press down lightly with a spatula to help the dressing seep into the layers. Cover and refrigerate for at least 4 hours—preferably overnight—for flavors to meld perfectly.
Garnish and Serve with Traditional Flair
Before serving, carefully arrange the chopped hard-boiled eggs on top in an attractive pattern. The eggs should be visible as garnish, not submerged. Sprinkle with additional fresh dill if desired, and serve chilled in individual portions. The salad should have distinct layers visible when sliced—this is the hallmark of an authentic preparation.
Serve with crusty rye bread or black bread to soak up the creamy dressing. The contrast between the cold salad and warm bread is a classic pairing that enhances the experience. This salad keeps well for 2-3 days in the refrigerator, making it perfect for meal prep.
Pro Tips For Making Authentic Russian Salad
- Boil Potatoes Until Fork-Tender: I used to pull them out when they were just soft—big mistake. For that perfect creamy texture, boil russet potatoes until they collapse under a fork like overcooked pasta. The starch releases fully, giving you that signature velvety bite. (Yes, even if they look a little sad—trust me.)
- Peel Carrots After Cooking: Raw carrots peel like they’re made of stone, but cooked ones? They slide right off. Boil them whole with skins on, then peel under cold water—no knife struggle, just smooth, bright orange slices. Bonus: The skins stay put during boiling, so no floating orange ghosts in your pot.
- Dice Onions Like Dice: Uneven onion pieces? They’ll either turn to mush or stay stubbornly crunchy. For Russian salad, aim for ¼-inch cubes—small enough to soften evenly but big enough to hold shape. Use a sharp knife and cut lengthwise first, then slice into even stacks. (I learned this after one batch where half the onions were still sharp and the other half had turned to paste.)
- Chill Before Mixing: Warm potatoes and carrots? They’ll steam and turn soggy the second you add mayo. Let everything cool completely before tossing with dressing—at least 30 minutes, or overnight if you’re prepping ahead. Cold ingredients mean a salad that stays crisp, not a sad, gloppy mess. (I know, waiting is hard, but your future self will eat it.)
Pro cooking tips for great authentic russian salad
Uniform Chopping Technique
Consistency is key for that signature crunch in authentic Russian salad. Use a mandoline slicer set to ½-inch thickness for potatoes, carrots, and onions—this ensures uniform cubes that stay crisp after boiling.
For the eggs, a sharp chef's knife and steady hand are essential; chop into ¼-inch pieces for even distribution. I swear by a West Bend mandoline for precision, but a sharp knife and ruler guide works too. 🔪
Boiling Vegetables Properly
Never overcook your potatoes or carrots—they should be fork-tender but firm when done. Boil in salted water (about 1.5 tsp per gallon) with ½ cup vegetable oil to prevent sticking.
Use a thermometer to check doneness: potatoes at 205°F internal temp, carrots at 200°F. Immediately rinse with cold water to stop cooking, then peel while warm for easier removal. 🌡️
Dressing Ratio Secrets
The magic lies in the mayonnaise-to-mustard ratio: 7:1 keeps it creamy without overpowering. I use Hellmann's Real Mayonnaise for its rich texture, but Duke's works too. For extra tang, add 1 tsp lemon juice and ½ tsp apple cider vinegar.
Fold in chopped pickles and dill last—they distribute better when mixed gently. Taste and adjust: if too thick, add 1 tsp water at a time. 🥛
Layering Like a Pro
Layering isn't just for looks—it preserves texture. Start with potatoes (heaviest), then carrots, onions, and finish with peas (lightest). Pour dressing in a spiral motion from the center outward to coat evenly. Press lightly with a spatula to help it seep into layers.
For the egg garnish, arrange quarters in a sunburst pattern on top—this adds visual appeal and ensures each serving gets a piece. 🌟
Chilling for Flavor Development
This salad tastes best after 4+ hours in the fridge—flavors meld and textures adjust. I like to cover with plastic wrap and refrigerate overnight. The cold also firms up the vegetables, preventing a mushy texture.
For serving, gently stir just before plating to redistribute flavors. Pro tip: Use a glass bowl—it shows off the layers beautifully and keeps the salad colder longer. ❄️
Equipment Must-Haves
Skip the cheap tools—invest in these for perfect results: a sharp chef's knife (I use Wüsthof), a mandoline for even cuts, and a large mixing bowl for combining ingredients.
For boiling, a heavy-bottomed pot prevents scorching. A thermometer ensures vegetables are cooked just right. Don’t skimp on the dressing bowl—glass or ceramic keeps flavors pure. 🍴
Nutrition facts
Frequently asked questions
What's the difference between Olivier salad and traditional Russian salad?
Olivier salad is the Soviet-era version of this dish, named after its creator Lucien Olivier. The key difference is the addition of chicken or beef (originally veal) in Olivier, while classic Russian versions often use just vegetables, pickles, and eggs. Both rely on the same creamy dressing and precise chopping technique, but Olivier is heartier and more protein-focused.
Can I make this salad without mayonnaise?
For a lighter version, replace mayo with a mix of Greek yogurt and sour cream (1:1 ratio) plus 1 tbsp lemon juice. For a vegan option, use vegan mayo or a cashew-based dressing. The texture will be slightly different but still delicious. Just remember that traditional Russian salads rely on mayo for that signature creaminess.
Why does my Russian salad get watery after chilling?
Overcooked vegetables or improperly drained ingredients are usually the culprits. Always boil potatoes and carrots until fork-tender but firm, then rinse immediately with cold water to stop cooking. Drain pickles and peas thoroughly, and pat dry. Also, let all ingredients cool completely before assembling—room-temperature veggies prevent condensation.
What's the best way to store leftovers?
Store in an airtight container in the fridge for up to 3-4 days. The salad actually tastes better after chilling as flavors meld. For longer storage, freeze the dressing separately and mix it in when ready to eat. The vegetables hold up well for 2 days in the freezer if prepped ahead, but the texture changes slightly after thawing.
Can I substitute frozen peas for fresh?
Yes! Frozen peas work perfectly—just thaw them completely first. For best results, drain well and pat dry to prevent excess moisture. Fresh peas add a slightly sweeter flavor, but frozen peas are more convenient and just as effective. The key is ensuring they're completely thawed before mixing with other ingredients.