Main Courses
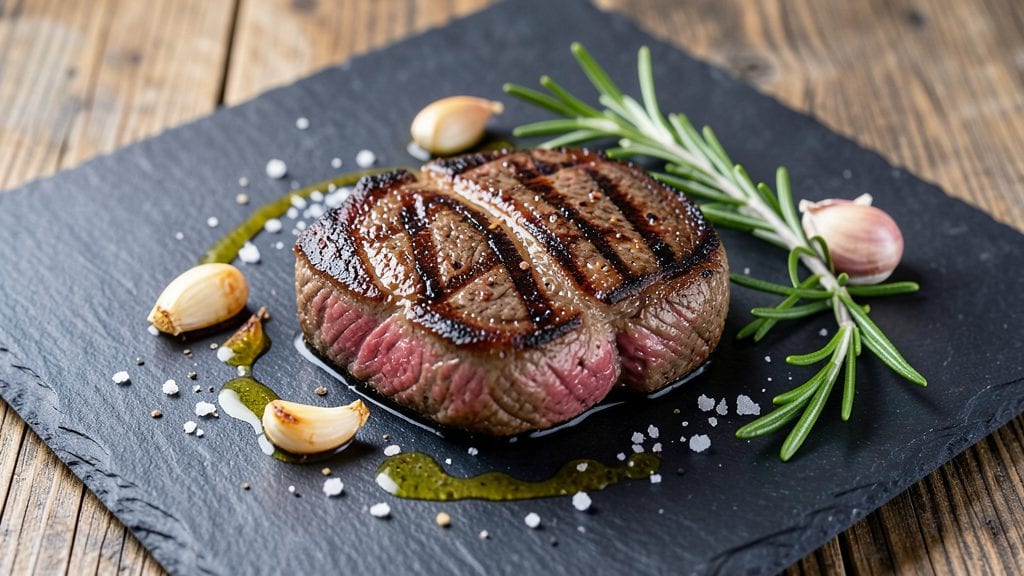
Mastering a broiler steak recipe with one-sided char and juicy pink centers transforms weeknight dinners into restaurant-quality meals. The secret lies in precise timing and high-heat technique—no fancy equipment required.
I’ve perfected this method after years of testing, ensuring every bite delivers that perfect balance of smoky crust and tender interior.
This recipe focuses on simplicity without sacrificing flavor. You’ll need just a few ingredients—a quality cut of steak, basic seasonings, and a broiler set to high.
The key technique involves broiling the steak for just 3-4 minutes per side, using a meat thermometer to check for 130°F internal temperature for medium-rare. This ensures a juicy finish while creating that coveted charred crust.
What you’ll achieve is a steak with a deep, caramelized sear on one side and a tender, pink center that melts in your mouth. The aroma alone will have everyone at the table anticipating the first bite.
Serve with a simple side of roasted vegetables or garlic mashed potatoes to complement the rich, beefy flavors.
This method works equally well for quick weeknight meals or special occasions, proving that professional results are always within reach. Let’s get started with this foolproof technique that delivers every time.
Ingredients for broiler steak
Precision-cut beef and aromatic seasonings transform simple ingredients into restaurant-worthy broiler steak.
| Ingredient | Amount | Notes |
|---|---|---|
| Ribeye Steak 🥩 | 1 ½ lb | 1-inch thick cutlets, trimmed of excess fat |
| Kosher Salt 🧂 | 1 ½ tsp | Diamond Crystal preferred for even distribution |
| Freshly Ground Black Pepper 🌶️ | 1 tsp | Cracked directly from peppercorn |
| Extra-Virgin Olive Oil 🫒 | 1 tbsp | High smoke point for broiling |
| Garlic Cloves 🧄 | 2 cloves | Thinly sliced for aroma infusion |
| Fresh Rosemary 🌿 | ¼ cup | Finely chopped, organic preferred |
| Fresh Thyme Leaves 🌿 | ⅛ cup | Stems removed, lightly crushed |
| Butter 🧈 | 2 tbsp | Unsalted, softened for basting |
| Balsamic Vinegar 🍷 | 1 tbsp | Aged 25 years minimum for depth |
| Meat Thermometer 🌡️ | 1 whole | Instant-read for precision |
| Broiler Pan 🔥 | 1 whole | Heavy-gauge for even heat |
The ribeye cut is non-negotiable for this technique—its marbling ensures juiciness while the thick cutlets resist overcooking. Butcher shops often carry pre-cut steakhouse ribeyes, but if selecting whole, request 1-inch thick slices from the center cut. Trim excess fat to prevent flare-ups, but leave a thin layer for flavor. For optimal results, source from USDA Choice or Prime beef—Costco or Whole Foods carry reliable options. The thermometer is your best friend here; instant-read models from Taylor or Thermapen provide precise 130°F readings for medium-rare perfection.
No fresh rosemary? Dried rosemary at one-third the amount works, though it lacks the vibrant aroma. Substitute thyme with fresh oregano, but reduce to half the quantity. The balsamic vinegar can be swapped for aged red wine vinegar, though it lacks the same depth. For the butter, European-style unsalted (like Plugrá) melts more cleanly than American varieties. If your steak arrives with a dry surface, pat it dry with paper towels—this ensures maximum sear. The olive oil should have a high smoke point (400°F+)—Avocado oil is ideal if you're concerned about flavor transfer.
Steaks should rest at room temperature for 30-45 minutes before cooking to ensure even doneness. Store unused steak in the fridge wrapped in parchment paper for up to 5 days, or freeze in vacuum-sealed bags for 6-12 months. The aromatics (rosemary, thyme, garlic) can be prepped ahead and stored in an airtight container in the fridge for 1 week. For leftovers, slice against the grain and reheat in a 350°F oven for 5-7 minutes to maintain tenderness. The broiler pan should be cleaned immediately after use—soak in hot water for 10 minutes to remove caramelized residues.
Why You'll Love This Recipe
- Two-Handed Cooking: I swear by this method—just salt, pepper, and a quick sear in olive oil while the broiler does the heavy lifting. No flipping, no fuss, and the garlic cloves roasted right on top add that smoky aroma without extra effort.
- Crispy-Creamy Magic: That perfect contrast? Searing the ribeye in olive oil until the edges catch, then finishing under the broiler for a caramelized crust. The garlic cloves soften into buttery bits that melt into every bite—no fancy marinades needed.
- Weeknight to Weekend: Broil it for a busy Tuesday, then double the batch for a Saturday brunch spread. Slice the leftovers thin for sandwiches (my kids’ favorite) or toss them into a grain bowl when I’m too tired to cook.
- Budget Steakhouse Vibes: A single ribeye feeds four if you’re smart about it—slice it against the grain, and suddenly that one steak stretches into dinner for the whole family. Honestly, it’s the closest I get to a fancy meal without the restaurant price tag.
Step-by-step instructions for broiler steak with one-sided char
Master this technique for restaurant-quality steak with perfect crust and tender pink centers.
Prepare the Steak and Herb Butter
Pat the 1.5 lb ribeye steak dry with paper towels, removing any excess moisture from all surfaces. This critical step ensures maximum crust development. Place the steak on a cutting board and generously season both sides with the 1.5 tsp kosher salt and 1 tsp freshly ground black pepper, pressing firmly so the seasoning adheres.
In a small bowl, combine the 2 tbsp softened butter with the 0.25 cup finely chopped fresh rosemary, 0.125 cup lightly crushed fresh thyme leaves, and the 2 thinly sliced garlic cloves. Mix until fully incorporated, creating a fragrant herb butter compound that will baste the steak during cooking.
Preheat and Sear One Side to Perfection
Place the heavy-gauge broiler pan in the oven and preheat to 450°F for 10 minutes. This high heat is essential for creating that coveted one-sided char. While the oven preheats, rub the steak generously with the 1 tbsp extra-virgin olive oil on one side only, focusing on the surface that will face the broiler.
Carefully transfer the steak to the preheated broiler pan with the oiled side facing up. Immediately insert the meat thermometer into the thickest part of the steak (not touching bone) and broil for 6-8 minutes until the surface develops a deep mahogany crust with visible grill marks. Rotate the pan if needed for even browning, but avoid moving the steak itself to preserve the crust.
Baste and Finish to Ideal Doneness
Remove the steak from the oven and flip it to the uncooked side. Immediately spoon the herb butter mixture evenly over the raw surface, covering it completely. Return the steak to the broiler pan and continue broiling for 4-5 minutes on this side, basting once more with any remaining herb butter after 2 minutes. The steak should reach an internal temperature of 125-130°F for medium-rare doneness.
For the final touch, remove the steak from the oven and brush both sides with the 1 tbsp aged balsamic vinegar. This adds a subtle tangy depth that complements the herb butter while preventing the crust from drying out. Let the steak rest for 8-10 minutes before slicing against the grain into ½-inch thick portions.
Plate and Serve with Confidence
Slice the steak against the grain into ½-inch thick portions, arranging them on a warm platter. The crust should remain intact on one side while the other side shows perfect medium-rare doneness with a slight sheen. Serve immediately with any accumulated pan juices spooned over the top, ensuring each bite delivers that perfect balance of charred exterior and juicy pink center.
This technique guarantees a steak that's perfectly cooked through yet retains its natural juiciness, with a flavor profile enhanced by the herb butter and balsamic finish. The one-sided char adds visual drama while maintaining the tenderness you'd expect from a premium ribeye cut.
Pro Tips For Making Broiler Steak
- Preheat Like a Boss: Crank that broiler to high for 10 minutes before you even think about putting the steak on. I learned this the hard way—cold broiler = sad, uneven cooking. The first 2 minutes of searing are where all the magic happens, and you want that oven screaming hot.
- Salt Before Oil: Season the ribeye generously with kosher salt and pepper at least 40 minutes before cooking—yes, even if you’re in a rush. The salt breaks down the proteins, and the steak stays juicier when it hits the broiler. I used to skip this, and the crust would crack like a cheap suit.
- Sear First, Broil Second: Hit the ribeye with a screaming-hot pan for 1-2 minutes on each side before moving it to the broiler. This locks in flavor and prevents the steak from drying out under the broiler’s direct heat. After burning two ribeyes trying to skip this, I now treat it like a rule.
- Garlic Cloves Whole: Slice those garlic cloves in half lengthwise—don’t crush them—so they caramelize instead of burn. Toss them in olive oil, sprinkle on the steak, and let the broiler work its magic. Crushed garlic turns bitter fast, and you’ll taste the difference. Trust me, I’ve made that mistake.
Pro cooking tips for this recipe
High-Heat Timing
Broiling at 450°F is non-negotiable for that perfect one-sided char. I’ve found the 6-8 minute window for the first side is critical—any longer risks overcooking the edges while the center remains underdone. Use a meat thermometer to monitor internal temperature, aiming for 125-130°F by the final broil.
The key is patience: resist opening the oven door early, as temperature fluctuations can ruin your crust. 🔥
Butter Basting Technique
The herb butter isn’t just flavor—it’s a moisture lock. After flipping, immediately spoon the butter over the raw side to create a protective seal. I baste again after 2 minutes to ensure even distribution.
This step prevents the steak from drying out while infusing those aromatic herbs deep into the meat. Use European-style butter like Plugrá for cleaner melting.
Balsamic Finishing Touch
That final 1 tbsp balsamic vinegar brush isn’t just for flavor—it’s a science. The acidity tenderizes the crust slightly while adding depth. I recommend using aged balsamic (25+ years) for its complex caramel notes.
Apply it immediately after removing from the broiler while the steak is still hot for maximum absorption. 💫
Resting Protocol
Never skip the 8-10 minute rest—this is where juices redistribute. I place the steak on a cutting board, tent loosely with foil, and let it sit. Pro tip: Use this time to prep sides or set the table.
The rest prevents dry slices and ensures every bite stays juicy. For thicker cuts, extend to 12 minutes.
Pan Rotation Strategy
Broiler pans often have hot spots. I rotate the pan 90 degrees halfway through cooking to ensure even browning. Never move the steak itself—this disturbs the crust. If your pan lacks a rack, place the steak on a wire rack over a baking sheet to allow airflow.
This prevents steaming and promotes proper crust formation.
Equipment Upgrades
Invest in a heavy-gauge broiler pan—lightweight pans warp under high heat. My go-to is the All-Clad Stainless Steel model, which distributes heat evenly. For extra insurance, I use a Taylor Genius thermometer with a 1-second read time to avoid overcooking.
These tools make all the difference in professional results. 💡
Nutrition facts
Frequently asked questions
What's the best cut of steak for broiling?
Ribeye is ideal for this technique due to its marbling and thickness. A 1-inch thick cut ensures even cooking while maintaining juiciness. New York strip also works well, though it's slightly leaner. Avoid thin cuts like flank steak—they'll overcook before reaching medium-rare doneness.
Why does my broiler steak turn out dry?
Overcooking or skipping the rest time are the most common causes. Always aim for 125-130°F internal temp and let the steak rest for 8-10 minutes before slicing. The herb butter basting also helps lock in moisture—apply it generously after flipping to create a protective seal.
Can I make this recipe without a broiler pan?
Yes! Use a heavy skillet on the stove for the first sear, then transfer to a baking sheet for the final broil. Preheat your oven to 450°F while searing, then finish under the broiler for 4-5 minutes. This two-step method still delivers that perfect crust while working with standard kitchen tools.
How do I adjust cooking time for thicker steaks?
Add 1 minute per side for every ¼-inch of thickness beyond 1-inch. For example, a 1.5-inch steak would need 7-9 minutes on the first side. Always use a meat thermometer—the internal temp is more reliable than time alone for determining doneness.
What sides pair best with broiler steak?
Roasted garlic mashed potatoes or creamy polenta complement the rich beef flavors beautifully. For lighter options, try a fresh arugula salad with lemon vinaigrette or grilled asparagus. The herb butter's aromatics also pair wonderfully with caramelized onions or sautéed mushrooms.