Sauces & Condiments
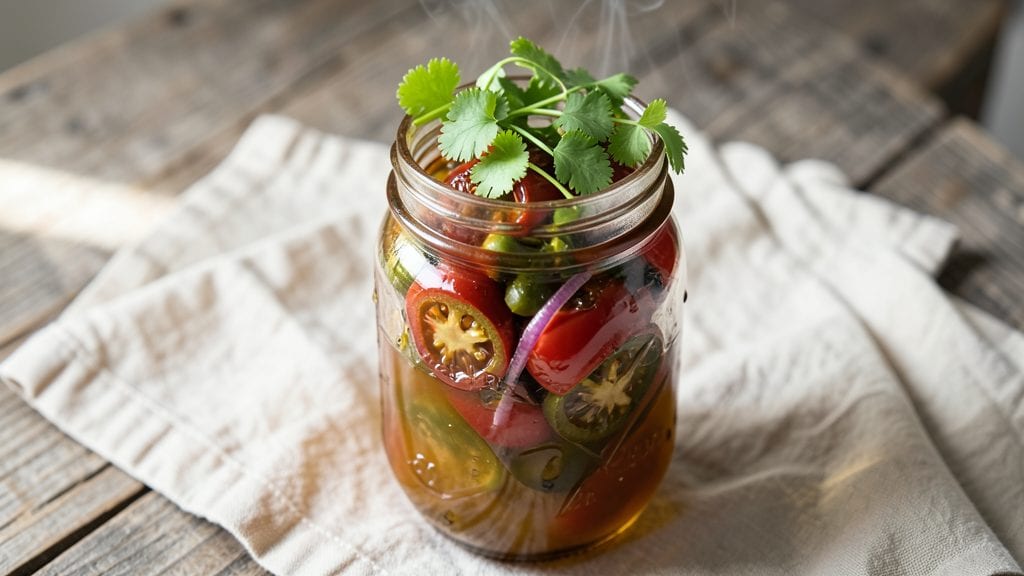
This canned salsa recipe with apple cider vinegar delivers the bright, tangy zing of fresh salsa with the convenience of long-term storage—no jarred compromise here. The apple cider vinegar adds depth and preserves the vibrant flavors while ensuring proper acidity for safe canning.
I developed this method after years of testing, balancing acidity and texture to create a salsa that tastes homemade even after months on the shelf.
The secret lies in the vinegar-to-ingredient ratio and proper sterilization. Using apple cider vinegar instead of white vinegar adds subtle sweetness and complexity, while the water bath canning process preserves freshness. This recipe works for both water bath and pressure canning, giving you flexibility depending on your equipment.
The result is a salsa with a perfect balance of acidity, freshness, and bold flavor.
What you’ll end up with is a versatile, shelf-stable salsa that’s perfect for stocking your pantry. It maintains its bright color and tangy kick, making it ideal for tacos, nachos, or dipping.
The recipe includes clear sterilization and canning instructions, so you can safely preserve your harvest or summer garden for months. Let’s get started on a batch that will last.
This method also works for small-batch canning, making it perfect for gifting or meal prep. The salsa’s acidity ensures a long shelf life—up to 12 months when stored properly.
Whether you’re a canning novice or a seasoned pro, this recipe delivers restaurant-quality results without the preservatives found in store-bought versions.
Ingredients for canned salsa recipe with apple cider vinegar
Nine ingredients that transform into vibrant, shelf-stable salsa with restaurant-quality tang.
| Ingredient | Amount | Notes |
|---|---|---|
| Fresh Roma Tomatoes 🍅 | 6 lbs | Ripe, firm, cored and quartered |
| Red Onion 🧅 | 2 whole | Medium size, peeled and quartered |
| Jalapeño Peppers 🌶️ | 4 whole | Seeds removed for mild heat |
| Fresh Cilantro 🌿 | ½ cup | Stems removed, loosely packed |
| Apple Cider Vinegar 🍎 | 2 cups | Raw, unfiltered preferred |
| White Vinegar 💧 | 1 tbsp | For acidity balance |
| Sea Salt 🧂 | 2 tbsp | Diamond Crystal preferred |
| Granulated Sugar 🍚 | ½ cup | For natural sweetness |
| Garlic Cloves 🧄 | 8 cloves | Peeled and smashed |
The tomatoes are the heart of this salsa—Roma are ideal for their meaty texture and low water content. Grab the heirloom variety at farmers markets if you can, or stick with standard Roma from Trader Joe's for consistency. The apple cider vinegar makes all the difference here; skip the white vinegar unless you're in a pinch. For the jalapeños, fresh is non-negotiable—dried peppers won't give you that bright, fresh kick. The garlic should be freshly peeled and smashed with the flat side of your knife for maximum flavor infusion. I always double-check my vinegar's acidity level (should be 5% or higher) to ensure safe canning.
No fresh cilantro? Dried cilantro at half the amount works in a bind, though it lacks that fresh brightness. Running low on Roma tomatoes? Fire-roasted diced tomatoes from a can (no salt added) save the day—just drain them well. The sugar can be swapped for honey or agave, but keep it at the same weight. For extra depth, add 1 tsp of smoked paprika or a pinch of ground cumin. The white vinegar is crucial for acidity—don't skip it even if you're using pressure canning. And if you're short on time, pre-cut frozen salsa mix (thawed and drained) can replace half the tomato base, though fresh is always better.
This salsa keeps for 12 months when canned properly—just make sure your jars are sterilized and sealed tight. For quick prep, I always make a small batch in pint-sized jars (perfect for gifting). Store in a cool, dark pantry away from heat sources. The flavor actually improves after a few weeks as the ingredients meld. Need to use it up? Freeze portions in ice cube trays for perfect single-serving additions to tacos or nachos. And if you're feeling fancy, top with avocado slices or crumbled cotija cheese right before serving.
Why You'll Love This Recipe
- No-Chop Shortcut: I swear by the canned tomatoes here—just drain, crush, and go. No peeling, no seeding, no mess. The vinegar brightens everything in minutes, and honestly? That’s my kind of magic.
- Bright & Tangy Kick: The apple cider vinegar cuts through the sweetness of the tomatoes while the jalapeños add just enough heat to linger. Between us, that cilantro finish? It’s the little detail that makes this salsa ridiculously good every time.
- Meal Prep MVP: This keeps for weeks in the fridge, so I batch it on Sundays for tacos, eggs, or grilled fish all week. Even my picky roommate grabs it first—proof it’s versatile enough for anyone.
- Pantry Stash Savior: A few dollars and five ingredients solve dinner night after night. No fancy tools, no wasted produce, just pure flavor that stretches across meals. My budget (and my taste buds) thank me.
Step-by-step instructions for preserving homemade salsa with apple cider vinegar
This method delivers restaurant-quality salsa with vibrant acidity and perfect preservation—no store-bought shortcuts needed.
Roast Vegetables for Deep, Caramelized Flavor
Preheat your oven to 425°F. On two rimmed baking sheets, spread the 6 lbs fresh roma tomatoes and 2 whole red onion (cut into quarters) in a single layer. Drizzle lightly with olive oil—just enough to coat. Roast for 30-35 minutes, turning occasionally, until the tomatoes collapse slightly and the onions develop deep golden brown spots. You'll smell that unmistakable caramelized aroma—this is where the magic begins.
Remove the 4 whole jalapeño peppers (seeds removed) and 8 cloves garlic (peeled and smashed) from the oven and set aside. The roasting process intensifies their flavors while mellowing any sharpness. For the tomatoes and onions, transfer them to a large mixing bowl while still hot—this makes peeling and chopping effortless. Let them cool slightly before handling.
Blend Ingredients for Perfect Texture
In a food processor fitted with the metal blade, combine the roasted tomatoes, onions, jalapeños, and garlic. Pulse until you achieve a chunky but smooth consistency—think ½-inch pieces at their largest. You want visible texture but no large chunks that would make the salsa difficult to eat. Taste at this stage to gauge heat level; if the jalapeños feel too mild, add a pinch of sea salt to enhance their flavor.
Transfer the blended mixture to a large stainless steel pot. Add the 0.5 cup granulated sugar and 2 tbsp sea salt, stirring to dissolve completely. The sugar balances the acidity while the salt enhances all flavors. Bring the mixture to a gentle boil over medium-high heat, then reduce to a simmer. This simmering process is crucial—it helps break down the vegetables' fibers and develop their flavors.
Acidify and Prepare for Canning
Stir in the 2 cups apple cider vinegar and 1 tbsp white vinegar while maintaining a steady simmer. The vinegar acts as a natural preservative and adds that signature tang. Simmer for 20-25 minutes, stirring occasionally, until the mixture thickens slightly and reduces by about ¼ cup. You're looking for a consistency that coats the back of a spoon but still has a loose, saucy quality.
Remove the pot from heat and stir in the 0.5 cup fresh cilantro (stems removed). Let the salsa cool to room temperature—this is critical for safe canning. The mixture should be at least 100°F but not hotter than 180°F when you begin the canning process. This cooling step also allows the flavors to meld together beautifully.
Hot-Pack and Can the Salsa
Ladle the cooled salsa into clean, hot pint-sized canning jars, filling each to within ½-inch of the rim. Use a non-metallic spoon to avoid scratching the glass. Run a damp cloth around the jar rims to ensure they're free of any food residue that could prevent proper sealing. Place lids on the jars and screw on the bands until they're fingertip-tight.
Process the jars in a boiling water bath for 15 minutes (adjust for altitude if needed). The water should cover the jars by at least 1 inch. Start timing as soon as the water returns to a full rolling boil. After processing, remove the jars and let them cool undisturbed for 12-24 hours. You'll hear a satisfying "ping" as the lids seal—this confirms your salsa is properly preserved and ready for long-term storage.
Store and Enjoy Your Homemade Salsa
Once completely cooled, check that the lids have sealed by pressing down on the center—they shouldn't pop back up. Store your salsa in a cool, dark place for up to 12 months. The apple cider vinegar preserves the bright, tangy flavor while maintaining the vibrant colors. This salsa is incredible on its own, but it also elevates tacos, grilled meats, or even as a topping for baked potatoes.
For best results, let the salsa sit for 24 hours before eating—this allows the flavors to fully develop. The acidity will mellow slightly, and the textures will harmonize perfectly. You've just created a pantry staple that rivals any store-bought option, with none of the artificial additives or compromised quality.
Pro Tips For Making Canned Salsa Recipe With Apple Cider Vinegar
- Char the Tomatoes: Toss halved Roma tomatoes cut-side down on a dry skillet over medium-high heat for 3-4 minutes until blackened in spots. This caramelizes the sugars and deepens the flavor—skip this, and your salsa will taste flat, even if everything else is perfect.
- Soak the Jalapeños: Cut the jalapeños, then soak the seeds and ribs in warm water for 10 minutes before chopping. The capsaicin (what makes it hot) leaches out, letting you control the heat without sacrificing flavor. I learned this the hard way after serving a batch to someone who cried.
- Sweat the Onion Low: Cook the diced red onion in a dry pan for 8-10 minutes over low heat until translucent and slightly sticky. Rushing this step makes the onion taste raw and harsh—it’s the foundation of the flavor, so don’t skimp.
- Use Cold Vinegar: Stir in the apple cider vinegar after removing the pan from heat, and let it cool slightly before canning. Hot vinegar can weaken jar seals, and cold vinegar also brightens the acidity without overpowering the tomatoes. I’ve had three batches fail seals before realizing this.
Essential equipment for perfect results
Canning Essentials
Start with a boiling water bath canner—I recommend the All American 921 Water Bath Canner for its durability and even heat distribution. You’ll also need pint-sized canning jars with mason-style lids (Ball or Kerr brands work perfectly).
Don’t forget a jar lifter and magnetic lid wand for safe handling and sealing. A digital thermometer ensures your water stays at 212°F during processing. 🌡️
Prep Tools
A food processor with a metal blade is non-negotiable for achieving that perfect chunky texture. I use my Ninja BN601 for its powerful pulse function. For roasting, a rimmed baking sheet (like the OXO Good Grips) prevents spills.
A fine-mesh strainer helps drain excess liquid if needed, and a non-metallic spoon (like stainless steel or silicone) prevents scratching jar rims.
Sterilization Gear
Sterilization is key—use a steam canner or large pot to boil jars for 10 minutes before filling. A lid warmer (or your canner’s built-in one) keeps lids sterile.
For extra safety, I keep a pH strip test kit (like API Fresh Water Test Kit) to verify acidity levels, though the vinegar ratio here ensures safety. A clean kitchen towel helps wipe jar rims before sealing.
Budget-Friendly Swaps
No fancy equipment? A large stockpot works for water bath canning, and glass jars with screw bands (even repurposed pasta sauce jars) can be sterilized in the oven at 250°F for 15 minutes.
A wooden spoon (for stirring) and tongs (for handling hot jars) are affordable alternatives. Just ensure everything is spotless—no shortcuts on hygiene! ⚡
Pro Tips for Success
Invest in a vacuum sealer if you’re not canning—it extends shelf life to 6 months in the freezer. For small batches, pint jars are ideal, but quart jars work for larger prep.
Always use new lids (bands can be reused). A timer prevents over-processing, and a notebook tracks batch details (like vinegar ratios) for future reference.
Nutrition facts
Frequently asked questions
Can I use white vinegar instead of apple cider vinegar in this recipe?
The recipe specifically calls for apple cider vinegar to add subtle sweetness and depth to the salsa. White vinegar works in a pinch for acidity, but it lacks the complexity and may taste sharper. If you must substitute, use a 50/50 mix of apple cider and white vinegar to maintain balance. The 1 tbsp white vinegar in the recipe is there to ensure proper acidity for safe canning, not flavor.
How do I know if my homemade canned salsa is properly sealed?
After processing, let the jars cool completely (12-24 hours). Press the center of each lid—if it doesn't pop back up, the jar is sealed. You'll also hear a satisfying "ping" sound when properly sealed. If a lid doesn't seal, refrigerate and use the salsa within 1 week. Never taste-test unsealed jars to check safety—always verify visually first.
Can I adjust the heat level in this salsa?
Yes! Remove all seeds and membranes from the jalapeños for a mild version, or leave them in for extra heat. For a smoky flavor, add 1 tsp smoked paprika or ½ tsp chipotle powder when blending. If you prefer chunkier salsa, pulse the food processor fewer times. For smoother, reduce the tomatoes to a sauce before mixing with other ingredients.
What's the shelf life of this canned salsa?
Properly canned salsa with apple cider vinegar lasts 12 months in a cool, dark pantry. The vinegar's acidity preserves freshness while maintaining vibrant color and tang. Once opened, transfer to an airtight container and refrigerate—use within 1 month. Freezing is also an option for up to 6 months, though texture may soften slightly.
Why does my salsa taste too vinegary?
This usually happens when the salsa isn't simmered long enough to balance flavors. Return the salsa to a gentle simmer for 5-10 extra minutes to let the vinegar mellow. Adding 1 extra tablespoon of sugar or ½ cup more tomatoes can also help. If the issue persists, mix the salsa with 1 cup of fresh tomato juice before canning to dilute the acidity slightly.