Desserts
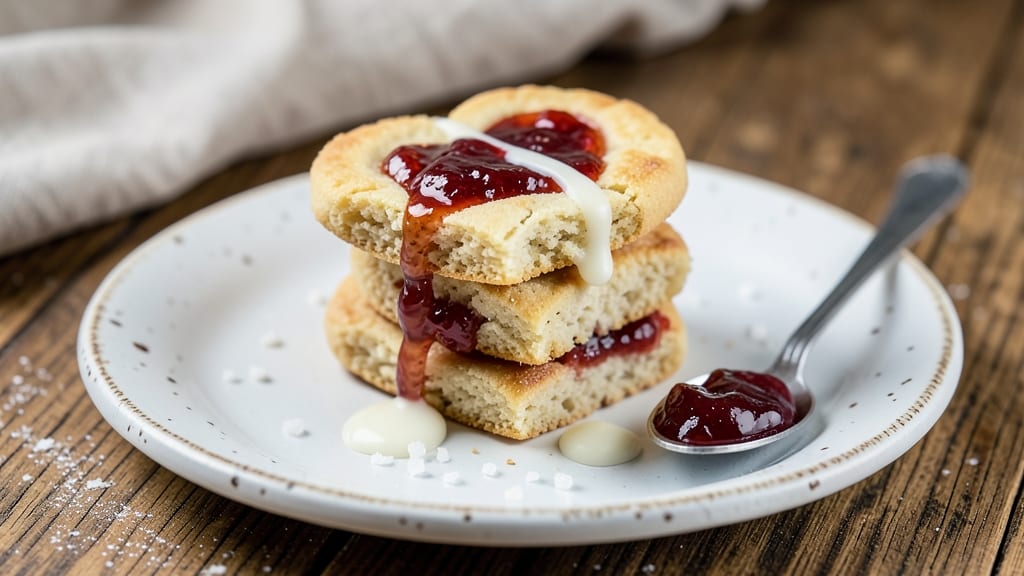
This jam heart cookies recipe delivers buttery, jam-filled bites that taste like a hug from a bakery—no fancy equipment or skills required. ✨ I've perfected the balance between tender cookie dough and jam that stays gooey in the center, using a simple technique that works every time.
The vanilla kiss in the dough adds warmth that pairs beautifully with any fruit jam, making these cookies irresistible for holidays or spontaneous treats.
What makes these cookies special is their foolproof method: rolled dough, filled hearts, and a precise baking time that ensures crisp edges and soft centers. You'll only need a few pantry staples—flour, butter, sugar, and your choice of jam—and about 20 minutes of active time.
The dough is easy to handle, and the shaping process becomes second nature after the first few cookies. Perfect for beginners or experienced bakers looking to add a classic touch to their repertoire.
The result is a batch of cookies that looks like they came straight from a holiday catalog—golden edges, plump jam centers, and that signature heart shape. The aroma of vanilla and warm jam fills your kitchen, while the texture delivers a satisfying crunch followed by creamy jam in every bite.
These cookies stay fresh for days, making them ideal for gifting or stashing in your dessert drawer for last-minute cravings.
For extra flair, dust with powdered sugar or add a sprinkle of flaky sea salt before baking. Swap the jam for seasonal fruits like raspberry, apricot, or even caramel for a twist. Let's get baking—these cookies are worth every minute of effort!
Ingredients for jam heart cookies
Buttery dough, gooey jam centers, and a vanilla kiss—just these ingredients transform into holiday-worthy cookies.
| Ingredient | Amount | Notes |
|---|---|---|
| Unsalted Butter 🧈 | 1 cup | Cold, cubed for easier mixing |
| Granulated Sugar 🍚 | ¾ cup | Superfine preferred for tenderness |
| Light Brown Sugar 🍚 | ¼ cup | Packed for moisture |
| Large Eggs 🥚 | 2 whole | Room temperature for best mixing |
| Pure Vanilla Extract 🌿 | 1 tbsp | High-quality, not imitation |
| All-Purpose Flour 🌾 | 2 ½ cups | Spooning into cup for accuracy |
| Baking Powder 🍃 | 1 tsp | Freshly opened for lift |
| Fine Sea Salt 🧂 | ½ tsp | Kosher or table salt |
| Fruit Jam 🍓 | ½ cup | Low-sugar preferred for balance |
| Powdered Sugar 🍚 | ¼ cup | For dusting, optional |
| Flaky Sea Salt 🧂 | 1 tsp | For finishing, optional |
The butter is non-negotiable here—European-style or high-fat American makes the dough tender without spreading. I grab mine from Trader Joe's or Whole Foods when it's on sale, but any good-quality unsalted works. For the jam, low-sugar varieties like raspberry or apricot keep the cookies from getting too sweet. If you're using store-bought jam, check the sugar content—some brands pack in the syrup. The vanilla extract? Nothing imitation—the real stuff adds that bakery-quality warmth. I always buy mine from Penzeys or Williams Sonoma when it's 50% off, but a good bottle lasts forever.
No vanilla extract? Vanilla bean paste at half the amount gives you those little specks and real flavor. Short on jam? Applesauce or caramel sauce works for a twist, though the texture will differ slightly. The powdered sugar is optional, but I always keep a cup on hand—it makes the cookies look like they came from a bakery. Flaky sea salt is worth the extra minute to sprinkle; it balances the sweetness beautifully. If you're baking for a crowd, double the dough and freeze half—the cookies reheat perfectly for fresh-out-of-the-oven taste later.
These cookies stay fresh for 5 days in an airtight container, but honestly, they rarely last that long. For gifting, wrap them in parchment-lined bags with a ribbon—they make the best holiday present. The dough can be chilled for 24 hours if you want to prep ahead; it actually improves the flavor. If you're making these for the first time, practice shaping on a sheet of parchment before transferring to the baking sheet—it makes filling the hearts way easier. And trust me, the first batch will be lumpy, but by the third cookie, you'll have it down.
Why You'll Love This Recipe
- No Mixer Needed: I swear by this dough—just cream butter and sugars until fluffy, then fold in jam. No stand mixer, no fuss, just that perfect tender crumb. My hands get sticky, but the cookies? Always perfect.
- Jam-Packed Flavor: That burst of jam in every bite—whether it’s raspberry or strawberry—cuts through the buttery richness. The brown sugar caramelizes just enough to make them taste like a hug from your grandma’s kitchen.
- Holiday or Snack Attack: These work for Christmas cookies or a 3 PM sugar craving. Shape them into hearts for gifts, or just bake them round for a quick treat. I’ve even frozen the dough for last-minute baking—genius.
- Budget-Friendly Batch: A single batch costs pennies and fills the house with smell. Butter and sugar stretch far, and you can use any jam you already have. Leftovers? They disappear faster than I can say “second batch.”
Step-by-step instructions for jam heart cookies
Here's how to make these melt-in-your-mouth cookies with perfect jam centers.
👨🍳 Step 1: Cream Butter and Sugars Together
In a stand mixer fitted with the paddle attachment, beat the 1 cup unsalted butter (cold, cubed) with the 0.75 cup granulated sugar and 0.25 cup light brown sugar on medium speed for 3-4 minutes. You'll know it's ready when the mixture is light, fluffy, and nearly doubles in volume. Here's the thing—don't rush this step. The air incorporated here creates those signature crackly tops.
I like to scrape down the sides every minute or so to ensure even mixing. The butter should be fully creamed but still hold its shape when you press it between your fingers. If it feels too soft, chill the bowl in the fridge for 10 minutes before proceeding. This ensures proper texture for the dough.
👨🍳 Step 2: Add Eggs and Vanilla
Add the 2 whole large eggs one at a time, mixing on low speed for 30 seconds after each addition. This slow incorporation prevents the eggs from scrambling. Then add the 1 tablespoon pure vanilla extract and mix for another 10 seconds until fully combined.
The mixture might look slightly curdled after adding the eggs, but don't worry—this will smooth out when we add the dry ingredients. Here's where it gets fun: the vanilla extract adds that subtle depth that makes these cookies truly special. I always use high-quality vanilla because you can taste the difference in simple recipes like this.
👨🍳 Step 3: Combine Dry Ingredients
In a separate bowl, whisk together the 2.5 cups all-purpose flour, 1 teaspoon baking powder, and 0.5 teaspoon fine sea salt. Gradually add this mixture to the wet ingredients, mixing on low speed for 30-45 seconds until just combined. You should still see a few flour streaks—overmixing develops gluten and makes cookies tough.
Now's the time to fold in the 0.5 cup fruit jam by hand using a silicone spatula. Be gentle—you're just mixing until the jam is evenly distributed. I like to use low-sugar jam for the best balance of sweetness and flavor. If your jam is particularly runny, you might want to chill the dough for 15 minutes before shaping to prevent the jam from leaking out during baking.
🥘 Step 4: Shape and Bake
Preheat your oven to 350°F and line two baking sheets with parchment paper. Using a cookie scoop or tablespoon, portion the dough into 1-tablespoon balls and roll them between your palms to form smooth, round cookies. Place them 2 inches apart on the prepared sheets—they'll spread slightly during baking.
Bake for 10-12 minutes until the edges are golden brown but the centers still look slightly underdone. They'll continue cooking on the hot pan after you remove them. I know it seems weird, but trust me—you want the centers to stay soft so the jam stays gooey. Let them cool on the baking sheet for 5 minutes before transferring to a wire rack.
🍽️ Step 5: Finish and Serve
While the cookies are still warm, dust them with the 0.25 cup powdered sugar using a fine-mesh sieve. This adds that beautiful, snowy finish. Then sprinkle with the 1 teaspoon flaky sea salt for a perfect balance of sweet and salty. The contrast makes these cookies irresistible.
Serve immediately while still warm for the ultimate experience. The jam centers should be warm and gooey, with just a hint of the surrounding buttery cookie. Store any leftovers in an airtight container for up to 5 days, though I doubt they'll last that long!
Pro Tips For Making Jam Heart Cookies
- Cream Butter Slowly: Beat the butter and sugars at medium speed until the mixture is pale and fluffy—about 3-5 minutes. I used to rush this, and the cookies turned out dense. Let the mixer do the work; the butter needs to lighten before adding eggs.
- Use Room-Temp Eggs: Pull eggs out of the fridge 30 minutes before mixing—they’ll blend smoother into the dough. Cold eggs make the texture uneven, and you’ll end up with splotchy cookies. Trust me, this small step makes a real difference.
- Don’t Overmix the Dough: Stop folding in the jam as soon as it’s just combined—overworking it turns the dough tough. I learned this after making a batch that tasted like chewy playdough. Keep it gentle; the jam should be swirled, not mashed.
- Chill Dough 24 Hours: Wrap the dough and refrigerate overnight—this isn’t optional. The flavors meld, and the jam doesn’t leak out when baking. I skipped it once, and the cookies spread into sad pancakes. Worth the wait.
Essential equipment for perfect results
Basic Mixer Essentials
You don’t need anything fancy here—my go-to is a KitchenAid stand mixer with the paddle attachment for creaming butter and sugars. The paddle’s broad surface ensures even mixing without overworking the dough. For budget-friendly alternatives, a hand mixer works perfectly, though you’ll need to scrape down the sides more frequently.
I’ve even made these with a wooden spoon in a pinch when traveling—just be prepared for more elbow grease. 💪
Pro tip: If you’re using a mixer, grab a spatula or rubber scraper to clean the bowl sides during creaming. This keeps the butter and sugar properly aerated, which is key for those signature crackly tops. A medium-sized mixing bowl (about 5-quart capacity) holds everything comfortably without spills.
Cookie Tools
A cookie scoop (about 1-tablespoon size) is your best friend for portioning dough evenly. I swear by the OXO Good Grips brand—they’re durable and easy to clean. No scoop? A tablespoon works in a pinch, but press firmly to get consistent balls.
For shaping, your hands are all you need—just roll the dough into smooth, round balls before flattening slightly for the heart shape.
Line your baking sheets with parchment paper or silicon baking mats to prevent sticking. I prefer parchment because it’s sturdy enough to handle the weight of warm cookies.
Pre-cut heart-shaped cookie cutters (about 2-inch diameter) make shaping easier, but you can also use a round cutter and press gently to flatten one side for a rustic look. 🍪
Jam and Finishing Touches
While you don’t need anything special for the jam, a small bowl for measuring and a silicone spatula for folding it into the dough are helpful. For finishing, a fine-mesh sieve makes dusting powdered sugar effortless.
I love the Norpro 4-inch sieve—it’s lightweight and fits snugly over cookie sheets. Flaky sea salt? A small shaker or pinch bowl works, but I often just sprinkle it freehand for a more even distribution.
Optional but fun: A piping bag with a small round tip lets you pipe jam into the centers for a cleaner look. Fill it with your jam and pipe a small dot before sealing the cookies.
For extra flair, grab edible glitter or colored sugar to decorate the tops—just a pinch adds holiday cheer without overpowering the flavors. ✨
Oven and Timing
Your oven is the star here, so invest in a good oven thermometer (I use Thermoworks) to ensure accurate temperature—350°F is critical for even baking. A wire cooling rack keeps cookies from getting soggy on the bottom while they cool.
For baking, two half-sheet pans fit perfectly in most home ovens, allowing you to bake in batches without crowding.
No timer? Set a phone alarm for the 10-12 minutes baking window—these cookies bake fast, and overcooking turns the jam into a sad, dry center. A digital kitchen timer with a loud alarm is worth the $10-15 if you bake often.
Pro move: Place a small bowl of water on the oven rack to add moisture and prevent over-browning.
Nutrition facts
Frequently asked questions
Can I substitute the jam with something else?
For a fruit-free option, try caramel sauce or peanut butter—they add rich flavor while keeping the cookie texture intact. For a lighter touch, applesauce or lemon curd work beautifully. Just remember: thicker fillings (like peanut butter) may require slightly longer baking to set properly.
Why did my jam leak out while baking?
This usually happens when the dough is too warm or the jam is too runny. Chill the dough for 15-20 minutes before shaping, and use a low-sugar jam (like raspberry or apricot). For extra insurance, pipe the jam into the center using a small piping bag instead of folding it in by hand.
How do I store these cookies to keep them fresh?
Store them in an airtight container at room temperature for up to 5 days. For longer storage, freeze the baked cookies for 3 months—just thaw at room temperature for 10-15 minutes before serving. Pro tip: Place parchment paper between layers to prevent sticking.
Can I make these cookies gluten-free?
Yes! Replace the all-purpose flour with a 1:1 gluten-free baking flour blend (like Bob's Red Mill). Add 1/4 teaspoon xanthan gum if your blend doesn't include it. The dough may be slightly crumbly, so handle it gently when shaping. Expect a slightly denser texture, but the jam centers will still be perfect.
What’s the best way to shape the hearts without a cutter?
Use a round cutter (about 2 inches) to cut circles, then gently press one side flat with your thumb to create the heart shape. For a rustic look, roll the dough into balls and flatten slightly with your palm before baking—no cutter needed! Practice makes perfect, and the first few might look lumpy, but they’ll taste just as good.