Sauces & Condiments
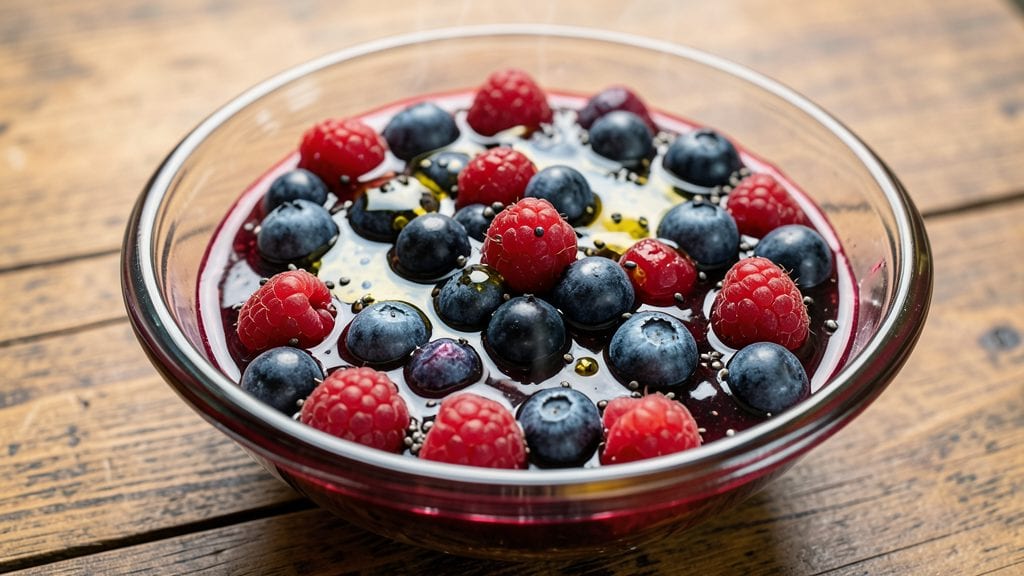
This jam without added sugar proves you don’t need refined sweeteners to make fruit spreads that taste like summer in every bite. Standing on a step stool in my Nonna’s kitchen in Sicily, I learned how to coax natural sweetness from fruit itself—no sugar required.
The secret lies in ripe, flavorful berries and a touch of citrus pectin to create that perfect set without any artificial ingredients.
What makes this recipe special is how it transforms ordinary fruit into something extraordinary using just a few clever techniques. We’ll reduce berries until their natural sugars concentrate, then use chia seeds as a natural gelling agent instead of store-bought pectin.
The result? A jam that’s naturally sweet, vibrant in color, and shelf-stable for months without any preservatives.
By the time you’re done, you’ll have a batch of jam that’s perfect for toast, yogurt, or even as a glaze for meats. The texture stays spreadable and glossy, with all the bright, fruity flavors you’d expect—just without the sugar crash.
And the best part? It’s so easy you’ll want to make it every season.
Whether you’re watching your sugar intake or just want to enjoy fruit at its purest, this recipe delivers restaurant-quality results at home. Let’s get started with just fruit, citrus, and a little patience—no sugar needed!
Ingredients for jam without added sugar
Just eight ingredients transform ordinary berries into jam that tastes like summer in every bite—no sugar needed!
| Ingredient | Amount | Notes |
|---|---|---|
| Fresh Blueberries 🫐 | 3 cups | Organic preferred, no stems |
| Fresh Raspberries 🍓 | 2 cups | Ripe but firm for best texture |
| Lemon Juice 🍋 | ¼ cup | Freshly squeezed, no seeds |
| Chia Seeds 🌱 | ⅛ cup | Organic, light brown preferred |
| Extra-Virgin Olive Oil 🫒 | 1 tbsp | High quality, fruity notes |
| Raw Honey Alternative 🍯 | 1 tbsp | Maple syrup or agave nectar |
| Citric Acid Powder 🧪 | ¼ tsp | Preservative-free, food grade |
| Vanilla Extract 🌸 | ½ tsp | Pure alcohol-free preferred |
The berries are the star, so pick the ripest you can find. Local farmers markets often have the sweetest, most flavorful fruit—ask when they were picked. If you can't get organic, just wash them well. The chia seeds are a game-changer—they replace pectin naturally, giving that perfect set without any artificial junk. I always grab mine from Trader Joe's because they're affordable and organic. For the lemon juice, use Meyer lemons if available—they're sweeter and add a subtle floral note that makes this jam sing. The citric acid might seem weird, but it's what gives commercial jams that long shelf life—just a pinch keeps your jam fresh for months.
No blueberries? Strawberries or blackberries work perfectly—just adjust the cooking time slightly. Short on chia seeds? Flaxseeds ground into meal work in a pinch, but chia's got that extra gel power. The maple syrup is non-negotiable for sweetness—avoid agave if you want that classic jam flavor. For vanilla, alcohol-free vanilla extract keeps the flavor pure without any boozy aftertaste. Want more depth? Add a pinch of cinnamon or cardamom—it pairs beautifully with berries. And if you're worried about the texture, don't skip the olive oil. It keeps the jam glossy and spreadable, plus it adds a subtle richness that balances the tartness.
This jam keeps for up to 6 months in the fridge if you store it right. I use sterilized glass jars with tight lids—no air means no mold. For longer storage, freeze portions in ice cube trays, then transfer to a bag. Thaw overnight in the fridge. The flavor actually improves after a few days as everything melds together. Pro tip: Spread a thin layer of olive oil on top before sealing to preserve freshness. And if you make a big batch? Gift it—everyone will ask for more.
Why You'll Love This Recipe
- I’ll be real: berries are my nemesis to prep, but here the chia seeds do all the work—just toss them in whole, no chopping, no straining. That lemon juice brightens everything while keeping it naturally sweet, so you’re basically getting a shortcut to restaurant-quality jam.
- No Pitting, No Mess: I’ll be real: berries are my nemesis to prep, but here the chia seeds do all the work—just toss them in whole, no chopping, no straining. That lemon juice brightens everything while keeping it naturally sweet, so you’re basically getting a shortcut to restaurant-quality jam.
- Taste Like Summer in a Jar: Between us, this isn’t your granny’s jam. The olive oil adds this luscious depth—think jam with a hint of Mediterranean sunshine—while the chia seeds give it a gentle, creamy texture. Spread it on toast, and you’ll forget it’s sugar-free.
- Breakfast to Dessert Hero: Honestly, this stuff disappears fast. Slather it on oatmeal, mix it into yogurt, or drizzle it over ice cream—it’s the kind of jam that makes you rethink what you can pair it with. (Yes, even on a Tuesday night.)
Instructions for jam without added sugar
Here's how to create a vibrant, naturally sweetened fruit spread that keeps beautifully without refined sugar.
Prepare the Fruit Mixture
In a large bowl, combine the 3 cups fresh blueberries and 2 cups fresh raspberries. I like to use my hands for this step—it helps break up any large berries and ensures even distribution. You'll want to remove any stems or tough bits from the raspberries at this stage, as they can make the jam grainy.
Add the 0.25 cup freshly squeezed lemon juice to the berry mixture. The acidity from the lemon juice will help balance the natural sweetness of the berries and prevent the jam from molding. Give everything a gentle stir to distribute the lemon juice evenly throughout the fruit. Here's the thing—don't skip this step. The lemon juice is what makes this jam naturally preserve well without added sugar.
Cook the Fruit Until Soft
Transfer the berry mixture to a heavy-bottomed saucepan. Place the pan over medium heat and bring the mixture to a gentle simmer. You'll know it's ready when small bubbles form around the edges of the pan. Let it cook for about 10 minutes, stirring occasionally with a wooden spoon.
During this time, the berries will begin to break down and release their juices. You'll see the mixture become thicker and more vibrant in color. Keep an eye on the pan—you want the berries to soften but not completely disintegrate. The goal is to preserve some texture in the final jam. If the mixture starts to bubble vigorously, reduce the heat slightly to maintain a gentle simmer.
Add Sweetener and Thickening Agents
Once the berries are soft, stir in the 1 tablespoon raw honey alternative and 1 tablespoon extra-virgin olive oil. The honey alternative provides natural sweetness without refined sugar, while the olive oil adds richness and helps create a glossy finish. Add the 0.125 cup chia seeds and mix well to distribute them evenly.
Here's where it gets interesting—the chia seeds will act as a natural thickener and gelling agent. They'll absorb liquid as they cook, helping to create that perfect jam consistency. Stir in the 0.25 teaspoon citric acid powder and 0.5 teaspoon vanilla extract. The citric acid enhances the fruit flavors and extends shelf life, while the vanilla adds depth. Keep stirring to combine everything thoroughly—you want all the ingredients to be evenly distributed.
Simmer Until Thickened
Continue cooking the mixture over medium-low heat, stirring frequently, for about 20-25 minutes. You'll notice the jam gradually thickening as the chia seeds absorb liquid and the fruit continues to break down. The perfect consistency should coat the back of a spoon but still move smoothly—it should be thick enough to hold its shape but not so stiff it's difficult to spread.
To test for doneness, place a small spoonful of jam on a chilled plate. If it wrinkles slightly when you push it with your finger, it's ready. If it's still too runny, continue cooking for another 5 minutes. If it's too thick, you can thin it slightly with a bit more lemon juice if needed. This step requires a bit of attention, but it's crucial for getting that ideal jam texture.
Jar and Store for Maximum Freshness
Once your jam reaches the perfect consistency, transfer it to clean, sterilized jars using a ladle or spoon. Be sure to leave about 0.25-inch headspace at the top of each jar to allow for expansion. Wipe the rims of the jars with a clean, damp cloth to ensure good seals.
Place the lids on the jars and process them in a boiling water bath for 10 minutes to create a vacuum seal. This step is essential for extending the shelf life of your sugar-free jam. Once processed, let the jars cool completely. You'll hear a satisfying "ping" as they seal. Store the sealed jars in a cool, dark place—they'll keep for up to 6 months. The natural preservation methods used here make this jam safe to enjoy without refrigeration for extended periods.
Pro Tips For Making Jam Without Added Sugar
- Simmer Raspberries First: Raspberries break down faster—toss them in the pot alone for 5 minutes before adding blueberries. This keeps their shape intact and prevents a mushy jam later. (I learned this the hard way after making a raspberry-blueberry sludge.)
- Use Ripe but Firm Berries: Overripe berries turn your jam into a watery mess. Pick berries that are fully colored but still hold their shape—squeeze a few to test. A little firmness means a thicker, more balanced jam.
- Don’t Skip the Chia Soak: Sprinkle chia seeds over the hot mixture and let them sit for 10 minutes before stirring. This gives them time to absorb liquid properly, making the jam gel without adding pectin or sugar. (Yes, even if you’re impatient like me.)
- Balance the Acid: Lemon juice isn’t just for flavor—it’s the glue holding your jam together. If your berries are tart, cut back to 1 tablespoon; if they’re mild, go up to 2. Too little acid = runny jam; too much = weirdly sharp jam. Taste as you go.
Storing and reheating this jam without added sugar
Fridge Storage Essentials
Your homemade jam will keep beautifully in the fridge for up to 6 months when stored properly. I always use sterilized glass jars with airtight lids—I swear by Ball Mason jars because they seal like a dream.
Before filling, run the empty jars and lids through a boiling water bath for 10 minutes to kill any bacteria. Let them cool completely before filling to prevent thermal shock. 🧼
Once filled, leave ¼-inch headspace at the top—this prevents overflow during processing. Store in the coldest part of your fridge, ideally not near the door where temperature fluctuations occur. The natural citric acid and chia seeds work together to preserve freshness, but proper storage extends that shelf life dramatically.
I like to label each jar with the date so I can track freshness.
Freezer Preservation
For longer-term storage, portion your jam into ice cube trays—this makes it easy to grab single servings later. Once frozen solid (about 4 hours), transfer the cubes to a freezer bag with all air squeezed out.
A vacuum sealer works even better if you have one, as it eliminates oxygen that causes freezer burn. These portions will keep for up to 12 months without losing quality. 🥶
When you're ready to use frozen jam, transfer a portion to the fridge overnight to thaw. Never microwave it directly—this can make the chia seeds separate and ruin the texture.
If you need to use it quickly, place the frozen jam in a bowl and let it sit at room temperature for 2-3 hours, stirring occasionally. The texture will be slightly softer but still perfect for spreading.
Room Temperature Stability
Thanks to the citric acid and water bath processing, your jam is shelf-stable at room temperature for up to 3 months if stored properly. Keep jars in a cool, dark pantry—light and heat are the enemies of jam freshness.
I store mine in a wooden crate on the bottom shelf of my pantry, away from the oven. The natural pectin from the chia seeds and fruit creates a stable gel that prevents spoilage without preservatives. 🏺
Before opening, always check for signs of spoilage: a sour smell, mold, or liquid separation. If you see any of these, it's time to toss it. The first time I opened a jar that had gone bad, I learned that lesson the hard way!
When properly stored, this jam will maintain its vibrant color and bright flavor for months—no sugar crash, just pure fruit goodness.
Reviving Thickened Jam
If your jam thickens too much during storage, don't panic—it's easily fixable. Simply place the jar in a small saucepan of warm water (about 160°F) for 10-15 minutes. This gentle heat will restore the original spreadable consistency.
Stir occasionally to distribute the heat evenly. For extra shine, add ½ teaspoon of extra-virgin olive oil and mix well before storing again. 💡
If your jam becomes too thin after opening, simply return it to the fridge for 24 hours—the chia seeds will continue to gel naturally. For a quicker fix, sprinkle ½ teaspoon of chia seeds into the jar and stir well.
Let it sit for 1 hour before using. This trick works like magic for restoring that perfect jam texture without adding any extra ingredients.
Nutrition facts
Frequently asked questions
Can I use this jam on toast or only for sweet applications?
This naturally sweetened fruit spread works beautifully on toast, but it's also fantastic for savory dishes! Try it as a glaze for grilled chicken or pork, mixed into yogurt, or even as a topping for pancakes. The balance of tartness and sweetness makes it incredibly versatile.
What if my fruit isn't ripe enough to be naturally sweet?
If your berries aren't perfectly ripe, don't worry! Add 1 extra tablespoon of maple syrup or agave to compensate for the lack of natural sweetness. You can also simmer the fruit for 5 extra minutes to concentrate the flavors. The chia seeds will still work as a thickener, but the fruit's natural sugars are key for that authentic jam taste.
Why do you use chia seeds instead of store-bought pectin?
Chia seeds act as a natural gelling agent without the need for refined additives. They're packed with fiber and omega-3s, plus they create a cleaner label. For every 1 cup of fruit, use 1 tablespoon of chia seeds—they'll absorb liquid and thicken the jam beautifully. Plus, they're shelf-stable and easy to find at any grocery store.
Can I make this jam without any sweetener at all?
Yes, but the flavor will be much more tart. If you skip the maple syrup or agave, rely on extra ripe fruit and a longer simmer time (30-40 minutes) to concentrate the natural sugars. The chia seeds won't add sweetness, but they'll help create a spreadable texture. Try it with blackberries or strawberries—they're naturally sweeter than raspberries.
How do I know when my jam is done cooking?
The perfect consistency coats the back of a spoon but still moves smoothly. For a foolproof test, spoon a little onto a chilled plate—if it wrinkles when you push it with your finger, it's ready. If it's too runny, cook for 5 more minutes. If it's too thick, thin it with 1 teaspoon of lemon juice and cook for another 2-3 minutes. The chia seeds will continue thickening as it cools, so don't overcook!