Desserts
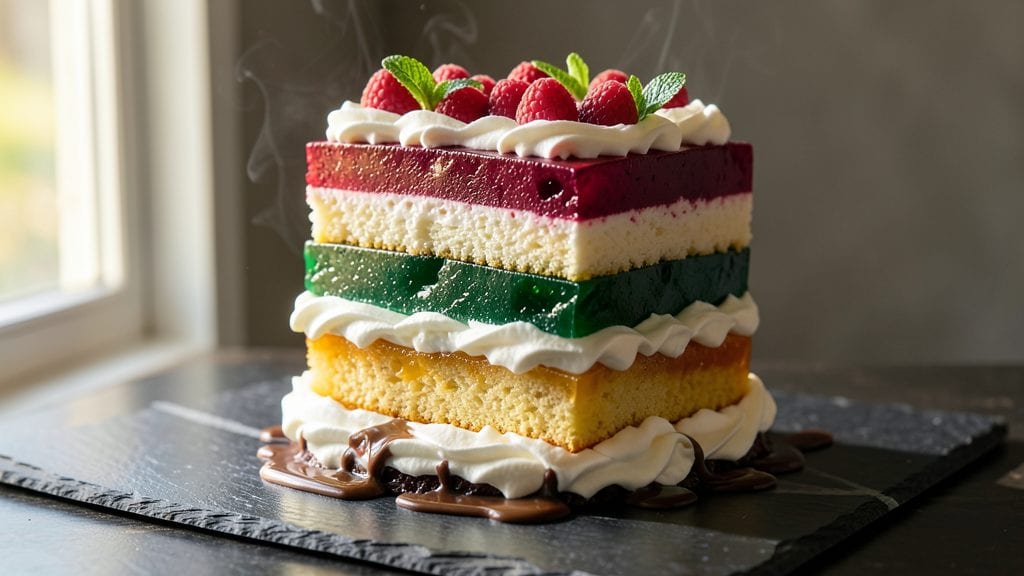
A jello layer cake recipe that combines vibrant gelatin layers with creamy frosting delivers a dessert that’s both nostalgic and impressive. This classic treat balances the perfect set of jello with rich cake layers, creating a showstopping centerpiece for celebrations.
The secret lies in precise timing—allowing each jello layer to set just enough to hold its shape while maintaining that signature wobble.
What sets this recipe apart is the harmony between the gelatin’s fruity brightness and the cake’s tender crumb. You’ll need basic baking skills, but the technique is straightforward: bake a simple vanilla or spice cake, prepare gelatin layers with your favorite flavors, and assemble with smooth frosting.
The result? A dessert that’s visually stunning and irresistibly creamy.
Each layer is carefully stacked to avoid soggy bottoms, ensuring every bite delivers that perfect mix of texture—crisp cake, jiggly gelatin, and velvety frosting. The frosting isn’t just decoration; it’s the glue that binds the layers, adding richness to balance the gelatin’s tang.
This cake is ideal for birthdays, showers, or any occasion where you want to impress without spending hours in the kitchen.
For an extra touch, top with whipped cream, fresh berries, or a sprinkle of crushed cookies. The possibilities are endless, but the foundation remains the same: precise layers, creamy frosting, and a dessert that tastes like a childhood favorite. Let’s get baking!
Ingredients for jello layer cake
Basic cake ingredients meet nostalgic gelatin layers for a dessert that’s equal parts fun and impressive.
| Ingredient | Amount | Notes |
|---|---|---|
| Unsalted Butter 🧈 | 1 cup | Room temperature, full-fat preferred |
| Granulated Sugar 🍚 | 2 cups | White or light brown |
| Large Eggs 🥚 | 4 whole | Room temperature, separated |
| All-Purpose Flour 🌾 | 2 ½ cups | Sifted, spooned and leveled |
| Baking Powder 🍃 | 2 tsp | Aluminum-free preferred |
| Vanilla Extract 🍯 | 2 tsp | Pure, not imitation |
| Salt 🧂 | ½ tsp | Fine sea salt |
| Unflavored Gelatin 🍬 | 4 tsp | Or 2 sheets (14g total) |
| Strawberry Jello Powder 🍓 | 1 box | 3oz size, or equivalent |
| Boiling Water 💧 | 1 ½ cups | For gelatin layers |
| Heavy Whipping Cream 🥛 | 1 ½ cups | Cold, full-fat |
| Powdered Sugar 🍚 | 2 cups | For frosting |
| Vanilla Ice Cream 🍦 | 1 cup | Optional, for extra creaminess |
| Fresh Strawberries 🍓 | ½ cup | Sliced, for garnish |
The cake layers are the foundation—flour, sugar, and butter are non-negotiable. King Arthur or Gold Medal flour gives the best texture, but any reliable brand works. For the gelatin, Great Value or Kraft boxes are perfect—cheap, consistent, and bright. If you’re feeling fancy, grab Smucker’s strawberry preserves to mix into the gelatin layers for extra flavor. The butter? Plugrá or Land O’Lakes are my go-tos—they’re reliable and affordable. Room-temperature butter is key here—no one likes greasy cake batter.
No vanilla extract? Vanilla bean paste works too, or even a pinch of ground vanilla bean. Running short on gelatin? Substitute agar-agar at half the amount—it sets differently but gives a similar texture. The frosting can be made ahead, but the gelatin layers need to be fresh when assembling. For a quicker version, use pre-made whipped cream instead of whipping your own. And if you’re not a strawberry fan? Blue raspberry or lime gelatin adds a fun twist—just adjust the garnish to match.
The cake layers keep 3 days wrapped in the fridge, but the gelatin layers? Make them fresh day-of—they lose their wobble fast. Frosting holds for 5 days in the fridge, so prep that ahead. For make-ahead assembly, bake the cake, prep the frosting, and store components separately. The whole cake keeps 4 days refrigerated, but it’s best enjoyed within 2 days for that perfect texture. Freezing isn’t recommended—the gelatin gets grainy.
Why You'll Love This Recipe
- No-Fuss Layers: The cake itself is just a simple butter cake—creamed butter, sugar, eggs, and flour—mixed in one bowl. No fancy techniques, no last-minute scrambling. The real magic? The jello layers slide in like a dream, no baking required.
- Sweet & Tangy Magic: That buttery cake paired with the bright, fruity jello? It’s the kind of contrast that makes you go back for seconds. The sugar in the cake caramelizes just enough to balance the jello’s tang—like a grown-up dessert that still feels fun.
- Birthday Party Ready: Honestly, this is my go-to for celebrations because it looks impressive without the stress. Stack those jello layers, add a quick whipped cream swirl, and boom—you’ve got a showstopper that feeds a crowd without the fuss of a multi-tiered cake.
- Budget-Friendly Stretch: A single cake pan and basic pantry staples (butter, sugar, flour) mean this feeds 12 for under $10. Leftovers? They’re even better the next day—slice it up for breakfast toasts or pack it for lunches. My kids’ favorite, honestly.
Step-by-step instructions for jello layer cake recipe
Here's how to create a perfectly layered cake with vibrant gelatin and luscious frosting.
Prepare the Cake Layers
Preheat your oven to 350°F. In a large mixing bowl, cream together the 1 cup unsalted butter and 2 cups granulated sugar until light and fluffy, about 3-5 minutes. This step is crucial for creating air pockets that make the cake tender.
Add the 4 whole large eggs, one at a time, beating well after each addition. Mix in the 2 tsp vanilla extract and 0.5 tsp salt. In a separate bowl, whisk together the 2.5 cups all-purpose flour and 2 tsp baking powder, then gradually fold into the wet ingredients. The batter should be smooth but not overly thick.
Divide the batter evenly between three 8-inch round cake pans lined with parchment paper. Bake for 25-30 minutes, or until a toothpick inserted into the center comes out clean. Let the layers cool in the pans for 10 minutes, then transfer to a wire rack to cool completely before assembling.
Create the Strawberry Jello Layers
Bloom the 4 tsp unflavored gelatin in 1.5 cups boiling water for 5 minutes, stirring until fully dissolved. Add the contents of the 1 box strawberry jello powder and stir until completely combined. Pour the mixture into a shallow dish and refrigerate for 2-3 hours, or until fully set.
Once set, cut the gelatin into 12 thin rectangles using a sharp knife dipped in hot water to prevent sticking. These will serve as the vibrant layers between your cake layers. If you prefer a smoother texture, you can also spread the set gelatin evenly over the cake layers before frosting.
Make the Creamy Frosting
In a medium bowl, whip the 1.5 cups heavy whipping cream and 1 cup vanilla ice cream together until soft peaks form. Gradually add the 2 cups powdered sugar, mixing until smooth and creamy. For extra flavor, you can add 1 tsp vanilla extract or a pinch of salt to balance the sweetness.
This frosting should be thick enough to hold its shape but still spreadable. If it's too stiff, chill it for 10 minutes to firm up. The cold temperature helps stabilize the frosting so it doesn't melt too quickly, keeping your cake creamy and delicious.
Assemble the Cake
Place the first cake layer on a serving plate. Spread a thin layer of frosting over the top, then arrange 4 rectangles of strawberry gelatin evenly across the surface. Add the second cake layer and repeat the process with another layer of frosting and gelatin. Top with the final cake layer.
Cover the entire cake with a final layer of frosting, smoothing the sides with a spatula. For a polished look, chill the cake in the refrigerator for 1 hour before serving. This ensures the frosting sets properly and the gelatin layers stay firm. Garnish with sliced 0.5 cup fresh strawberries for a pop of color and freshness.
Serve and Enjoy
Slice the cake into 12 equal portions using a serrated knife dipped in hot water. This prevents the layers from tearing and ensures clean cuts. Serve immediately for the best texture—your guests will love the perfect balance of moist cake, vibrant jelly, and creamy frosting.
For an extra touch, drizzle a little extra strawberry syrup or melted gelatin over the top before serving. The contrast of warm cake and cool gelatin makes every bite exciting, and the creamy frosting ties it all together beautifully.
Pro Tips For Making Jello Layer Cake
- Whisk Eggs Until Ribbon-Stage: I learned this the hard way—overmixed cake batter turns gummy. Beat eggs and sugar on medium-high until the mixture holds a slow ribbon when the whisk is lifted (about 2-3 minutes). Stop when the batter looks smooth but not stiff; overworking it adds air that collapses during baking, leaving you with dense layers.
- Sift Dry Ingredients Twice: My grandmother swore by this, and she was right: sift flour and baking powder together before adding to the butter mixture, then sift again right before folding. This prevents lumps that create uneven texture in your layers—especially important for jello cakes where you want that silky consistency.
- Chill Layers Before Assembly: Skip the rush and let cake layers cool completely, then refrigerate for at least 30 minutes. Cold layers hold their shape better when stacking, and the jello filling won’t melt into a puddle the second you slice it. (Yes, even if you’re impatient like me.)
- Use Room-Temp Butter: Cold butter creates pockets of steam that make your layers dome in the middle. Let unsalted butter sit out for 1-2 hours until soft but not melted—press your finger in; it should leave a slight indent. This guarantees even baking and a tender crumb.
Make-ahead tips for jello layer cake
Prep Cake Ahead
Bake your cake layers up to 3 days in advance and store them in an airtight container at room temperature. Wrap each layer tightly in plastic wrap to prevent drying. Refrigerate for 30 minutes before assembling to bring them to room temperature—this makes slicing easier and prevents crumbs.
I like to label them with the date so I don’t forget how long they’ve been waiting! 📅
Frosting Prep
The frosting is the perfect component to make 5 days ahead—just store it in the fridge in an airtight container. Bring it to room temperature before using by letting it sit for 15-20 minutes.
If it’s too thick, whisk in 1 tsp heavy cream to loosen it up. Pro tip: Add a splash of vanilla extract or a pinch of salt to refresh the flavor after storage. 🥛
Gelatin Timing
Gelatin layers are the trickiest to prep ahead—make them fresh the day of assembly for that perfect wobble. However, you can prep the boiled water and gelatin mixture up to 1 day ahead and store it in the fridge.
Just reheat the mixture gently until dissolved, then pour into your dish and chill until set. This saves you time on the big day! ⏰
Full Assembly
For a stress-free assembly, bake the cake, prep the frosting, and store them separately. When ready, assemble the cake layers with frosting and gelatin, then refrigerate for 1 hour before serving.
This method keeps everything fresh and prevents soggy layers. I’ve even done this for events—just assemble the cake in the morning and keep it chilled until serving time. 💫
Storage Tips
Once fully assembled, your jello layer cake keeps well in the fridge for 4 days in an airtight container. For best texture, enjoy it within 2 days—after that, the gelatin starts to lose its bounce.
If you need to transport it, place it in a sturdy box with a layer of paper towels underneath to catch any drips. Avoid freezing—it ruins the texture of both the gelatin and frosting. ❄️
Garnish Last
Add fresh fruit or whipped cream garnishes right before serving to keep them looking vibrant. Strawberries, raspberries, or even a sprinkle of crushed cookies add a pop of color and freshness.
If you’re prepping ahead, store garnishes separately in the fridge and add them just before slicing. This keeps your cake looking like it came straight from a bakery! 🍓
Nutrition facts
Frequently asked questions
Can I use store-bought cake layers instead of baking from scratch?
Store-bought vanilla or spice cake layers work perfectly—just choose a moist variety with minimal frosting. For best results, trim off any excess frosting and level the tops to create even surfaces for your gelatin layers. This shortcut saves time while keeping the cake delicious.
Why does my gelatin layer turn out too firm or too soft?
Firmness depends on chilling time and gelatin ratio. For a perfect set, refrigerate for 2-3 hours—not too long or it’ll lose its jiggle. If using powdered gelatin, follow the package instructions precisely. For a softer texture, reduce chilling time by 30 minutes or add 1 tsp extra water to the mixture.
How do I prevent soggy cake layers when adding gelatin?
Use a thin layer of frosting as a barrier between cake and gelatin. Spread only 1/4-inch of frosting on each cake layer before adding gelatin. Also, ensure your cake layers are completely cool before assembly—warm cake speeds up gelatin melting. Chill the assembled cake for 1 hour before serving to set everything properly.
Can I make this cake without dairy (for lactose-free needs)?
Yes! Replace butter in the cake with 1 cup coconut oil (solid) and use dairy-free heavy cream or coconut cream for frosting. For gelatin layers, check that your gelatin powder is dairy-free (most are). The texture will be slightly different but still delicious. Just ensure all frosting ingredients are lactose-free.
What’s the best way to cut clean slices without smashing the layers?
Use a serrated knife and dip it in hot water between each slice. This prevents sticking and creates clean cuts. Also, chill the cake for 1 hour before slicing—cold gelatin holds its shape better. For extra precision, mark your cutting lines with a toothpick before slicing.