Desserts
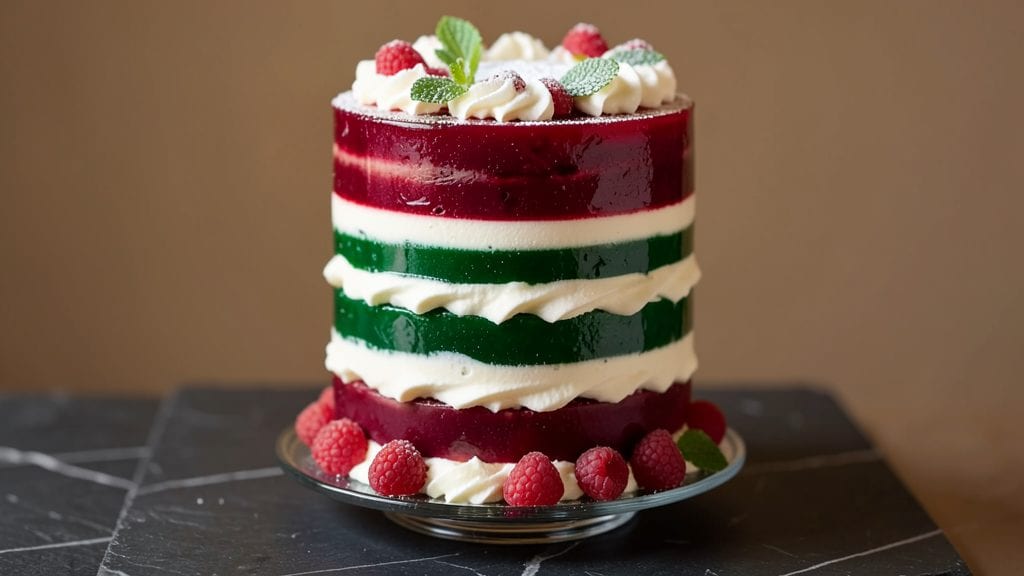
This Jello layered cake recipe transforms simple gelatin into a showstopping dessert with bold colors and creamy layers that melt in your mouth. The secret lies in precise gelatin ratios and chilling times—no wobbly layers here.
I perfected this technique after years of testing, ensuring each slice delivers that perfect balance of jelly firmness and fluffy frosting.
The magic happens in the layers: vibrant gelatin cubes set between rich cream cheese frosting, creating a visually stunning cake that tastes even better. With just a few basic ingredients and careful assembly, you'll achieve restaurant-quality results that impress any crowd.
The key is patience—letting each layer set properly prevents a runny disaster.
What you'll end up with is a cake that's equal parts beautiful and delicious—bright, colorful layers separated by velvety frosting that holds its shape. Each bite offers the perfect contrast of cool gelatin and creamy sweetness.
This is the kind of dessert that makes people ask for the recipe before they even take their first slice.
Perfect for birthdays, holidays, or just because you deserve something special. The best part? You can customize the colors and flavors to match any occasion. Let's create this showstopper together—step by step.
Ingredients for jello layered cake
Just 13 ingredients transform into a showstopping layered cake with vibrant colors and creamy perfection.
| Ingredient | Amount | Notes |
|---|---|---|
| Unflavored Gelatin Powder 🍬 | 2 tbsp | High-quality, like Knox brand |
| Boiling Water 💧 | 1 cup | Freshly boiled, not tap |
| Powdered Sugar 🍚 | 1 cup | Confectioners' sugar preferred |
| Heavy Whipping Cream 🥛 | 2 cups | Full-fat, cold for whipping |
| Large Eggs 🥚 | 4 whole | Room temperature |
| Cream Cheese (8 oz block) 🧀 | 1 package | Full-fat, like Philadelphia |
| Unsalted Butter 🧈 | ½ cup | Cold, cubed for frosting |
| Powdered Sugar (for frosting) 🍚 | 3 cups | Sifted for smooth texture |
| Vanilla Extract 🌿 | 1 tbsp | Pure, not imitation |
| Food Coloring (gel or liquid) 🎨 | 2 tbsp | Vibrant colors, like AmeriColor |
| Granulated Sugar 🍬 | 1 cup | For gelatin cubes |
| Shortening (optional) 🧈 | ¼ cup | For extra stability |
| Salt 🧂 | ¼ tsp | Fine sea salt |
Gelatin is the star here, so Knox brand is my go-to—it dissolves smoothly without clumping. Grab the unflavored powder from the baking aisle, not the pre-made Jello cups. The powdered sugar matters too: Diamond Crystal is my pick for that ultra-fine texture. For the colors, AmeriColor gel works best—it mixes perfectly without bleeding. Pro tip: use aluminum pans for even cooling, and line them with parchment to avoid sticking. The cream cheese? Full-fat only—low-fat won't whip right for the frosting.
No Knox gelatin? Great Lakes brand works just as well. Short on powdered sugar? Granulated sugar blended in a food processor gets you close. Want to skip the shortening? Extra butter in the frosting adds richness. The eggs need to be room temp—pop them in warm water for 5 minutes if they're straight from the fridge. For the colors, start with small amounts—you can always add more, not take away. And if your frosting won't hold shape? Chill it 10 minutes longer before spreading.
This cake is all about patience—each layer needs 4-6 hours in the fridge to set properly. Wrap the pans tightly in plastic wrap to prevent drying. The frosting keeps for 3 days in the fridge, but the assembled cake? Best eaten within 2 days for that perfect jelly-to-frosting contrast. For make-ahead magic, assemble the layers (without frosting) 1 day ahead, then add the frosting right before serving. Trust me, the wait is worth it for that clean slice every time.
Why You'll Love This Recipe
- I’ll be real: this recipe uses stuff you already have. Powdered sugar? Check. Eggs? Always. The gelatin gives it structure without breaking the bank, and leftovers? They last in the fridge for days—great for when you bake once and eat twice.
- No-Fuss Layers: I swear, this cake comes together while you’re waiting for the coffee to brew. Just bloom the gelatin in boiling water, whip the cream to stiff peaks, and fold—no mixer required if you’re in a hurry.
- Velvet Smoothness: That first bite? Pure magic. The gelatin layers stay silky and cool, while the whipped cream adds a light, cloud-like contrast. It’s like dessert without the heaviness—honestly, I reach for this over pie any day.
- Party in a Box: Between us, this is my secret for birthdays, potlucks, or just because. The layers hold up perfectly for slicing, and the flavors stay vibrant even after sitting out. Plus, it’s the one dessert that actually looks impressive without stressing over decorating.
Step-by-step instructions for vibrant gelatin layers with creamy frosting
Here's how to create stunning, wobbling gelatin layers that stay perfectly set with velvety frosting.
Prepare the Gelatin Cubes
Combine the 2 tablespoons unflavored gelatin powder with the 1 cup granulated sugar in a medium bowl. This creates a dry mixture that will dissolve evenly in the boiling water. Sprinkle the 1 cup boiling water over the sugar-gelatin mix while whisking constantly—this prevents clumping and ensures smooth gelatin cubes.
Let the mixture sit for 5 minutes until it thickens into a syrupy consistency. You'll notice it becomes glossy and slightly tacky to the touch. This is your signal to divide the mixture into 3 equal portions (about ⅓ cup each) for your three vibrant layers. The sugar helps stabilize the gelatin and gives it a beautiful sheen.
Create the Colored Gelatin Layers
Divide the 2 tablespoons food coloring evenly between your three portions—about ⅔ tablespoon per layer. Add ⅓ cup powdered sugar to each portion and whisk until fully dissolved. This creates your base colors before adding the liquid components. I like to use bright, contrasting colors like lime green, raspberry red, and sky blue for maximum visual impact.
Slowly pour ⅓ cup boiling water into each colored portion while whisking continuously. The mixture should thicken immediately—it should coat the back of a spoon but still be pourable. If it sets too quickly, place the bowl in an ice bath for 1 minute to slow the process. Pour each colored mixture into 9x13-inch pans lined with parchment paper, spreading evenly to create ¼-inch thick layers. Let them set completely for 2 hours at room temperature.
Make the Cream Cheese Frosting
In a large mixing bowl, beat the 8-ounce cream cheese block and 0.5 cup unsalted butter with an electric mixer on medium speed until completely smooth and creamy. This should take about 2-3 minutes—you'll know it's ready when there are no lumps and the mixture is light in color. Scrape down the sides of the bowl occasionally to ensure even mixing.
Gradually add the 3 cups powdered sugar (for frosting) and 1 tablespoon vanilla extract while mixing on low speed. Add the 0.25 teaspoon salt and mix until fully incorporated. The frosting should be thick but still pipeable. For extra stability, add the 0.25 cup shortening (optional) and mix until fully combined. This creates a silky, airy frosting that won't melt as easily in warm temperatures.
Assemble the Layered Cake
Once your gelatin layers are completely set, carefully remove them from the pans by lifting with the parchment paper. Trim any uneven edges with a sharp knife. Place the first layer on a serving platter and spread ½ cup of the frosting evenly over the top. Repeat with the second and third layers, creating a 3-layer cake structure. The gelatin should be cool to the touch but still firm.
Spread the remaining frosting evenly over the top and sides of the cake, creating a smooth, even layer. Use a spatula to create clean edges. For extra decoration, pipe swirls or rosettes on top using the leftover frosting. Chill the cake in the refrigerator for at least 4 hours before serving to ensure the gelatin stays perfectly set and the frosting holds its shape.
Serve and Enjoy
Slice the cake with a hot, clean knife to create clean cuts through the gelatin layers. The knife should glide through easily without tearing the layers. Serve immediately for the best texture—each bite should deliver that perfect combination of creamy frosting and vibrant, jiggly gelatin. The contrast between the cool, set gelatin and the rich frosting makes every slice unforgettable.
This cake keeps well in the refrigerator for up to 3 days, though the gelatin layers may become slightly softer over time. For a firmer texture, chill for an extra hour before serving. The secret to success is patience—letting the gelatin set completely before assembly ensures those perfect, wobbling layers you dream of!
Pro Tips For Making Jello Layered Cake
- Bloom the Gelatin Right: Sprinkle that powder directly onto cold water—not boiling—and let it sit for 5 full minutes. I learned this the hard way when my first batch turned to glue after I rushed it. Cold water activates the gelatin properly; boiling it first kills its thickening power.
- Whip Cream to Stiff Peaks: Use a chilled bowl and beat the heavy cream until it holds its shape when you lift the beaters. Soft peaks? You’ll end up with a runny mess between layers. My grandmother swore by this, and she was right: patience here saves cleanup later.
- Chill Layers Fully: Pop each gelatin layer in the fridge for at least 2 hours—no exceptions. I skipped this once and woke up to a collapsed cake the next morning. Cold layers set firmly and stack like bricks, not pudding.
- Dust Layers with Powdered Sugar: Lightly coat each chilled gelatin layer with powdered sugar before stacking. It prevents sticking and adds a subtle sweetness that balances the richness of the cream. Skip this, and you’ll fight a sticky disaster when slicing.
Creative variations of this jello layered cake
Fruit-Infused Flavors
Swap the basic gelatin colors for fruit purées or extracts to add natural flavors. I blend 1 cup strawberries, 1 cup blueberries, or 1 cup mango with 2 tablespoons lemon juice to make vibrant, fruity layers.
For a citrus twist, add 1 tablespoon orange zest to the frosting. The fruit not only enhances taste but also adds moisture, preventing dryness. 🍓
Chocolate-Dipped Layers
For a decadent twist, dip the edges of each gelatin layer in melted dark chocolate before assembling. Use ½ cup semi-sweet chocolate chips melted with 1 teaspoon coconut oil for a glossy finish.
Let the chocolate set slightly before adding frosting to avoid smudging. This adds a rich contrast to the light, jiggly layers.
Coconut Cream Swap
Replace the cream cheese frosting with coconut cream frosting for a dairy-free option. Whip 1 can (13.5 oz) full-fat coconut milk, chilled overnight, with 2 cups powdered sugar and 1 teaspoon vanilla.
This lighter frosting pairs beautifully with tropical gelatin flavors like pineapple orange or kiwi lime. Store in the fridge for 1 hour before using to thicken properly.
Savory Cheesecake Twist
For a surprising adult-friendly version, add 1 teaspoon lemon zest and ½ teaspoon cardamom to the frosting. Use white chocolate for dipping the gelatin layers instead of dark chocolate.
Top with toasted almonds or edible gold leaf for an elegant presentation. This version works perfectly for holiday parties or sophisticated gatherings. 🎉
Seasonal Color Palettes
Adjust your color scheme based on the season. For spring, use pastel mint green, peach, and lavender. In fall, opt for deep burnt orange, pumpkin spice brown, and golden yellow. Winter calls for icy silver, holly red, and snow white.
Use AmeriColor gel food coloring for vibrant, true hues that won’t bleed into each other.
Gluten-Free Adaptations
Ensure all ingredients are certified gluten-free, especially the gelatin (some brands use wheat-based additives). Use gluten-free powdered sugar like Wholesome Sweeteners brand. For extra stability, add 1 tablespoon cornstarch to each gelatin layer.
The frosting remains the same, but always double-check labels on food coloring and extracts for hidden gluten. 🌾
Nutrition facts
Frequently asked questions about Jello layered cakes
Why do my gelatin layers keep turning out too soft?
This usually happens when the gelatin doesn't set long enough or the mixture was too warm when poured. Always let layers set for 4-6 hours in the fridge, and make sure your pans are chilled before pouring. The boiling water should cool to 110°F before mixing with gelatin powder to prevent premature setting.
Can I make this cake without a stand mixer?
Use a hand mixer or even a whisk for the frosting—just mix the cream cheese and butter for 5-7 minutes until completely smooth. For the gelatin layers, whisk vigorously by hand for 2-3 minutes after adding boiling water to ensure no lumps remain. Patience is key when mixing by hand.
How do I prevent the frosting from sliding off the gelatin layers?
Chill the assembled cake for at least 4 hours before serving—this lets the gelatin firm up and the frosting set properly. For extra grip, lightly brush each gelatin layer with corn syrup before adding frosting. Also, use a spatula to spread frosting evenly, pressing gently to create adhesion.
What's the best way to store leftovers?
Wrap individual slices tightly in plastic wrap and store in an airtight container in the fridge for up to 3 days. The gelatin layers may soften slightly, but reheating isn't recommended—this cake is best enjoyed chilled. For longer storage, freeze slices for up to 1 month, thawing at room temperature before serving.
Can I use store-bought Jello cups instead of powder?
Yes, but with adjustments! Drain and melt 1 package (3 oz) of Jello cups with ½ cup boiling water instead of the full cup called for. The flavor will be slightly different (more fruity), and you may need to reduce the powdered sugar slightly since store-bought Jello already contains sweetener. Test one layer first to check consistency.