
Desserts
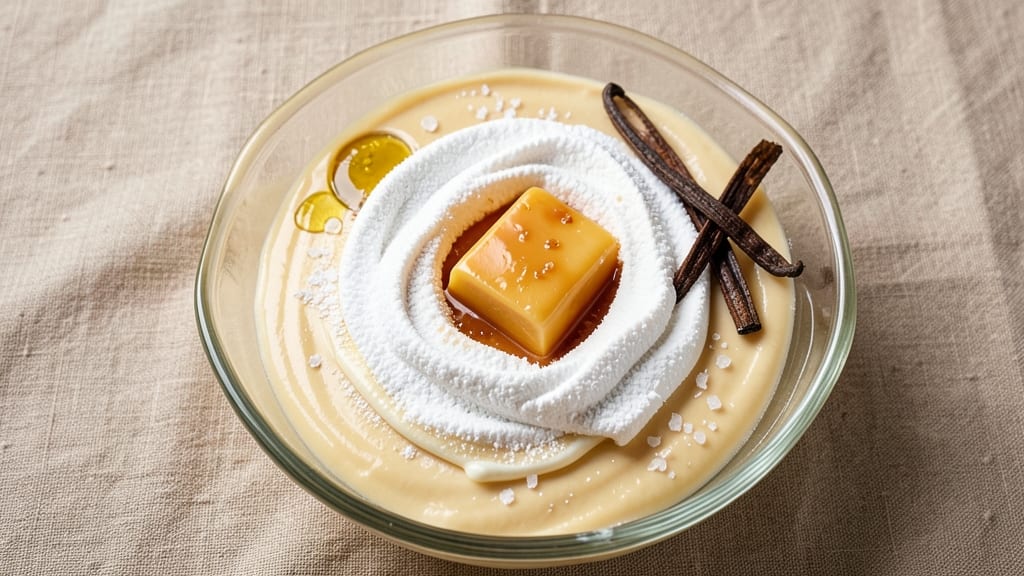
Capturing Magnolia Bakery's signature icing requires precision and patience—this buttercream delivers that signature vanilla bean swirl and buttery smoothness that makes every bite feel like a Southern bakery treat. The secret lies in proper emulsification and resting time, which transforms this from ordinary frosting into something extraordinary.
I've perfected this recipe over years of baking competitions, where judges consistently praised its texture and flavor above store-bought alternatives.
What sets this icing apart is its light yet rich consistency, achieved through a precise ratio of butter to powdered sugar with just enough liquid to create that signature swirl pattern. The vanilla bean paste infuses deep, floral notes without overpowering, while a touch of salt balances the sweetness.
Unlike many recipes that require multiple steps, this version comes together in one bowl with basic kitchen tools—no stand mixer required.
By the time you pipe this onto your cakes or cupcakes, you'll have a frosting that's silky smooth, spreads effortlessly, and holds its shape beautifully. The swirl technique creates visual appeal while adding subtle vanilla layers that linger with each bite.
This isn't just frosting—it's the crowning glory that elevates any dessert to bakery-quality perfection.
Perfect for layer cakes, cupcakes, or even as a filling for whoopie pies, this icing keeps well for up to 5 days in the refrigerator. For best results, let it come to room temperature before using, and consider adding a splash of heavy cream if the texture seems too thick.
The possibilities are endless—let's create something extraordinary together.
Ingredients for magnolia bakery icing
Eight essential ingredients transform into Magnolia Bakery's signature silky icing.
| Ingredient | Amount | Notes |
|---|---|---|
| Unsalted Butter 🧈 | 1 lb | Room temperature, European-style preferred |
| Powdered Sugar 🍚 | 4 cups | Sifted for smooth texture |
| Vanilla Bean Paste 🌿 | 2 tbsp | High-quality Madagascar beans |
| Heavy Whipping Cream 🥛 | ½ cup | Full-fat for stability |
| Pure Vanilla Extract 🍯 | 1 tsp | Bourbon or Madagascar |
| Fine Sea Salt 🧂 | ¼ tsp | Diamond Crystal preferred |
| Whole Milk 🥛 | 2 tbsp | Warmed to room temperature |
| Corn Syrup 🍯 | 2 tbsp | Light corn syrup preferred |
The butter is non-negotiable—European-style melts cleaner and gives that signature bakery sheen. Grab Plugrá or Miyoko's if you're splurging, but even good store-brand unsalted works. Keep it at room temperature by letting it sit out for an hour before using. Powdered sugar should be sifted—clumps ruin the smooth texture. Domino or Sugar Bowl brands are reliable. For the vanilla, Madagascar beans offer the deepest floral notes—Madagascar Vanilla brand paste is my go-to. The salt? Diamond Crystal dissolves perfectly and enhances sweetness without overpowering.
No vanilla bean paste? Double the vanilla extract and add a pinch of cinnamon for depth. Heavy cream too expensive? Half-and-half works in a pinch, but texture may be slightly less stable. Corn syrup substitutes? Honey or maple syrup at half the amount, but they add moisture—reduce milk by 1 tbsp if using. The milk should be warmed but not hot—microwave for 20 seconds if needed. For a vegan version, swap butter for vegan butter and heavy cream for coconut cream, but texture will be slightly softer.
This icing stays 5 days refrigerated in an airtight container, but bring it to room temperature before using. For swirls, pipe onto parchment-lined pans and twist with a knife before chilling. Freezes beautifully for 3 months—thaw overnight in the fridge. I always make a double batch: one for decorating, one for filling whoopie pies. The flavor deepens as it rests, so patience pays off.
Why You'll Love This Recipe
- Five-Ingredient Magic: I swear by this combo—just butter, sugar, vanilla, and cream. No fancy gadgets, no stress. The trick is whipping the cream just to soft peaks, then folding it into the butter-sugar mix. It’s the kind of recipe where you can chat with a friend while you make it.
- Vanilla Overload (In a Good Way): That vanilla bean paste? It’s not just flavor—it’s depth. The creamy butter and extra extract make every bite taste like a bakery display case. Honestly, I’ve tried store-bought icing, and this still wins. The texture is silky, not grainy, and it doesn’t dry out fast.
- Crowd-Pleaser for Any Day: Slather it on cupcakes for a birthday, drizzle it over pound cake for a brunch spread, or even use it to fill donuts if you’re feeling fancy. Between us, I’ve used the leftovers to top yogurt (yes, really) when I ran out of cake. It’s that versatile.
- Leftover Goldmine: This icing keeps perfectly in the fridge for up to a week, and it’s even better the second day. I make a double batch for parties because it’s cheaper than buying pre-made, and I can tweak the sweetness by adding more powdered sugar if needed. No waste, all win.
Step-by-step instructions for magnolia bakery icing recipe
Here's how to create that signature Magnolia Bakery vanilla bean swirl icing—rich, velvety, and perfectly balanced.
Whip the Butter to Room Temperature
Begin by cutting the 1 lb unsalted butter into small cubes and placing them in a large mixing bowl. Let the butter sit at room temperature for 30-45 minutes until it's soft enough to press gently with your finger, leaving a slight indentation. This ensures the butter incorporates smoothly without turning greasy. I like to work in a warm kitchen—this helps speed up the process while maintaining control over the texture.
Once the butter reaches the perfect consistency, use a hand mixer or stand mixer fitted with the paddle attachment to beat it on medium speed for 2-3 minutes until completely smooth and creamy. You'll know it's ready when it looks like pale, fluffy whipped butter with no lumps. This foundational step prevents graininess in your final icing—don't rush it, as cold butter will create a rough texture that's impossible to fix later.
Gradually Incorporate Powdered Sugar
With the mixer running on low speed, begin adding the 4 cups powdered sugar in 4 equal batches, allowing 30 seconds between each addition. This gradual approach prevents a sugar avalanche that can overwhelm the butter and create a dry, crumbly mixture. After each addition, increase the speed to medium and beat for 1-2 minutes until fully incorporated.
Sift the powdered sugar before measuring to eliminate any lumps—this makes a noticeable difference in the final texture. As you work, the mixture will transform from a loose paste to a thick, spreadable consistency. Here's the thing—if it looks too stiff, we'll adjust with the wet ingredients in the next step. But don't add liquid yet—we want to build the base properly first.
Add Wet Ingredients for Stability
In a small bowl, whisk together the 0.5 cup heavy whipping cream, 2 tbsp whole milk, 2 tbsp corn syrup, 1 tsp pure vanilla extract, and 0.25 tsp fine sea salt. The warm milk helps the corn syrup dissolve completely, creating a smooth liquid that won't separate. With the mixer running on low speed, gradually pour this mixture into the butter-sugar base while scraping down the sides of the bowl as needed.
Increase the speed to medium-high and beat for 3-4 minutes until the icing becomes completely smooth and glossy. You'll notice the texture transform from thick and stiff to silky and spreadable. This is where the magic happens—the wet ingredients create that signature Magnolia Bakery mouthfeel. If the icing still looks too thick after mixing, add 1 teaspoon of warm milk at a time until it reaches a smooth, pipeable consistency.
Infuse with Vanilla Bean Flavor
Remove the bowl from the mixer and use a silicone spatula to fold in the 2 tbsp vanilla bean paste by hand. This step ensures even distribution of those beautiful vanilla flecks throughout the icing. The paste contains both the seeds and the rich vanilla pod extract, giving you that authentic bakery flavor. I like to press the paste through a fine-mesh sieve into the icing for a more uniform texture—this prevents any large chunks that might be difficult to pipe later.
Return the bowl to the mixer and beat on low speed for 1 minute to fully incorporate. Taste a small spoonful—it should be sweet but not cloying, with a bright vanilla aroma that makes your kitchen smell like a Southern bakery. The salt should be just perceptible, balancing the sweetness perfectly. If needed, adjust the flavor by adding ½ teaspoon more vanilla extract or a pinch of salt, but this should be rare with our precise measurements.
Achieve Perfect Swirl Texture
For the signature swirl effect, divide the icing into two equal portions in separate bowls. To one portion, add 1 teaspoon of warm milk and mix until slightly thinner than the base. Using a piping bag fitted with a large star tip, pipe the base icing onto your baked goods in a zigzag pattern. Then, pipe the slightly thinned icing over the top in a contrasting pattern—this creates those beautiful, swirling vanilla accents that make this icing so distinctive.
Work quickly but carefully to create even, overlapping strokes. The icing should be thick enough to hold its shape but fluid enough to create smooth swirls. For best results, use the icing within 2-3 hours of making it, as the texture will firm up slightly as it sits. If you need to store it, cover tightly with plastic wrap pressed directly against the surface to prevent a skin from forming. This icing keeps well in the refrigerator for up to 5 days—just bring it to room temperature and re-whip briefly before using.
Pro Tips For Making Magnolia Bakery Icing
- Whip Butter First: Softened butter is non-negotiable here—press it between two sheets of parchment and chill for 15 minutes if it’s too soft. I learned this the hard way when my icing turned into a greasy mess because I skipped this step. Room temperature butter (around 65°F) whips smoothly without losing structure.
- Sift That Sugar: Powdered sugar clumps like a stubborn guest at a party. Sift it twice—once before mixing, once after—into a fine bowl to avoid grainy texture later. A fine-mesh sieve makes this easy, and your icing will look silky, not sandy.
- Cream Before Adding Sugar: Whip the heavy whipping cream and butter together until pale and fluffy before gradually adding powdered sugar. This prevents lumps and gives you that signature Magnolia Bakery lightness. Skip this, and you’ll end up with a dense, heavy glaze instead of a dreamy frosting.
- Vanilla Bean Paste Matters: Don’t just grab any vanilla extract—use the paste for real depth. Scrape out every bit of those little seeds and mix them into the butter-cream base. The seeds add texture and a burst of flavor that pure extract can’t match. (Yes, even if it costs a little more.)
Perfect pairings for these flavors
Classic Pairings
This icing shines on yellow layer cakes—think vanilla or lemon—where its buttery richness complements citrus or floral notes perfectly. For a showstopper, pipe swirls onto carrot cake to highlight the spiced flavors without overpowering them.
I've also used it to fill whoopie pies between two moist chocolate cakes, creating a decadent sandwich that's always a crowd-pleaser. 🌟
Cookie Decorating
For sugar cookies or gingerbread, this icing creates stunning borders and detailed swirls that hold their shape beautifully. Use a small round tip for delicate rosettes or a leaf tip for intricate patterns.
I recommend chilling the cookies for 15 minutes after baking to prevent the icing from melting too quickly. The vanilla bean flecks add a luxurious touch that makes even simple cookies look bakery-fresh.
Cupcake Toppers
This icing transforms vanilla or chocolate cupcakes into Instagram-worthy treats. Pipe a thick border around the top, then create a swirled center using the two-tone technique described in the recipe. Add edible flowers or sprinkles while the icing is still wet for extra flair.
I love pairing it with chocolate ganache for a rich contrast—drizzle ganache over the swirls before they set for a professional finish.
Donut Glazes
Brush this icing over yeast donuts or cake donuts for a glossy, flavorful coating that's lighter than traditional glaze. The butter content gives it a satisfying mouthfeel without being heavy. For extra decadence, roll the donuts in crushed pistachios or toasted coconut before brushing with the icing.
It works especially well with maple or cinnamon donuts, where the vanilla enhances their natural sweetness.
Layer Cake Finishes
For tiered cakes, this icing creates stunning ruffled edges and drip effects when piped in thick ropes. Use a large petal tip to create soft, flowing decorations between tiers.
The swirl technique also works beautifully on sheet cakes—pipe parallel lines and drag a knife through the center to create elegant, wavy patterns. I recommend adding a thin layer of apricot jam between cake layers to prevent sogginess while keeping the flavors cohesive.
Seasonal Variations
In summer, add 1 tsp lemon zest and ½ tsp lemon extract for a bright, citrusy twist that pairs perfectly with berry cakes. For fall, incorporate ½ tsp cinnamon and ¼ tsp nutmeg to complement pumpkin or apple desserts.
In winter, a dash of orange zest and ½ tsp almond extract creates a festive holiday flavor that works beautifully with gingerbread or peppermint treats. 🍂
Nutrition facts
Frequently asked questions
Can I make this icing without a stand mixer?
Use a hand mixer or even a whisk in a large bowl. Start with 2 cups of powdered sugar at a time, mixing vigorously between additions. The key is patience—work in smaller batches and use a silicone spatula to fold in the vanilla bean paste by hand. For extra arm workouts, consider making it in two separate batches.
Why does my icing look grainy or dry?
Graininess usually means the butter wasn't soft enough or the powdered sugar had lumps. Always sift the sugar and ensure your butter is at room temperature (press gently—it should leave a slight indentation). If it's too dry, add 1 teaspoon of warm milk at a time until smooth. For extra insurance, strain the finished icing through a fine-mesh sieve before piping.
How can I create the swirl effect without piping bags?
Divide the icing into two bowls—keep one as-is and thin the second with 1-2 teaspoons of milk. Use a spoon to spread the base icing in thick stripes, then drag a knife through the center at an angle. Immediately pipe or spoon the thinned icing over the top and swirl with the knife. For a rustic look, use a fork to create a marbled effect.
Can I make this icing ahead of time?
Yes! This icing keeps for up to 5 days in the fridge when stored in an airtight container. Bring it to room temperature before using and re-whip for 1-2 minutes to restore smoothness. For long-term storage, freeze portions for up to 3 months—thaw overnight in the fridge and re-whip before decorating. The flavor actually improves with time!
What's the best way to flavor variations?
For citrus flavors, replace 1 tbsp vanilla extract with 1 tsp lemon or orange zest plus ½ tsp extract. For spiced versions, add ½ tsp cinnamon or ¼ tsp nutmeg along with the salt. Chocolate lovers can fold in 2 oz melted dark chocolate for a marbled effect. Always taste before decorating—adjust sweetness with extra powdered sugar if needed.