Desserts
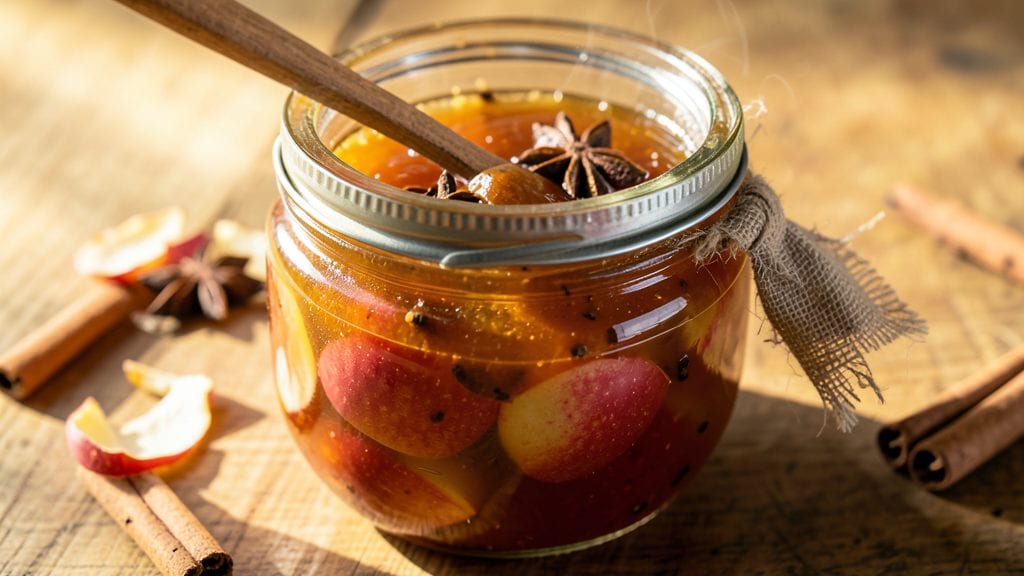
This old-fashioned apple jam recipe brings back the art of homemade preservation with every spoonful, where cinnamon sticks and cloves infuse warmth into every jar. The slow simmer transforms tart apples into a velvety spread with just the right balance of sweetness and spice—no pectin required.
I've perfected this method over years of canning seasons, ensuring a texture that's smooth yet chunky enough to feel truly homemade.
What makes this recipe special is its simplicity and depth of flavor. You'll need just five core ingredients—apples, sugar, lemon juice, cinnamon, and cloves—plus a few hours of gentle cooking time.
The secret lies in the spice bag: whole spices steep in the simmering jam, releasing aromatic oils that elevate the flavor without overpowering it. This method creates a jam that's rich, fragrant, and far superior to anything store-bought.
By the time you're done, you'll have jars of golden amber jam with visible apple pieces and a spiced aroma that fills your kitchen. The texture is perfectly set—not too runny, not too stiff—with a subtle tang from the lemon that brightens every bite.
This jam keeps beautifully for months, making it ideal for gifting or stocking your pantry for winter.
The best part? This recipe scales perfectly for small batches or large harvests, and the spiced version pairs beautifully with toast, cheese boards, or even savory dishes like pork chops. Let's get started on your homemade preservation journey!
Ingredients for old fashioned apple jam
Five ingredients, one spice bag, endless jars of homemade spiced apple jam.
| Ingredient | Amount | Notes |
|---|---|---|
| Apples 🍎 | 4 lb | Firm, tart varieties like Granny Smith |
| Granulated Sugar 🍚 | 3 cups | White or light brown preferred |
| Lemon Juice 🍋 | ½ cup | Freshly squeezed, unsweetened |
| Cinnamon Sticks 🌿 | 4 whole | High-quality, aromatic variety |
| Whole Cloves 🌶️ | 4 whole | Freshly pounded lightly |
| Cheesecloth 🧵 | 1 piece | For making spice bag |
| Water 💧 | ¼ cup | For spice bag |
| Muslin Bag 🧵 | 1 piece | Alternative to cheesecloth |
The apples are everything here. Granny Smith or McIntosh are my go-tos—their tartness balances the sweetness perfectly. Avoid anything too soft or mealy, and don't peel them unless you're feeling fancy (the skin adds texture). For the best quality, hit up the farmers market in fall when apples are freshest. If you're working with a mix of varieties, just eyeball it—about 4 lbs should give you roughly 6 cups of chopped apples. The sugar? White or light brown works best—it dissolves cleanly and doesn't add that molasses-like depth you might get with darker brown sugars.
No cheesecloth? Muslin or even a clean coffee filter in a pinch will work for your spice bag. Running out of cloves? Allspice berries or star anise can add depth, though the flavor will be different. The lemon juice is non-negotiable—it's what keeps the jam from getting too sweet and adds that bright tang. If you're making this for gifts, organic lemons from Whole Foods or Trader Joe's have the best flavor. Want to skip the spice bag? Toss the whole spices directly into the pot, but you'll lose some of that aromatic infusion. And if you're worried about the cinnamon sticks being too strong, just use 2 instead of 4—they'll still add warmth without overpowering.
This jam tastes even better the next day as the flavors meld. Store it in the fridge for up to 3 weeks or can it for 12 months on the shelf. I always make a double batch—one for the pantry and one to give away. The spice bag can be reused once or twice if you give it a quick rinse between batches. For gifting, use pretty jars with ribbon—it makes the whole process feel special. And if you're canning, make sure your jars are sterilized properly to avoid any spoilage. The smell alone will make your kitchen feel like autumn in a jar.
Why You'll Love This Recipe
- No Chopping Needed: I just toss in whole apples—peeled, cored, and left in chunks—so no dicing, no mess. The fruit breaks down beautifully on its own while you sip coffee and pretend you’re not cooking.
- Spiced Like Grandma’s: That cinnamon and clove combo? It’s warm, like autumn in a jar. The lemon juice brightens the sweetness just enough to keep it from being cloying—honestly, it’s the kind of flavor that makes you reach for a second spoonful without thinking.
- Gift-Worthy in Minutes: Slap it in a pretty jar, tie a ribbon, and boom—you’ve got a hostess favorite that costs pennies to make. It’s perfect for holiday swaps, teacher gifts, or just stashing in your pantry for when you need a sweet pick-me-up.
- Lasts All Winter: This jam thickens up just right and keeps for months in the fridge. Between us, I’ve had jars from last December still taste fresh—great for when you forget to buy more or just want to avoid the store. Plus, sugar’s cheap, so you can make a big batch without guilt.
Step-by-step instructions for old fashioned apple jam recipe
Here's how to make a rich, spiced apple jam that tastes like nostalgia in every jar.
Prepare the Spice Bag
First, tie the 4 whole cinnamon sticks and 4 whole whole cloves together with a piece of string or dental floss. If you're using the cheesecloth, place the spice bundle inside and gather the edges tightly. If you're using the muslin bag, simply drop the spices in and tie the bag closed. This keeps the spices whole while infusing flavor.
Add the 0.25 cup water to the spice bundle to help release the aromatic oils. The water should be enough to moisten the spices but not soak them completely. This creates a fragrant infusion that will permeate the jam as it simmers. Set the spice bag aside for now—it'll join the pot later.
Peel and Chop the Apples
Peel the 4 lb apples, removing any bruised or blemished spots. I like to use a vegetable peeler for this—it's quick and leaves the fruit intact. Cut the apples into ¼-inch thick slices or small chunks. The smaller the pieces, the faster they'll soften and release their juices. You want about 4 cups of chopped apples total.
Don't worry if the pieces aren't uniform—this is rustic cooking. Just make sure they're small enough to soften completely during cooking. You can leave the core intact or remove it, but the core will add a slightly bitter note that some people enjoy. If you prefer milder flavor, trim it away.
Simmer the Apple Mixture
In a large, heavy-bottomed pot, combine the chopped apples, 3 cups granulated sugar, and 0.5 cup lemon juice. Stir well to distribute the sugar evenly. Place the spice bag in the center of the pot and bring the mixture to a boil over medium-high heat. Once boiling, reduce the heat to medium-low and let it simmer uncovered.
Here's where the magic happens: the apples will release their juices and begin to soften. You'll see bubbles form around the edges of the pot and the mixture will start to thicken. Stir occasionally to prevent sticking, but don't worry if it gets a little caramelized on the bottom—that's part of the flavor. Simmer for 30-40 minutes, stirring every 10 minutes to ensure even cooking.
Test for Doneness and Thicken
After 30-40 minutes, remove the spice bag and check the jam's consistency. It should coat the back of a spoon but still be slightly loose. If it's too thin, return the spice bag to the pot and continue simmering for another 10-15 minutes. The jam is done when it reaches the 220°F "jelly test" stage—when you can draw a line with your finger that doesn't fill back in immediately.
For the jelly test, dip a cold spoon into the jam and run your finger through it. If the line stays, it's ready. If it fills back in, simmer for another 5-10 minutes. Remove the spice bag completely once the jam is thick enough—you don't want it to overcook and turn into syrup. Taste and adjust sweetness if needed, though the sugar should balance the tartness of the apples.
Jar and Preserve
Ladle the hot jam into sterilized jars, leaving about ¼-inch headspace at the top. Wipe the rims with a clean, damp cloth to ensure a good seal. Place the lids on the jars and screw the bands down until they're fingertip-tight. Process the jars in a boiling water bath for 10 minutes to seal them properly.
Let the jars cool completely before storing. The jam will thicken further as it cools, so don't be alarmed if it looks slightly runny while still hot. Once sealed, store the jars in a cool, dark place for up to 1 year. This old-fashioned method preserves all the natural flavors and spices, giving you a taste of autumn every time you open a jar.
Pro Tips For Making Old Fashioned Apple Jam
- Peel and Core Fast: Use a paring knife to slice off the skin in long strips—no need for a peeler. Cut apples into even ¼-inch chunks (smaller = quicker cooking), but don’t go smaller or they’ll turn to mush. I learned this the hard way after watching a batch of jam turn into applesauce.
- Simmer Slow and Steady: Start on medium-high heat to get the jam going, then drop to a gentle simmer once it thickens. Skipping this step means scorched sugar and a bitter edge—trust me, your nose will know. Stir often, but not constantly (every 5 minutes is enough).
- Sugar in Stages: Add half the sugar upfront, then the rest only after the apples have broken down and released juice. This prevents a grainy jam and lets the flavors meld properly. My grandmother swore by this, and she was right: patience here makes all the difference.
- Strain the Spices: After simmering, strain out the cinnamon sticks and cloves with a fine-mesh sieve—no one wants a mouthful of clove while spreading jam on toast. (Yes, even if you love spice, texture matters here.) Save the spices for next time if they still smell good.
Make-ahead tips for this old fashioned apple jam
Prep Ahead for Efficiency
Chop your apples and mix them with sugar and lemon juice up to 24 hours ahead. Store in an airtight container in the fridge—this lets the flavors meld and saves you time on cooking day.
I always do this step the night before because the apples release juices overnight, making the simmering process faster. Just add the spice bag fresh when you're ready to cook. 💡
Spice Bag Prep
Assemble your spice bag the day before and store it in a dry, cool place. The spices will release their aromatic oils more effectively after sitting overnight, giving your jam deeper flavor.
If you're short on time, tie the spices together without the water and add it during cooking—just know the flavor will be slightly less intense. I keep mine in a small muslin bag tied with twine, ready to go. ✨
Sterilize Jars Early
Wash and sterilize your jars at least 2 hours before canning to ensure they're completely dry and ready. I run them through a 200°F oven for 10 minutes or boil them for 10 minutes in a water bath.
Store them in a clean kitchen towel-lined basket until ready to use. This step prevents spoilage and makes the canning process smoother when the time comes. ❄️
Make Double Batches
This recipe scales beautifully, so double it if you have extra apples. Use a large Dutch oven (like a Le Creuset 5.5-quart) to handle the extra volume. I often make two batches—one for immediate use and one for gifting.
The extra work upfront means you'll have jam ready for holidays without last-minute stress. Just remember to adjust your spice bag proportionally. 🍎
Freeze for Quick Use
If you won't be canning right away, freeze the finished jam in airtight containers for up to 3 months. Leave ½-inch headspace to prevent ice crystals. Thaw in the fridge overnight before using—it's perfect for quick toast toppings or last-minute gifts.
I label mine with the date to keep track. This method works great if you're not ready to commit to long-term storage. ❄️
Reuse Spice Bags
Rinse and reuse your spice bags once or twice for future batches. After the first use, give them a quick rinse in warm water and let them dry completely. Store them in a small jar with a lid until your next jam-making session.
The spices retain their flavor surprisingly well, so you won't need to buy new ones every time. This is my favorite money-saving trick! 💛
Nutrition facts
Frequently asked questions
Can I use any type of apple for this recipe?
Tart apples like Granny Smith or McIntosh work best—their acidity balances the sweetness perfectly. Avoid overly sweet varieties like Gala or Fuji as they can make the jam taste cloying. For the best flavor, use a mix of tart and slightly sweet apples.
What if my jam doesn't thicken enough?
If your jam is too runny, return the spice bag and simmer uncovered for another 10-15 minutes. Stir occasionally to prevent sticking. The jam should reach 220°F on a candy thermometer for proper set. If it's still too thin, you can add 1 tablespoon of cornstarch mixed with 2 tablespoons water and simmer for 5 more minutes.
How long will homemade apple jam last?
Properly canned jam lasts 12 months in a cool, dark pantry. Once opened, refrigerate and consume within 3 weeks. For short-term storage, keep it in the fridge for up to 3 months in an airtight container. The flavor actually improves over time!
Can I make this jam without canning?
Yes! Simply follow the same recipe and store the finished jam in the fridge for 3 weeks or freeze it for 3 months. For freezing, leave ½-inch headspace in airtight containers. Thaw overnight in the fridge before using—it works perfectly for toast or baked goods.
What can I do with leftover apple peels?
Don't waste them! Use peels for apple peel tea (steep in hot water with cinnamon), add to apple cider for extra flavor, or compost them. For a sweet treat, bake the peels with sugar in the oven for 10 minutes at 350°F to make apple peel candy.