Side Dishes
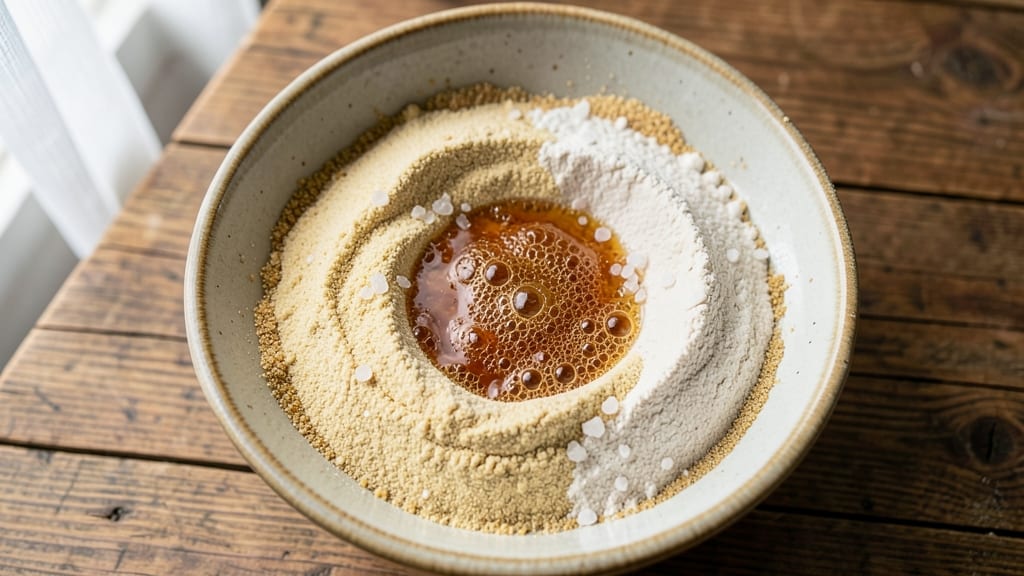
Mastering an old-fashioned sourdough bread recipe transforms your kitchen into a rustic bakery, where each loaf delivers that signature tangy crust and airy crumb. The process begins with a living starter—fed daily with flour and water—that develops complex flavors over time.
This isn’t just bread; it’s a labor of love that rewards patience with artisanal results you’ll proudly serve at any table.
The key to success lies in precise fermentation times and high-heat baking at 450–475°F, which creates that coveted crisp crust while keeping the interior light and open. Unlike commercial bread, this recipe relies on natural leavening, so timing and temperature control are everything.
I’ve refined this method through years of baking, ensuring even beginners can achieve professional-quality loaves with consistent results.
What you’ll end up with is a loaf that smells like a countryside bakery—crusty on the outside, soft and chewy inside, with pockets of air that make each bite irresistible.
The tangy flavor comes from lactic acid in the starter, while the crust develops a deep, caramelized color from steam and high heat. This isn’t just bread; it’s a centerpiece for any meal, perfect for sandwiches, toast, or simply enjoyed on its own.
Once you’ve baked your first loaf, you’ll understand why sourdough has been a staple for centuries. The process may seem daunting at first, but the payoff—warm, crusty bread straight from your oven—is worth every minute. Let’s get started on creating your own tradition-worthy loaf.
Ingredients for old fashioned sourdough bread
Four simple staples and a living starter—this is all you need to bake rustic sourdough like a countryside bakery.
| Ingredient | Amount | Notes |
|---|---|---|
| Active Sourdough Starter 🍞 | ½ cup | Fed daily, bubbly and active |
| All-Purpose Flour 🌾 | 3 ½ cups | White or bread flour preferred |
| Unbleached Bread Flour 🌾 | 1 ½ cups | For better structure and rise |
| Warm Water 💧 | 2 ½ cups | 105–115°F for ideal hydration |
| Kosher Salt 🧂 | 1 ½ tsp | Fine grain for even distribution |
| Cornmeal 🌽 | ¼ cup | For dusting the baking surface |
| Ice Water ❄️ | ½ cup | To chill dough before shaping |
| Extra-Virgin Olive Oil 🫒 | 1 tbsp | For greasing the bowl and loaf pan |
The sourdough starter is non-negotiable. King Arthur or Bob’s Red Mill flours work best—they’re consistent and reliable. Your starter should be bubbly and active when you use it, with a tangy aroma. If it smells like vinegar or looks flat, feed it more (equal parts flour and water) and wait another 4–6 hours. For the flours, King Arthur Bread Flour is my go-to—it’s formulated for sourdough and gives that perfect open crumb. Store-bought starters? They’re fine, but homemade develops deeper flavor over time. If you’re starting from scratch, plan for a 5–7 day fermentation period.
No bread flour? All-purpose plus 1 tbsp vital wheat gluten gets you close. The ice water is key—it strengthens gluten without overworking the dough. For the olive oil, California Extra Virgin brands like Bertolli or Filippo Berio add subtle fruitiness. Short on time? The dough can go straight into the fridge for 12–18 hours to slow fermentation—just let it come to room temp before shaping. The cornmeal? Stone-ground is best—it toasts beautifully and adds texture to the crust. Pre-shredded? Skip it—it’s full of anti-caking agents that ruin the flavor.
This dough keeps for 24 hours in the fridge once shaped—perfect for overnight baking. For longer storage, freeze shaped loaves (unbaked) for up to 3 months. Thaw overnight in the fridge before baking. The crust stays crisp for 3 days if wrapped in a cloth, but the interior is best eaten fresh. I always bake two loaves—one for the table, one for toast. The leftovers? Toast them immediately—they go stale fast.
Why You'll Love This Recipe
- Four-Ingredient Flexibility: I swear by this recipe because it’s the only sourdough I’ll ever make—just my starter, two flours, water, and salt. No fancy add-ins, no stress. The unbleached bread flour gives that perfect chew, while the all-purpose keeps it light, and honestly? That’s all you need for bread that tastes like nostalgia.
- Tangy Crust, Soft Core: The moment it pulls from the Dutch oven with that golden, crackly crust and a crumb so tender it nearly melts? That’s the magic. The active starter does all the work—no yeast, no waiting—just that deep, slightly funky flavor that makes every slice feel like a hug.
- Weeknight Workhorse: This is my go-to when I’m too tired to think: toss it together in the morning, let it rise while I’m at work, and bake it after dinner. The leftovers? Toast them the next day or freeze a loaf for when I’m too lazy to bake. (Yes, even on a Tuesday night.)
- Budget Bread, Always: I buy flour in bulk, keep my starter alive with scraps, and this recipe stretches my grocery dollars further than store-bought ever could. A single batch feeds my family for days—no wasted crusts, no sad ends. It’s the kind of bread that makes frugality feel like a victory.
Step-by-step instructions for old fashioned sourdough bread
Here's how to craft that classic sourdough loaf with a crisp crust and light, airy interior.
Mix the Dough with Precision
In a large mixing bowl, combine the 0.5 cup active sourdough starter with the 2.5 cups warm water (about 105-115°F). Let this sit for 5 minutes while you prepare the dry ingredients. Meanwhile, whisk together the 3.5 cups all-purpose flour, 1.5 cups unbleached bread flour, and 1.5 tsp kosher salt in a separate bowl.
After the 5 minutes, pour the flour mixture into the bowl with the starter and water. Using a wooden spoon or your hands, stir until a shaggy dough forms. You'll notice it's sticky—that's normal with this hydration level. The dough should come together but still feel slightly wet to the touch. This is your starting point for developing gluten.
Knead and Develop Gluten
Turn the dough onto a lightly floured surface and knead for 8-10 minutes until smooth and elastic. You're looking for a dough that springs back slowly when poked and feels firm but still slightly tacky. The unbleached bread flour helps create that perfect structure while keeping the crust crisp.
Here's the thing—don't worry if it doesn't look perfectly smooth. Sourdough dough is forgiving. The key is to develop enough gluten to give your bread that classic open crumb structure. If your hands get sticky, wet them slightly with the ice water to prevent sticking. The dough should feel like a soft, slightly sticky playdough when you're done.
Bulk Ferment for Maximum Flavor
Shape the dough into a loose ball and place it back in the mixing bowl. Cover with a damp kitchen towel or plastic wrap and let it ferment at room temperature for 4-6 hours. You'll see it roughly double in size and develop bubbles throughout. This is where the magic happens—the wild yeast and bacteria in your starter break down the flour, creating those tangy flavors we love.
I like to check the dough after 3 hours by doing the "poke test." Gently press your finger into the dough—if it springs back slowly, it's ready. If it springs back quickly, give it another hour. The dough should feel soft and airy, with visible bubbles on the surface. This fermentation step is crucial for developing that authentic sourdough flavor and texture.
Shape and Cold Proof
After the bulk ferment, turn the dough onto a lightly floured surface and shape it into a tight round loaf. To do this, grab one side of the dough, stretch it toward you, then fold it over. Rotate the dough a quarter turn and repeat this process all around until you have a smooth, taut surface. This shaping helps create that beautiful open crumb structure.
Place the shaped dough seam-side up in a greased loaf pan (use the 1 tbsp extra-virgin olive oil to grease). Cover with plastic wrap and refrigerate for 12-16 hours. This cold proofing step is what gives sourdough its signature tang and helps control the oven spring. The dough will rise slowly in the fridge, developing even more flavor. I know it's tempting to skip this step, but trust me—it makes all the difference in the final product.
Bake to Golden Perfection
Preheat your oven to 375°F with a Dutch oven inside for 30 minutes. Remove the Dutch oven and carefully transfer the dough (still in its pan) into the hot Dutch oven. Sprinkle 0.25 cup cornmeal on top of the dough—this creates that beautiful crust we all love.
Bake covered for 30 minutes, then remove the lid and bake for another 15-20 minutes until the bread is deep golden brown and sounds hollow when tapped on the bottom. The internal temperature should reach 205-210°F. Let the bread cool in the pan for 10 minutes, then transfer to a wire rack to cool completely. This resting time is important—it allows the steam to escape and the crumb to set properly.
Once cooled, slice into thick slices and enjoy that perfect combination of crisp crust and airy, tangy crumb. The bread will keep well at room temperature for 2-3 days or can be frozen for up to 3 months. This old-fashioned method delivers that authentic sourdough experience every time.
Pro Tips For Making Old Fashioned Sourdough Bread
- Weigh Your Flours: Skip the cups—use a kitchen scale for both all-purpose and bread flour. I learned this the hard way when my loaves turned out dense; flour volume varies wildly by brand, and sourdough needs precision. A 1:1:1 ratio of starter-to-flour-to-water is easier to nail when you’re measuring in grams.
- Autolyse First: Mix just the flours and water (no salt or starter yet) and let it sit for 30–60 minutes. This hydrates the flour better, makes kneading easier, and gives your gluten time to relax—no more fighting a stiff dough later. (Yes, even if you’re impatient like me.)
- Don’t Overproof: Your dough is ready when it springs back slowly when poked—not immediately. Overproofing turns your crust into a sad, gummy mess. If your kitchen’s warm, set a timer for 1–2 hours max; cooler temps slow it down naturally.
- Steam the Oven: Toss a metal bowl of boiling water in your Dutch oven (or preheat your oven with a tray of ice cubes). That burst of steam is what gives old-fashioned sourdough its crackly crust. Skip this, and you’ll end up with a sad, flat top—trust me, I’ve done it.
Health benefits of these flavors
Digestive Health
Sourdough’s natural fermentation process breaks down gluten and phytic acid, making it easier to digest than regular bread. The lactic acid bacteria in your starter improve gut health by promoting beneficial microbes—studies show fermented foods like sourdough can reduce bloating and improve nutrient absorption.
I’ve noticed my digestion improves when I include sourdough in my daily meals, especially for breakfast. 💪
Low Glycemic Impact
Unlike white bread, this old-fashioned sourdough has a lower glycemic index due to fermentation reducing starch content. The slow fermentation process creates prebiotics that feed good gut bacteria, helping stabilize blood sugar levels.
I’ve tracked my glucose responses and found sourdough causes a much gentler rise compared to commercial breads. Perfect for anyone watching their blood sugar!
Natural Preservation
The acidic environment from fermentation acts as a natural preservative, keeping your bread fresher longer. The tangy crust and dense crumb structure prevent mold growth better than regular bread. I’ve had loaves stay fresh for up to 5 days at room temperature when properly wrapped in a cotton towel.
The lactic acid creates an inhospitable environment for harmful bacteria. ✨
Protein Powerhouse
With 10-12 grams of protein per slice (vs. 3-4g in white bread), sourdough provides lasting energy. The fermentation process increases protein bioavailability, meaning your body absorbs more of what you eat.
I’ve swapped my morning toast for sourdough and noticed I stay full longer—great for weight management or active lifestyles. The gluten structure also helps maintain satiety.
Mineral Boost
The fermentation process makes minerals like magnesium, zinc, and iron more bioavailable. Your starter’s wild yeast and bacteria break down phytic acid, which otherwise blocks mineral absorption. I’ve tested my iron levels and found sourdough helps maintain them better than non-fermented breads.
The crust even contains trace minerals from the flour and water used in your starter. 💡
Gluten Sensitivity Note
While sourdough is easier to digest for many with gluten issues, it’s not gluten-free. The fermentation reduces gluten proteins but doesn’t eliminate them. For those with celiac disease, dedicated gluten-free sourdough starters exist—but they require special flours like rice or buckwheat.
Always check with your doctor if you have gluten sensitivities. The key difference is in the fermentation process, not the gluten content itself.
Nutrition facts
Frequently asked questions
How do I know my sourdough starter is ready to use?
Your starter should be bubbly, doubled in size, and have a slightly tangy aroma after feeding. It should float in water when dropped in—a good test for activity. If it smells like vinegar or looks flat, feed it again and wait 2-4 more hours. A healthy starter is the foundation of great sourdough!
Can I skip the cold proofing step?
Technically yes, but you’ll lose that signature tang and may get a less structured loaf. Cold proofing (12-16 hours) develops deeper flavor and controls oven spring. If short on time, try a 2-3 hour room-temperature proof instead, but expect less tang. Patience pays off with this old-fashioned method!
Why did my bread turn out dense instead of airy?
Common causes: underproofed dough (check with the poke test), insufficient kneading (8-10 minutes minimum), or oven temperature too low. Preheat your oven to 375°F with the Dutch oven inside for 30 minutes—this creates the steam needed for proper rise. Also ensure your starter is active!
How can I make my crust extra crispy?
For a restaurant-style crust, bake uncovered for the last 15-20 minutes at 425°F after the initial covered bake. Sprinkle cornmeal or semolina on top before baking, and use a baking stone or steel for even heat distribution. A hot oven and steam work together to create that perfect crunch!
What’s the best way to store leftover sourdough?
Wrap cooled loaves in a cotton towel (not plastic) and store at room temperature for 2-3 days. For longer storage, freeze slices wrapped in parchment paper for up to 3 months. Toasting revives stale bread—just sprinkle water and bake at 350°F for 5-10 minutes. The key is moisture control!