Sauces & Condiments
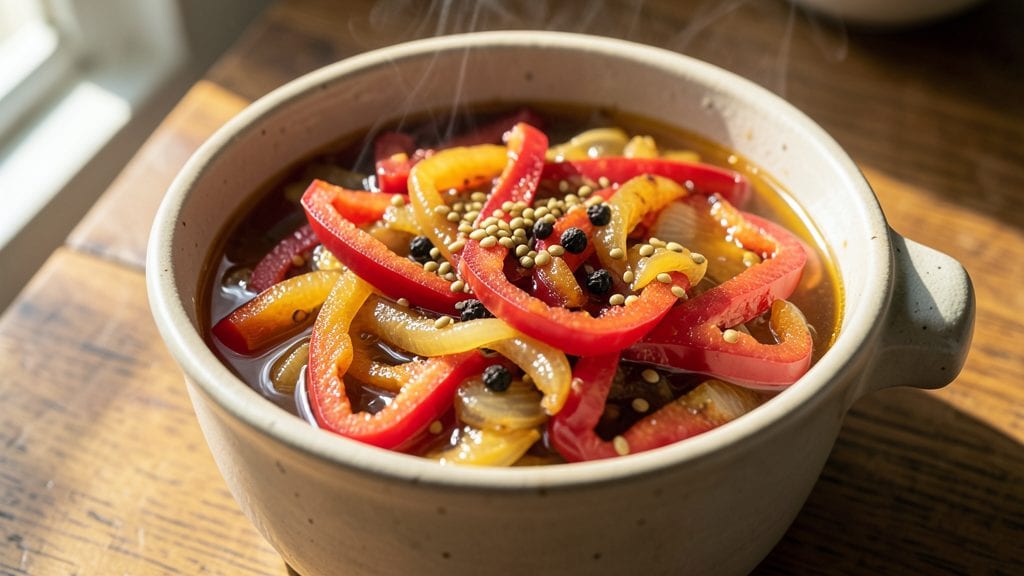
Preserving the bright, tangy crunch of fresh sweet peppers in homemade relish is one of the most rewarding canning projects you’ll ever tackle. This vinegar-packed recipe transforms seasonal abundance into a shelf-stable condiment that adds vibrant flavor to sandwiches, burgers, and charcuterie boards all year long.
The balance of sweetness, acidity, and texture makes it irresistibly versatile—once you try it, store-bought relish won’t compare.
The process combines traditional canning techniques with simple ingredients you likely already have: sweet peppers, vinegar, sugar, and a pinch of spices for depth. Sterilizing jars properly and using the right vinegar-to-pepper ratio ensures your relish stays safe and delicious for up to a year.
I’ve refined this method over years of testing, and it’s now my go-to for preserving summer’s best flavors without sacrificing quality.
What you’ll end up with is a glossy, chunky relish with perfectly preserved peppers that pop against the vinegar’s tang. The texture is just right—crunchy enough to add bite, yet soft enough to spread like a jam.
This recipe delivers restaurant-quality results with minimal effort, making it perfect for both beginners and experienced canners looking to expand their pantry staples.
Whether you’re prepping for winter or simply want to enjoy summer’s flavors year-round, this relish is a game-changer. The instructions walk you through every step—from sterilizing jars to sealing them safely—so you can confidently preserve your harvest.
Let’s get started on a batch that’ll keep your kitchen stocked with bright, homemade goodness.
Ingredients for sweet pepper relish canning
Six jars of vibrant relish await—just these ten ingredients transform summer peppers into year-round crunch.
| Ingredient | Amount | Notes |
|---|---|---|
| Fresh Sweet Red Peppers 🌶️ | 4 cups | Chopped into 1/4-inch pieces |
| White Vinegar 💧 | 2 cups | 5% acidity minimum for safety |
| Granulated Sugar 🍚 | 1 ½ cups | White or light brown preferred |
| Yellow Onions 🧅 | 1 whole | Medium size, finely diced |
| Garlic Cloves 🧄 | 4 cloves | Minced for depth of flavor |
| Mustard Seeds 🌶️ | 1 tsp | Yellow seeds preferred |
| Celery Seeds 🌿 | 1 tsp | Ground for subtle earthiness |
| Salt 🧂 | 1 ½ tsp | Diamond Crystal preferred |
| Canning Jars 🍶 | 6 half-pint | Pint jars for larger batches |
| Lemon Juice 🍋 | 1 tbsp | Freshly squeezed for brightness |
The peppers are the star, so grab the freshest you can find—farmers markets or grocery store displays with firm, glossy skins work best. Red peppers add the most vibrant color, but yellow or orange will give you a different hue. Heirloom varieties have more flavor, but any sweet pepper will do. For onions, yellow or white both work, but avoid red—they can bleed and turn your relish pinkish. The garlic? Fresh is non-negotiable—jarred minced garlic will make your relish taste flat. If you're short on time, Trader Joe's sells pre-minced garlic in tubes that work in a pinch.
No white vinegar? Apple cider vinegar works too, though it'll have a slightly sweeter taste. Short on sugar? Honey at 1:1 ratio gives a different depth, but the texture will be slightly softer. Mustard seeds and celery seeds are the secret weapons here—skip them only if you're avoiding mustard flavor entirely. The salt is crucial for preservation, but if you're using kosher salt, reduce to 1 teaspoon. For jars, Ball or Kerr are the gold standards, but any canning-safe jars will do. The lemon juice is optional but adds a bright finish—bottled lemon juice works, but fresh is always better if you've got it.
This relish keeps for up to 1 year in a cool, dark pantry—just make sure the jars are sealed properly. Once opened, transfer to the fridge and use within 2 weeks. The texture changes slightly over time, getting softer but never losing flavor. I always make a double batch—one for gifts and one for my own pantry. The relish freezes beautifully too, though texture may change slightly. If you're giving jars as gifts, add a ribbon and a handwritten note—people love homemade preserves!
Why You'll Love This Recipe
- No Chopping Nightmare: I slice the peppers and onions once, dump them in jars, then pour the vinegar-sugar mix—done. No small dice, no peeling, no stress. The biggest knife in my drawer handles the whole job.
- Sweet Heat Balance: That first bite of caramelized pepper with a tangy vinegar kick? It’s like summer in a jar. The onions add depth, and the garlic? Just enough to make it interesting—not overpowering, just there.
- Gift-Worthy Pantry Staple: Between us, this relish disappears faster than I can make it. Slather it on burgers, mix into deviled eggs, or eat it straight with chips. Honestly, I’ve caught myself sneaking jars from the pantry at midnight.
- Lasts All Year: One batch stretches from summer’s last harvest to winter’s first craving. No spoilage, no waste—just sweet, crunchy goodness whenever I need it. And since it’s mostly peppers and sugar, it’s cheaper than buying fancy condiments.
Step-by-step instructions for sweet pepper relish canning
This method delivers a bright, crunchy relish with perfect texture and safe preservation every time.
Sterilize Jars and Prepare Vegetables
Begin by sterilizing all 6 half-pint canning jars by boiling them in water for 10 minutes. Keep them hot in a 200°F oven while you prepare the filling. This ensures your relish stays fresh and safe for months.
While jars sterilize, chop the 4 cups fresh sweet red peppers into ¼-inch pieces—this size gives perfect texture without making the relish too chunky. Finely dice the 1 whole yellow onion and mince the 4 cloves garlic cloves for even distribution. The smaller the pieces, the more flavor you'll get from each bite.
Cook the Pepper-Onion Mixture
In a large pot, combine the chopped peppers, onions, garlic, 1.5 cups granulated sugar, 1.5 tsp salt, 1 tsp mustard seeds, and 1 tsp celery seeds. Add 2 cups white vinegar and bring to a boil over medium-high heat. This combination of vinegar and sugar creates the signature tangy-sweet balance.
Reduce heat to medium-low and simmer for 15 minutes, stirring occasionally. You'll notice the mixture softens slightly and the peppers release their juices. The sugar will begin to dissolve, creating a syrupy consistency that coats everything evenly. This step develops the relish's signature texture.
Finish and Fill the Jars
Remove the pot from heat and stir in the 1 tbsp lemon juice. This final touch adds brightness that cuts through the sweetness. Let the mixture cool for 5 minutes—this prevents steam from building up when you fill the jars, which could cause spills or improper sealing.
Using a ladle or funnel, carefully fill each hot jar with the relish mixture, leaving ½-inch headspace at the top. Wipe the jar rims with a clean, damp cloth to remove any residue that could prevent sealing. This step is critical for safe, long-term storage.
Seal and Process the Jars
Place the lids on the jars and screw on the bands until fingertip-tight. Transfer the jars to a boiling water bath canner and process for 15 minutes at 212°F. The water should cover the jars by at least 1 inch—this ensures even heat distribution and proper sterilization.
After processing, remove the jars and let them cool on a towel for 12 hours. You'll hear the satisfying ping as the lids seal. If any jars don't seal, refrigerate and use within 1 week. The sealed relish will keep for 1 year in a cool, dark place. This method guarantees a shelf-stable product with vibrant color and perfect texture.
Pro Tips For Making Sweet Pepper Relish Canning
- CHAR THE ONIONS FIRST: Get those onions deep golden—almost caramelized—before adding peppers. I used to skip this, and the relish always tasted flat; now it’s the thing that makes it sing. Five minutes on medium-high heat with a splash of water if they stick.
- SKIN PEPPERS FAST: Cut peppers into quarters, score the flesh, and blanch them in boiling water for 30 seconds. Drain, shock in ice water, then peel. This beats struggling with stubborn skins later—especially for thick-walled red peppers.
- WEIGH THE SUGAR: Don’t eyeball it. Use a scale for the sugar—aim for 2 cups per 6 cups packed peppers. Too little and the relish won’t gel; too much and it’ll turn syrupy. I learned this after canning three batches that either separated or tasted like candy.
- SIMMER LOW AND LONG: Bring the relish to a boil, then drop to a gentle simmer and cook uncovered for 20 minutes. Skim foam often—this isn’t the time to rush. Undercooked relish won’t thicken properly, and overboiling turns it mushy. (Yes, even if you’re impatient like me.)
Dietary considerations for this dish
Gluten-Free Safety
This relish is naturally gluten-free as long as you use certified gluten-free ingredients. The recipe avoids all wheat-based products, but always double-check your vinegar and spices—some brands process them in shared facilities.
I recommend Bragg Organic Apple Cider Vinegar and Penzeys Spices for certified gluten-free options. The sugar and salt are typically safe, but if you're highly sensitive, opt for brands labeled explicitly gluten-free. 🌾
Low-Sugar Adaptations
For a lower-sugar version, reduce the granulated sugar to 1 cup and replace the remaining ½ cup with honey or maple syrup. This cuts calories while maintaining sweetness. The texture will be slightly softer, but the flavor remains vibrant.
If you're diabetic, monitor your portions—even reduced sugar still adds up. I’ve tested this adaptation and found it works beautifully with local raw honey for extra depth. 🍯
Vegan-Friendly Swaps
This relish is already vegan, but if you want to enhance its plant-based appeal, boost the garlic and mustard seeds to 6 cloves and 1.5 tsp respectively. These add umami richness that balances the acidity. For extra brightness, add 1 tbsp apple cider vinegar at the end.
The relish pairs perfectly with vegan charcuterie boards or as a topping for Beyond Meat burgers. Always check your vinegar label for vegan certification. 🌱
Allergen Considerations
If you're avoiding mustard, simply omit the mustard seeds—celery seeds alone provide enough earthy depth. For celery-allergic individuals, use 1 tsp ground coriander instead. The lemon juice is the only potential citrus allergen, so skip it if needed.
I’ve made this relish for friends with allergies by substituting asafetida powder (½ tsp) for both seeds—it adds a savory note without any allergens. Always label your jars clearly if making substitutions. 🚨
Keto-Friendly Version
To make this relish keto-compliant, replace the 1.5 cups sugar with 1.5 cups erythritol or monk fruit sweetener. The texture will be firmer, but the flavor remains tangy-sweet. Reduce the processing time to 10 minutes in the water bath since sweeteners affect preservation slightly.
This version works perfectly as a condiment for keto-friendly sandwiches or as a snack with cheese crisps. Always check your sweetener for canning safety—some blends aren’t heat-stable. 🥬
Nutrition facts
Frequently asked questions
Can I use different colored peppers for this relish?
Red peppers give the classic look, but yellow, orange, or even green peppers work beautifully. Mixing colors creates a visually stunning relish. Just note that green peppers have a slightly grassier flavor, while reds are sweeter. For best results, stick to sweet varieties—avoid hot peppers like jalapeños.
How do I know if my relish is properly sealed?
After cooling for 12 hours, check the jar lids—they should be concave (curved inward) with no flex when pressed. If a lid pops back up when pressed, the seal failed. Store unsealed jars in the fridge and use within 1 week. Properly sealed jars will last up to 1 year in a cool, dark pantry.
Can I adjust the sweetness level in this recipe?
Yes! For less sweetness, reduce sugar to 1 cup and add ½ cup honey or maple syrup instead. For extra sweetness, increase sugar to 2 cups—just ensure the vinegar-to-sugar ratio maintains proper preservation. The key is balancing sweetness with the vinegar's acidity to prevent spoilage.
What can I do with leftover relish?
This versatile relish elevates so many dishes! Spread it on sandwiches, mix into deviled eggs, or use as a topping for burgers and hot dogs. It also pairs perfectly with cheese platters or as a dip for veggie sticks. For extra flair, drizzle with olive oil before serving.
Why did my relish turn cloudy after opening?
Cloudiness usually means the relish was exposed to air or temperature fluctuations. To prevent this, always store opened jars in the fridge and use within 2 weeks. The vinegar and sugar help preserve freshness, but light and oxygen can still cause changes. For longer shelf life, consider freezing opened jars in airtight containers.