Main Courses
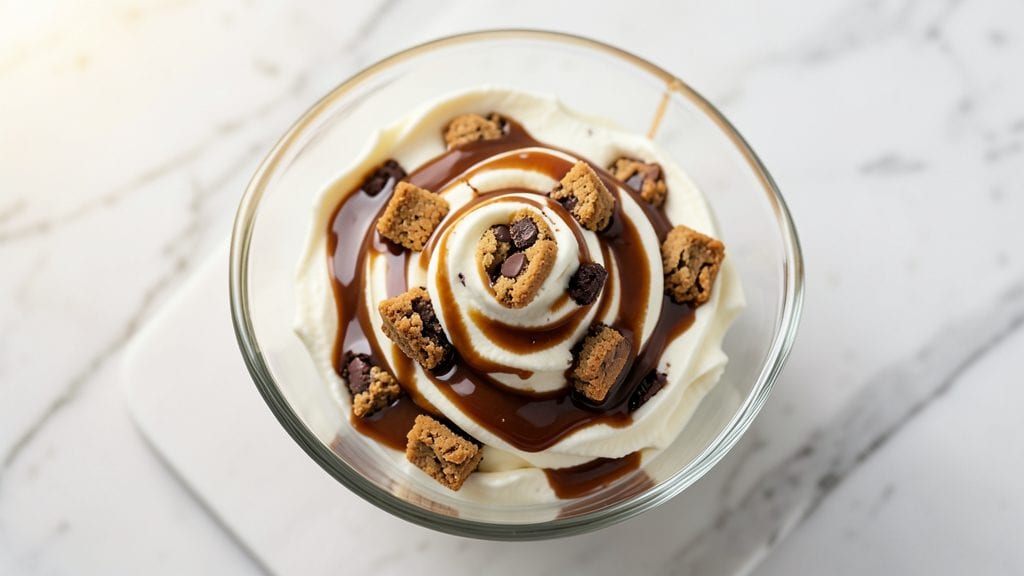
Valerie's no-churn ice cream recipe delivers restaurant-quality velvety swirls without the fuss of an ice cream maker—just four simple ingredients and 15 minutes of prep.
I first discovered this method when my daughter Lily begged for homemade ice cream after a trip to the ice cream shop, and it became our weekend tradition.
The secret lies in the perfect balance of heavy cream, sweetened condensed milk, and vanilla, which creates a silky texture that freezes beautifully.
This recipe transforms basic pantry staples into creamy, dreamy ice cream with a smooth consistency that rivals store-bought brands. The magic happens when you whisk the mixture vigorously before freezing, breaking down any potential ice crystals for that signature velvety mouthfeel.
Whether you're a beginner or a seasoned home cook, this foolproof technique ensures perfect results every time—no special equipment required.
By the time it’s ready, you’ll have a rich, velvety dessert that’s perfect for scooping, layering with mix-ins, or serving in fancy dishes. The texture is so smooth it practically melts in your mouth, and the flavor is pure, unadulterated sweetness with just the right amount of richness.
Add cookie dough chunks, fruit swirls, or a drizzle of caramel for extra indulgence—this recipe is endlessly customizable.
Serve immediately for soft-serve texture or freeze for a firmer bite, making it ideal for summer gatherings, family dinners, or spontaneous dessert cravings. The best part? You can make it ahead and store it for up to two weeks, so there’s always a treat on hand. Let’s get started!
Ingredients for valerie's no churn ice cream
Four core ingredients plus optional mix-ins—this no-churn magic delivers restaurant-quality ice cream every time.
| Ingredient | Amount | Notes |
|---|---|---|
| Heavy Whipping Cream 🥛 | 2 cups | Full-fat for best texture |
| Sweetened Condensed Milk 🥛 | 1 can | 14 oz can, not low-fat |
| Pure Vanilla Extract 🌿 | 1 tbsp | High-quality, not imitation |
| Granulated Sugar 🍚 | ¼ cup | For extra sweetness control |
| Salt 🧂 | ¼ tsp | Fine sea salt preferred |
| Cookie Dough Mix-Ins 🍪 | ½ cup | Optional, store-bought or homemade |
| Fresh Strawberries 🍓 | ½ cup | Hulled and sliced, optional |
| Chocolate Chips 🍫 | ¼ cup | Semi-sweet preferred |
The heavy whipping cream is non-negotiable—full-fat gives you that velvety texture. Store-brand works fine, but organic or grass-fed has a richer flavor. Grab the 14 oz can of sweetened condensed milk from any grocery store dairy aisle—just make sure it's not the low-fat version. Vanilla extract? Look for pure vanilla in the baking section, not the imitation stuff near the spices. I always buy a small bottle of Goya or Nielsen-Massey for the best flavor, but any reputable brand works. The sugar and salt are simple but crucial—measure carefully for perfect balance.
No sweetened condensed milk? Mix 1 cup powdered sugar with 1 cup heavy cream as a substitute, though it won't be identical. Vanilla extract out of stock? Vanilla bean paste or even vanilla sugar works in a pinch. For mix-ins, pre-made cookie dough is easiest, but homemade is better. If you're adding fruit, toss it in lemon juice first to prevent browning. Chocolate chips? Ghirardelli or Guittard melt beautifully. Want extra richness? Add 1 tablespoon of melted butter to the base mixture—trust me, it makes a difference.
This freezes beautifully—24 hours for perfect scooping texture. Store in an airtight container with parchment between layers for easy scooping. Keeps for up to 2 weeks in the freezer, though it's best within 10 days. For soft-serve texture, let it sit at room temperature for 5-10 minutes before scooping. The base mixture doubles well, so make extra for future treats. I always keep a batch in the freezer—nothing beats homemade ice cream on a hot summer day.
Why You'll Love This Recipe
- No Churn Magic: I swear by this trick—just mix, freeze, and forget. No ice cream maker, no stress, no waiting for hours. The heavy cream and condensed milk do all the heavy lifting while you sip lemonade.
- Vanilla Bomb: That pure vanilla extract? It’s the star here. One deep inhale of the mix, and you’re hooked—rich, creamy, with a sweetness that’s just right. Honestly, I’ve tried store-bought, but this tastes like childhood nostalgia in a bowl.
- Party in a Bowl: Birthdays, potlucks, or just because—this is my go-to crowd-pleaser. It’s easy to double, and everyone thinks I slaved over it. (Between us, it took 10 minutes of active time.)
- Fridge Goldmine: The best part? It keeps perfectly for days. No freezer space? No problem. Leftovers taste just as good—because who can resist seconds when it’s this smooth and dreamy? My kids call it “emergency dessert.”
Step-by-step instructions for valerie's no-churn ice cream recipe
This method delivers restaurant-quality ice cream without a single spin in the churn.
Whip the Heavy Whipping Cream to Stiff Peaks
Place the 2 cups heavy whipping cream in a chilled mixing bowl and use a hand mixer or stand mixer fitted with the whisk attachment. Beat on medium-high speed until soft peaks form—this usually takes about 2-3 minutes. The cream should hold its shape when the whisk is lifted, but still feel slightly wobbly at the tips.
Here's the thing—cold equipment matters. Make sure your bowl and beaters are chilled first by placing them in the freezer for 10 minutes before starting. This prevents the cream from overheating and losing its ability to whip properly. If you notice the cream starting to look grainy or separating, stop immediately and start over with fresh, cold cream.
Combine Sweetened Condensed Milk and Flavorings
In a separate medium bowl, whisk together the 1 can sweetened condensed milk, 1 tbsp pure vanilla extract, 0.25 cup granulated sugar, and 0.25 tsp salt until completely smooth. This mixture should be thick and syrupy—almost like a caramel sauce. The salt enhances all the flavors, so don't skip it even if you're not used to adding salt to sweet recipes.
This is where the magic happens—the condensed milk provides the perfect balance of sweetness and creaminess without needing to add extra sugar. If you're using the optional 0.5 cup cookie dough mix-ins or 0.25 cup chocolate chips, fold them into this mixture now using a rubber spatula. Be gentle to avoid deflating any whipped cream you've already made.
Fold the Whipped Cream into the Base
Gently fold about one-third of the whipped cream into the sweetened condensed milk mixture using a spatula. This helps lighten the base and makes the final folding step easier. Once incorporated, add the remaining whipped cream in two additions, folding just until no white streaks remain. Work quickly but carefully—overmixing can cause the cream to deflate.
At this stage, you'll notice the mixture transform from thick and syrupy to airy and light. If you're adding the 0.5 cup fresh strawberries, gently fold them in now using a spatula, being careful not to crush them. The strawberries will add beautiful pink swirls and bursts of fresh flavor throughout each serving. For a marbled effect, you can also drizzle a few extra strawberries on top before freezing.
Freeze for Perfect No-Churn Texture
Transfer the mixture to a 9x5-inch loaf pan or similar shallow container, spreading it evenly with a spatula. Cover tightly with plastic wrap, pressing it directly onto the surface to prevent ice crystals from forming. Place in the freezer and freeze for at least 6 hours, but ideally overnight for 8-12 hours. This long freeze time ensures the ice cream develops that creamy, velvety texture we all love.
Here's a pro tip: For easier scooping, let the ice cream sit at room temperature for 5-10 minutes before serving. If you notice any ice crystals forming after freezing, simply give it a good stir with a fork to redistribute the creaminess. The result should be smooth, rich, and perfectly scoopable—no machine required!
Pro Tips For Making Valerie'S No Churn Ice Cream
- CHILL THE MIX FIRST: Pour your heavy cream and condensed milk into a large bowl before adding vanilla or sugar. Pop it in the freezer for 10 minutes—this helps the cream whip faster and stiffer. I used to skip this and always ended up with ice cream that was more "soft serve" than creamy.
- WEIGH THE CREAM: Measure your heavy cream by weight (300g for 1 quart) instead of volume. Volume cups lie—especially when you’re in a hurry. Cold cream is thicker, and a cup measure will give you less than you think. Trust the scale, not your eyeballs.
- DON’T OVERMIX THE SUGAR: Once you fold in the sugar, stop stirring after it just dissolves. Keep mixing, and you’ll turn your mix into a gluey mess that won’t whip. Stir until the sugar grains vanish, then switch to spatula folds—gentle, like you’re tucking in a baby.
- USE A STAND MIXER: Hand-whipping cream is a workout that yields inconsistent results. A stand mixer with the whisk attachment (on medium-high) does the job in 3-4 minutes—no arm cramps, no guesswork. If you’re using a hand mixer, work in batches and keep the bowl ice-cold between whips.
Essential equipment for perfect results
Mixing Bowls
You’ll need two mixing bowls—one for the whipped cream and one for the sweetened condensed milk mixture. I use stainless steel bowls from OXO because they’re durable and chilled quickly in the freezer.
A medium-sized bowl (8-10 cups) works best for the cream, while a smaller bowl (4-6 cups) is perfect for the condensed milk mixture. If you’re short on bowls, wash one out between steps—just make sure it’s completely dry to prevent any water from getting into your mixture. 🥄
Hand or Stand Mixer
A hand mixer (like the KitchenAid KHM5221OB) or stand mixer (like the KitchenAid K45WH) is essential for whipping the cream to stiff peaks. I prefer a hand mixer for this recipe because it’s lightweight and easy to clean.
If you don’t have one, a French whisk and your arm muscles can work in a pinch, but it’ll take 5-10 minutes of vigorous whisking. Just be patient—rushing here can cause the cream to separate. 💪
Rubber Spatula
A silicone or rubber spatula (I love the OXO Good Grips one) is your best friend for folding the whipped cream into the condensed milk mixture. It’s flexible enough to scrape every last bit from the bowl without tearing the cream.
Avoid metal spatulas—they can leave scratches in your bowls and, more importantly, they’re harder to clean once the sugar sets. Keep one dedicated to dessert tasks to avoid cross-contamination with savory dishes. ✨
Loaf Pan or Airtight Container
For freezing, a 9x5-inch loaf pan (like the Wilton Premium Non-Stick) is ideal because it’s shallow and allows the ice cream to freeze evenly. If you don’t have one, a rectangular plastic container (like Rubbermaid) or even a freezer-safe glass dish works too.
Just make sure it’s shallow—deeper containers can lead to uneven freezing and ice crystals. Line the pan with parchment paper for easy removal and to prevent sticking. 🧊
Plastic Wrap
Covering your ice cream with plastic wrap (pressed directly onto the surface) is non-negotiable—it prevents ice crystals from forming on the top layer. I use Glad Press'n Seal because it sticks tightly and doesn’t tear easily.
Press it down firmly with your fingers or the back of a spoon to eliminate any air pockets. If you’re really ambitious, you can even use parchment paper as a barrier between the plastic and the ice cream for extra protection. ❄️
Optional: Ice Cream Scoop
While not essential, an ice cream scoop (like the OXO Good Grips one) makes serving a breeze. It’s especially helpful if you’re making this for a crowd or adding mix-ins like cookie dough or chocolate chips.
If you don’t have one, a large spoon or ice cream cone works in a pinch—just warm it under hot water for a few seconds to soften the ice cream before scooping. For kids, let them use a smaller spoon—it’s part of the fun! 🍦
Nutrition facts
Frequently asked questions
Can I make this no-churn ice cream without sweetened condensed milk?
Yes! Mix 1 cup powdered sugar with 1 cup heavy cream to replace the condensed milk, though the texture won't be identical. For best results, use the condensed milk as it provides the perfect balance of sweetness and creaminess. The salt and vanilla still need to be added separately to this substitute mixture.
Why does my no-churn ice cream have ice crystals?
Ice crystals form when air gets trapped during freezing or if the mixture wasn't whipped enough. Always press plastic wrap directly onto the surface to eliminate air pockets, and make sure your cream reaches stiff peaks. For existing ice crystals, stir vigorously with a fork to redistribute the creaminess before serving.
How long does this recipe keep in the freezer?
This no-churn ice cream stays fresh for up to 2 weeks when stored in an airtight container. For best quality, enjoy it within 10 days and avoid refreezing once thawed. The texture remains creamy when properly stored, though flavor may mellow over time.
Can I make this dairy-free?
Not traditionally, as the recipe relies on heavy cream and condensed milk. For a dairy-free alternative, try coconut cream-based recipes or store-bought dairy-free condensed milk substitutes. The texture will differ significantly, but you can achieve a similar creamy result with proper whisking techniques.
What's the best way to serve this ice cream?
Let it sit at room temperature for 5-10 minutes before scooping for perfect texture. Serve in bowls with your favorite toppings like crushed cookies, fresh berries, or a drizzle of caramel sauce. For a fancy touch, use an ice cream scoop and garnish with whipped cream or mint leaves.