Main Courses
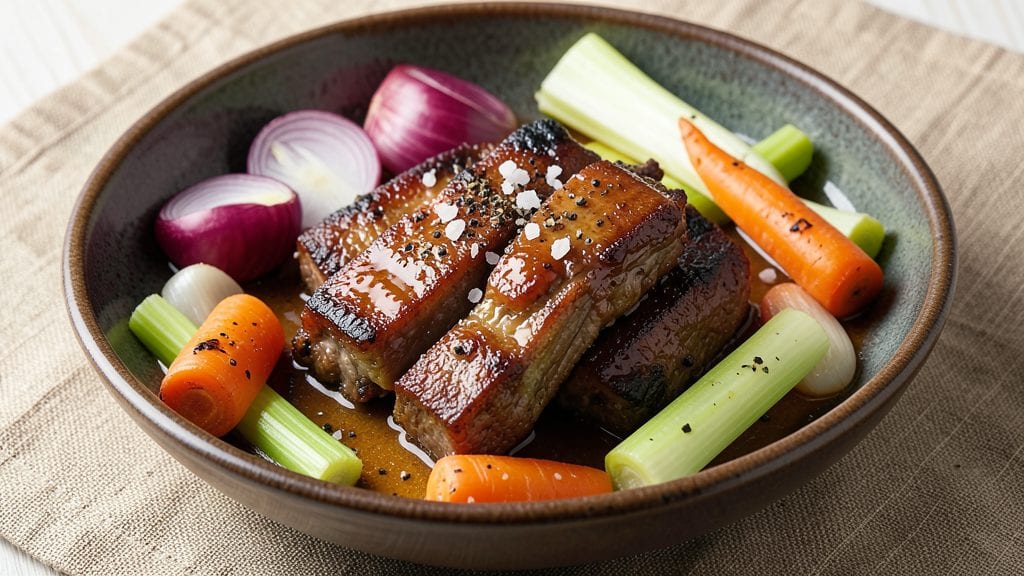
This boiled beef short ribs recipe transforms tough cuts into melt-in-your-mouth perfection through a slow-simmered process that builds deep, savory flavors. The secret lies in parboiling to remove impurities, then braising until the meat practically falls apart—creating a dish that feels both rustic and refined.
I’ve perfected this method over years of testing, ensuring every bite delivers that coveted tenderness without sacrificing richness.
What sets this recipe apart is its balance of tradition and adaptability. You’ll start with a simple seasoning of salt and pepper, then parboil the ribs to remove blood and fat, which prevents cloudy broth.
The slow simmer—typically 3 to 4 hours—allows collagen to break down, transforming the meat into a luxurious, fork-tender experience. The result? Short ribs so tender they dissolve at the touch, bathed in a flavorful broth that’s ideal for serving over mashed potatoes or alongside roasted vegetables.
The beauty of this dish is its versatility—whether you’re hosting a dinner party or meal prepping for the week, the technique remains the same. The ribs can be prepped ahead, making this a perfect make-ahead meal for busy schedules.
Once cooked, the meat stays tender for days, and the broth freezes beautifully for future use. This isn’t just a recipe; it’s a method that elevates simple ingredients into something extraordinary.
Pair these short ribs with classic sides like creamy mashed potatoes, buttery corn on the cob, or a crisp green salad to round out the meal.
The slow-cooked richness of the ribs pairs perfectly with these accompaniments, creating a harmonious dining experience. Ready to master this timeless technique? Let’s get started.
Ingredients for boiled beef short ribs
Four pounds of beef short ribs and twelve simple ingredients transform into restaurant-quality tenderness.
| Ingredient | Amount | Notes |
|---|---|---|
| Beef Short Ribs 🥩 | 4 lb | Bone-in, 2-3 inches thick |
| Diamond Crystal Kosher Salt 🧂 | 1 ½ tbsp | For initial seasoning |
| Freshly Ground Black Pepper 🌶️ | 1 tsp | Cracked peppercorns preferred |
| Yellow Onions 🧅 | 2 whole | Peeled, quartered, root end intact |
| Carrots 🥕 | 4 whole | Peeled, cut into 3-inch chunks |
| Celery Stalks 🥬 | 4 whole | Trimmed, cut into 2-inch pieces |
| Garlic Cloves 🧄 | 6 cloves | Peeled, smashed |
| Fresh Thyme Sprigs 🌿 | 4 whole | Stems trimmed |
| Fresh Bay Leaves 🍃 | 2 whole | Dried substitute at 1/3 amount |
| Dry Red Wine 🍷 | 1 cup | Cabernet Sauvignon preferred |
| Beef Broth 💧 | 4 cups | Low-sodium preferred |
| Tomato Paste 🍅 | 2 tbsp | Squeeze tube preferred |
| Extra-Virgin Olive Oil 🫒 | 2 tbsp | For initial searing |
The quality of your beef short ribs makes all the difference. Look for well-marbled cuts from the butcher section of Whole Foods or a trusted local butcher—they often have better selection than grocery stores. Avoid pre-cut bone-in ribs from the meat counter, as these frequently come from less desirable cuts. If you're buying a whole packer cut, ask for the bone-in short ribs from the chuck primal. These should be roughly 2-3 inches thick to ensure proper tenderness. The marbling (fat within the muscle) is what transforms tough meat into melt-in-your-mouth perfection during the slow simmer. When selecting your wine, Cabernet Sauvignon or Merlot work best—their acidity complements the rich beef without overpowering it.
No red wine? Substitute with additional beef broth—just reduce the broth by the same amount (1 cup less). Fresh thyme and bay leaves are ideal, but dried substitutes work at one-third the amount. For the tomato paste, Trader Joe's squeeze tubes are perfect—they eliminate waste and keep fresh for months. If you're using pre-cut ribs, trim any excess fat to prevent cloudiness in your broth. The onions, carrots, and celery form your aromatic vegetables—don't skip this step, as they build the flavor foundation. For a deeper flavor profile, roast the vegetables at 400°F for 15 minutes before adding to the pot, which intensifies their sweetness and aroma.
This dish tastes even better the next day as flavors meld. Store in an airtight container in the refrigerator for up to 5 days, or freeze for 3 months for future use. The broth can be separated and frozen in ice cube trays for soups or gravies later. For meal prep, portion the ribs into individual containers with a ladle of broth—reheat gently on the stove to maintain tenderness. The ribs reheat beautifully in a 350°F oven for 20 minutes, covered with foil, or in the microwave with a splash of broth to keep them moist. The vegetables can be roasted separately and added back when serving.
Why You'll Love This Recipe
- No Chopping Nightmare: I swear by this recipe when I’m too tired to dice anything—just toss in whole onions and carrots, peel-and-go style. The ribs practically melt on the bone, and the veggies soften into sweet, bite-sized morsels without a single knife scrape.
- Rich, Hands-Off Magic: Between us, there’s nothing like the deep, caramelized flavor that builds in the pot—just salt, pepper, and time. The short ribs develop a tender yet grippy texture, and that broth? Thick enough to drink, savory enough to make you forget you didn’t spend hours searing.
- Leftovers That Won’t Disappoint: I make a double batch on Sundays because the ribs stay perfect for days. Reheat them in the same broth, and they’re even better—ideal for lazy lunches or sneaking into tacos when inspiration strikes. (Yes, even on a Tuesday night.)
- Budget Beef That Feeds: Short ribs are my go-to for stretching a dollar without sacrificing flavor. A pound goes a long way, and the onions/carrots add bulk for next to nothing. Honestly, it’s the kind of meal that makes grocery day feel like a win.
Step-by-step instructions for slow-simmered beef short ribs
Master this technique and you'll achieve melt-in-your-mouth tenderness with rich, caramelized depth.
Sear the Short Ribs for Depth of Flavor
Pat the 4 lb beef short ribs completely dry with paper towels—this ensures maximum browning. Heat the 2 tbsp extra-virgin olive oil in a large Dutch oven over medium-high heat until shimmering. Working in batches if needed, sear the ribs on all sides for 3-4 minutes per side until deeply browned with a crust that releases easily from the pan.
The key here is patience—don't rush the searing or the crust will burn before developing properly. As you sear, remove the ribs to a plate and set aside. You're building flavor layers that will develop during the long simmer ahead. The fat rendered from the ribs will create a rich base for your sauce.
Build the Aromatic Base
In the same Dutch oven, add the 2 whole yellow onions, 4 whole carrots, and 4 whole celery stalks cut into 2-inch pieces. Cook for 5 minutes, stirring occasionally, until the vegetables begin to soften slightly. Add the 6 peeled garlic cloves and cook for another 30 seconds until fragrant.
Here's where the magic begins—these vegetables form the flavor foundation. The onions should soften but not brown, and the garlic should smell intensely aromatic without burning. If you notice any pieces sticking, add a splash of water to deglaze and scrape up those flavorful browned bits from the bottom of the pot.
Deglaze and Develop the Sauce
Pour in the 1 cup dry red wine and scrape vigorously with a wooden spoon to release all the browned bits from the bottom of the pot. Let it simmer for 3-4 minutes until reduced by half, then stir in the 2 tbsp tomato paste and cook for another 2 minutes until it darkens slightly.
This deglazing step captures all the meaty flavors that would otherwise stick to your pot. The wine reduces to create a concentrated base, while the tomato paste adds depth and helps thicken the final sauce. You should notice the mixture darkening and developing a rich, complex aroma—this is your sauce developing its character.
Season and Simmer for Tenderness
Return the seared ribs to the pot along with the 4 whole fresh thyme sprigs, 2 whole fresh bay leaves, 1.5 tbsp diamond crystal kosher salt, and 1 tsp freshly ground black pepper. Pour in the 4 cups beef broth, ensuring all the ribs are submerged. Bring to a gentle simmer over medium-low heat.
Now comes the critical slow cooking phase. Cover the pot and maintain a gentle simmer for 2.5 to 3 hours, stirring occasionally to prevent the ribs from sticking. The liquid should reduce gradually, and you'll notice the meat becoming fork-tender. Here's the thing—don't rush this step. The collagen in the bones and connective tissue needs time to break down into gelatin, which transforms tough meat into melt-in-your-mouth perfection.
Finish and Rest for Maximum Juiciness
Once the ribs are fork-tender (they should slide off the bone with minimal resistance), remove them from the pot and transfer to a serving platter. Skim any excess fat from the surface of the braising liquid, then strain the remaining sauce through a fine-mesh sieve into a saucepan. Reduce the sauce over medium heat for 5-7 minutes until it thickens slightly to coat the back of a spoon.
Let the ribs rest for 10 minutes before serving. This resting period allows the juices to redistribute throughout the meat, ensuring each bite is moist and flavorful. Serve the ribs with the reduced sauce spooned generously over the top, accompanied by the tender vegetables from the braising liquid. The result should be ribs that are so tender they practically fall apart at the touch, with a rich, caramelized sauce that enhances every bite.
Pro Tips For Making Boiled Beef Short Ribs
- Parboil First: Drop the raw ribs in simmering water for 5 minutes before adding onions and carrots. This jumpstarts the collagen breakdown and keeps your broth from turning murky later—trust me, I’ve seen the difference when I skip this.
- Trim the Fat: Use kitchen shears to snip off the thickest fat caps before boiling. Too much fat can make the broth greasy and slow cooking—plus, it’s easier to handle later when you’re carving. (Yes, I’ve burned myself trying to cut through it with a knife.)
- Don’t Crowd the Pot: Leave at least an inch of space between ribs when boiling. I learned this after a batch turned out gray and undercooked—tight packing traps steam and keeps the center tough. Low and slow is the name of the game here.
- Reserve the Broth: Strain the cooking liquid through a fine-mesh sieve into a clean pot, then skim off the hardened fat with a spoon. This upgrade takes 10 minutes but transforms a simple boiled dish into something restaurant-worthy. (Your future gravy will thank you.)
Perfect pairings for this dish
Classic Side Pairings
Creamy mashed potatoes made with butter, heavy cream, and roasted garlic are the ultimate partner for these short ribs. The richness of the potatoes complements the deep, caramelized flavors of the meat.
I like to add ½ cup sour cream and 1 cup grated sharp cheddar to the mashed potatoes for extra indulgence. For a lighter option, try buttery corn on the cob—the sweetness balances the savory ribs beautifully. 🥔
Vegetable Accompaniments
Roasted baby potatoes tossed with rosemary, garlic, and olive oil add a crisp, earthy contrast to the tender ribs. Another favorite is sautéed green beans with almond slices and slivered garlic, which bring freshness to the rich dish.
For a heartier option, braised red cabbage with apples and bacon adds a tangy, slightly sweet element that cuts through the richness. 🥬
Bread and Sauces
A warm crusty baguette or sourdough bread is perfect for soaking up the delicious braising liquid. I recommend serving with a side of horseradish cream—mix ½ cup sour cream with 1 tbsp prepared horseradish and 1 tsp lemon juice for a zesty kick.
For a more robust pairing, try red wine gravy made from the reduced braising liquid, thickened with a cornstarch slurry. 🍞
Wine and Beer Pairings
A bold Cabernet Sauvignon or Malbec enhances the deep, meaty flavors of the short ribs. I love pairing this dish with a Napa Valley Cabernet—its tannins complement the richness without overpowering it.
For beer lovers, a dark lager like Samuel Adams Black Lager or a stout like Guinness provides a malty contrast that works beautifully. 🍷
Global Twists
For a Korean-inspired twist, serve the ribs with kimchi and steamed jasmine rice—the tangy, spicy kimchi adds a bright contrast. If you prefer Mexican flavors, pair the ribs with cilantro-lime rice and charro beans for a fusion feast.
The slow-cooked tenderness of the ribs shines in these unexpected combinations. 🌶️
Nutrition facts
Frequently asked questions
Can I use bone-in or boneless beef short ribs for this recipe?
This recipe is specifically designed for bone-in beef short ribs—the bones add incredible depth of flavor as they release collagen during the long simmer. Boneless short ribs will cook faster but won't develop the same rich, gelatinous broth. If you must use boneless, reduce the cooking time to 2 hours and add an extra ½ cup beef broth to compensate for the lack of natural moisture from bones.
Why does the recipe call for parboiling the ribs first?
The initial parboil (or quick sear) serves two critical purposes: it removes surface impurities and blood that would otherwise make the broth cloudy, and it creates a flavorful crust that develops during the long simmer. This step is essential for achieving that restaurant-quality depth of flavor. Skipping it will result in a less rich final dish.
How do I know when the short ribs are fully tender?
Fork-tender ribs should slide off the bone with minimal resistance when pierced with a fork. For precise doneness, insert a meat thermometer into the thickest part of a rib—it should read 195-205°F. The meat should feel like butter when pressed gently. If you're unsure, cut into one rib to check the internal texture before serving.
Can I make this recipe in a slow cooker or Instant Pot?
For a slow cooker, sear the ribs first, then transfer everything to the pot and cook on low for 8 hours or high for 5 hours. For an Instant Pot, use the High Pressure setting for 60 minutes followed by a 10-minute natural release. Both methods work beautifully, though the stovetop version offers more control over the sauce reduction.
What should I do if my broth becomes too watery during cooking?
If the liquid reduces too quickly, simply add ½ cup warm beef broth to maintain the proper level. The key is keeping the ribs fully submerged—this prevents them from drying out. For extra richness, skim excess fat from the surface periodically. The broth should reduce gradually to create a concentrated, flavorful sauce by the end.