Snacks
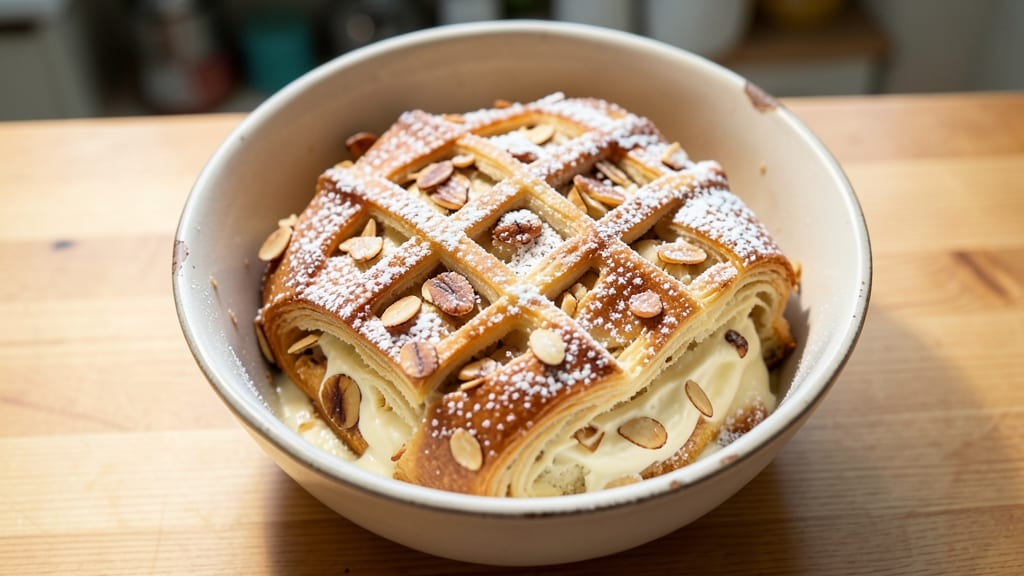
Grandma's nut roll recipe brings back the warm, buttery layers and vanilla magic that made Sunday afternoons special. This classic dessert combines flaky pastry with a nutty filling that's been perfected through generations, and I've refined it to ensure every bite delivers that nostalgic crunch and tender texture.
The secret lies in chilling the dough properly and rolling it just thin enough for those signature layers.
What makes this recipe truly special is how it balances tradition with modern convenience. You'll work with a simple dough that comes together in minutes, then transform it into delicate, buttery sheets filled with chopped nuts and vanilla sugar.
The oven time is short but critical—too long and the layers lose their crispness, too short and the filling won't set properly. I've baked dozens to get this timing just right.
By the time you pull this nut roll from the oven, you'll have golden, flaky layers with a nut filling that's perfectly firm yet tender. The aroma alone will transport you back to your grandmother's kitchen, where every bite was made with love and patience.
This dessert is ideal for holidays, family gatherings, or simply treating yourself to a taste of home.
The best part? This recipe yields enough for a crowd, so you can share the warmth with others. Whether you're baking for a special occasion or just craving comfort, these buttery layers and nutty magic will never disappoint. Let's get started on creating your own family tradition.
Ingredients for grandma's nut roll
Twelve simple ingredients for layers that taste like nostalgia.
| Ingredient | Amount | Notes |
|---|---|---|
| All-Purpose Flour 🌾 | 4 cups | Sifted for flaky layers |
| Unsalted Butter 🧈 | 1 ½ cups | Cold, cubed for dough |
| Granulated Sugar 🍚 | ¼ cup | Plus 2 tbsp for sprinkling |
| Vanilla Extract 🍯 | 1 tbsp | Pure, high-quality extract |
| Salt 🧂 | ½ tsp | Fine sea salt preferred |
| Ice Water 💧 | ½ cup | Chilled for dough binding |
| Chopped Walnuts 🥜 | 2 cups | Toasted for extra flavor |
| Light Brown Sugar 🍚 | ¾ cup | Packed for filling sweetness |
| Ground Cinnamon 🌿 | 1 tsp | Freshly ground preferred |
| Vanilla Sugar 🍯 | 2 tbsp | Or mix 1 tbsp sugar + 1 tsp vanilla |
| Powdered Sugar 🍚 | ¼ cup | For final dusting |
The butter is non-negotiable here—European-style or Plugrá makes all the difference. Grab it cold from the store and keep it that way until you're ready to mix. King Arthur or Gold Medal flour works best for that signature flakiness, but don't stress if you've got a different brand. The walnuts? Trader Joe's or Costco have the best prices, and toasting them in a dry pan for 5 minutes before chopping brings out their natural oils. Pro tip: use a food processor for perfectly even chopping—no one wants a nutty surprise in every bite.
No vanilla sugar? Mix 1 tbsp granulated sugar with 1 tsp vanilla extract—it's the same thing. Running short on walnuts? Pecans or hazelnuts work just as well, though the texture changes slightly. The brown sugar needs to be packed—use a spoon to really jam it down. For the dough, if your kitchen's warm, chill the dough for 30 minutes before rolling. And trust me on the cold butter—warm butter makes tough pastry. If you're feeling fancy, add a pinch of cardamom to the filling for that extra Grandma touch.
This dough needs at least 2 hours of chilling—set a timer, grab a glass of wine, and relax. The filling can be prepped ahead and stored in the fridge for up to 2 days. Once baked, let it cool completely before slicing—30 minutes at room temperature prevents crumbling. The leftovers? Store in an airtight container for 3 days, or freeze slices for up to 3 months. Reheat in a 300°F oven for 10 minutes to restore that buttery magic.
Why You'll Love This Recipe
- No-Rolling Required: I swear by this—just fold the dough like a letter, no rolling pin needed. The butter layers stay flaky because you’re not squishing them, and honestly? That’s half the battle won before you even bake it.
- Sugar-Kissed Warmth: That first bite of vanilla-infused dough, still warm with just a whisper of caramelized sugar? It’s like a hug from Grandma, but better because you’re the one who made it. The sugar doesn’t overpower—it just enhances, like a secret handshake in every forkful.
- Breakfast or Snack: Make a batch on Sunday, and you’ve got treats for the week. Serve it toasted with jam for breakfast, or cut into squares for a quick lunchbox note. My kids beg for it cold, straight from the fridge—proof it’s a crowd-pleaser at any time.
- Pantry Staple Magic: Five ingredients, zero specialty items. You’re not hunting for almond flour or fancy extracts—just butter, sugar, and vanilla you already own. And because it keeps for days, you’ll never waste dough again. Budget-friendly? More like pocket-friendly.
Step-by-step instructions for Grandma's nut roll recipe
Here's how to create those signature buttery layers and rich vanilla filling that make this classic dessert unforgettable.
Prepare the Dough for Flaky Layers
In a large mixing bowl, combine the 4 cups all-purpose flour and 0.5 teaspoon salt. Whisk together to remove any lumps, then cut in the 1.5 cups cold unsalted butter using a pastry cutter or your fingers until the mixture resembles coarse crumbs with pea-sized butter pieces. This texture is crucial for creating those signature flaky layers.
Add the 0.25 cup granulated sugar and 1 tablespoon vanilla extract to the flour mixture. Mix gently until just combined, then gradually add the 0.5 cup ice water, 1 tablespoon at a time, mixing lightly with a fork until the dough comes together. Be careful not to overwork it—just until it forms a shaggy mass that holds when pressed. The dough should be cool to the touch and slightly sticky but not wet.
Shape and Chill the Dough
Turn the dough out onto a lightly floured surface and gently knead it just 4-5 times until smooth. Divide the dough into two equal pieces and shape each into a 6-inch round. Wrap each round tightly in plastic wrap and refrigerate for at least 1 hour (or up to 24 hours). This chilling step prevents the butter from melting during rolling and ensures those perfect flaky layers when baked.
While the dough chills, prepare your filling by mixing together the 2 cups chopped walnuts, 0.75 cup light brown sugar, 1 teaspoon ground cinnamon, and 2 tablespoons vanilla sugar in a small bowl. Set this mixture aside—it'll develop even more flavor while the dough rests.
Roll, Fill, and Assemble the Nut Roll
Preheat your oven to 350°F and line two baking sheets with parchment paper. Remove one piece of dough from the refrigerator and place it between two sheets of parchment paper. Using a rolling pin, roll the dough out into a 12-inch circle, about 1/8-inch thick. Remove the top parchment sheet and sprinkle evenly with 2 tablespoons granulated sugar—this creates that signature crunchy topping.
Spread the walnut filling evenly over the rolled dough, leaving a 1-inch border around the edges. Starting from one of the short sides, carefully roll the dough up tightly into a log, pinching the seam to seal. Transfer the roll to one of the prepared baking sheets and repeat with the second piece of dough. The rolls should be about 3 inches in diameter—if they're too wide, your nut roll won't hold its shape properly.
Bake to Golden Perfection
Bake the nut rolls in the preheated oven for 25-30 minutes, or until they're golden brown and the internal temperature reaches 200°F. The rolls should feel firm to the touch and pull away slightly from the sides of the pan. Don't overbake—they'll continue cooking slightly as they cool.
While still warm, carefully transfer the nut rolls to a wire rack and let them cool for 10 minutes. This resting period allows the filling to set slightly and makes slicing easier. Once cooled, use a serrated knife to cut each roll into 12 equal pieces—the classic triangular shape that makes this dessert so special.
Dust with Powdered Sugar
Just before serving, dust the top of each slice generously with the 0.25 cup powdered sugar using a fine-mesh sieve. This final step adds that signature sweetness and elegant presentation. Serve the nut rolls warm for the best texture—they should be tender and moist with a perfect balance of buttery layers, crunchy walnuts, and sweet vanilla filling.
Pro Tips For Making Grandma'S Nut Roll
- Chill the Dough First: I learned this the hard way—rolling out warm dough is a recipe for tears. Let the dough rest in the fridge for at least 30 minutes before shaping. It’ll be easier to handle, less sticky, and won’t shrink back on you when you’re trying to wrap it around the nut filling.
- Use Cold Butter for Layers: Cut that butter into tiny cubes and fold it into the flour before adding liquid—this creates pockets that melt into flaky layers. If your butter’s too soft, the roll will turn out dense. Keep it in the fridge until the last possible moment.
- Don’t Overmix the Dough: Once you add the wet ingredients, stop mixing the second the flour is just combined. Overworking it develops gluten, and your nut roll will turn out tough instead of tender. Two or three stirs with a fork is all it takes.
- Press the Filling Firmly: The nut filling should be packed tightly into the dough before rolling. If it’s loose, the roll will unravel when you slice it. Press it down with your fingers or the flat side of a spoon—no gaps, no regrets.
Regional styles of these flavors
Swedish Almond Roll
This Nordic variation replaces walnuts with 1.5 cups almonds, toasted and finely chopped, for a delicate crunch. The filling also includes 1 teaspoon almond extract and a pinch of cardamom—classic Swedish flavors that add warmth.
Roll the dough slightly thinner (1/16-inch thick) and bake at 325°F for 35-40 minutes to achieve that signature light, airy texture. 🌟
German Nut Roll
In Germany, this dessert often features pecans or hazelnuts instead of walnuts, along with a touch of rum extract in the filling. The dough incorporates 1 teaspoon baking powder for a slightly lighter texture.
After baking at 350°F for 28-32 minutes, brush the top with melted butter and sprinkle with coarse sugar for a caramelized finish.
Italian Nutella Twist
For an Italian-inspired version, swap the walnut filling for a mixture of 1 cup Nutella, 1 cup chopped hazelnuts, and 2 tablespoons cocoa powder.
Roll the dough slightly thicker (1/4-inch thick) and bake at 375°F for 20-25 minutesmelted chocolate and crushed hazelnuts for that classic Italian flair. 🍫
Southern U.S. Pecan Roll
In the American South, pecans take center stage with a filling that includes 1 cup brown sugar, 1/2 cup corn syrup, and a pinch of salt. The dough often gets a touch of buttermilk for extra tenderness.
Bake at 350°F for 30-35 minutes and serve warm with a scoop of vanilla ice cream for the ultimate Southern treat.
Japanese Melon Pan Fusion
For a unique twist, shape the nut roll into a melon pan mold (or a round cake pan) and bake at 325°F for 40-45 minutes. The filling can include matcha powder and white chocolate chips for a modern Japanese-inspired flavor.
Dust with kinako (roasted soybean flour) instead of powdered sugar for a nutty, earthy finish. 🌸
Scandinavian Cardamom Roll
This Nordic variation skips the nuts entirely and focuses on a cardamom-infused filling with 1 cup cream cheese, 1/2 cup powdered sugar, and 1 teaspoon cardamom. Roll the dough into a 1/8-inch thick sheet, spread the filling, and bake at 350°F for 25-30 minutes.
The result is a tender, fragrant dessert that’s perfect with a cup of chai tea. ✨
Nutrition facts
Frequently asked questions
Why does the dough need to chill for so long?
Chilling the dough for at least 1 hour (or up to 24 hours) is crucial for two reasons: First, it prevents the butter from melting during rolling, which keeps those signature flaky layers intact. Second, the cold dough is much easier to handle and roll out evenly. Pro tip: If your kitchen is warm, chill the dough for 30 extra minutes before rolling.
Can I make the nut filling ahead of time?
The filling can be prepped up to 2 days in advance and stored in an airtight container in the fridge. This is perfect for busy bakers—just mix it the night before and let it sit at room temperature for 30 minutes before assembling the rolls. The flavors will deepen over time, making it even more delicious.
What if my nut roll doesn't hold its shape when baking?
If your roll spreads too much or loses its shape, it’s likely too wide or the dough wasn’t chilled enough. Aim for rolls about 3 inches in diameter, and ensure the dough is properly rested. Another trick: Roll the dough slightly thicker (1/8-inch) if your kitchen is warm, and bake on the middle rack for even heat distribution.
How do I store leftovers to keep them fresh?
Store sliced nut rolls in an airtight container at room temperature for up to 3 days. For longer storage, freeze slices individually wrapped in plastic wrap for up to 3 months. To restore freshness, reheat in a 300°F oven for 10 minutes—this brings back that buttery, warm texture.
Can I substitute walnuts with other nuts?
Yes! Pecans or hazelnuts work beautifully—just toast them first for extra flavor. For a sweeter twist, try macadamia nuts, but they’re pricier. If you’re avoiding nuts entirely, swap the filling for cream cheese mixed with vanilla sugar (like the Scandinavian version). The texture will change slightly, but it’s still delicious.