Soups & Stews
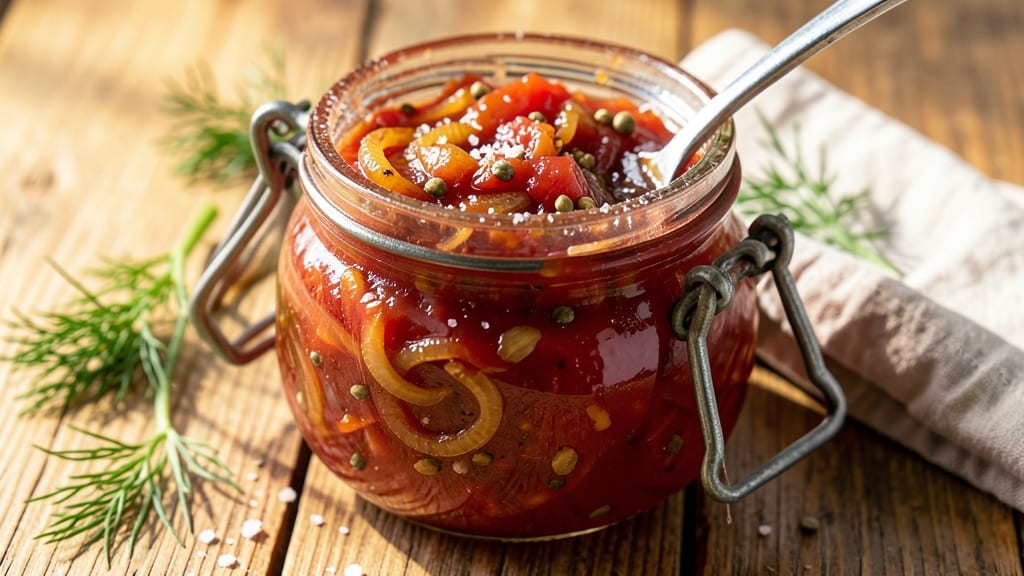
Grandma's tomato relish recipe preserves summer's bounty in a jar, balancing sweetness and tang with just the right amount of vinegar brightness. This heirloom recipe transforms fresh tomatoes into a versatile condiment that elevates sandwiches, hot dogs, and burgers with every spoonful.
I first learned it from my grandmother, who swore by her precise measurements and slow-simmered method for developing deep, complex flavors.
The magic lies in the balance—sugar to sweeten, vinegar to preserve, and spices like mustard seed and celery salt that create that signature tangy crunch. You'll start with fresh tomatoes (or canned if you prefer), onions for depth, and a blend of spices that transforms ordinary ingredients into something extraordinary.
The slow cooking process reduces the mixture to a thick, jam-like consistency with just the right texture—chunky enough to bite into, smooth enough to spread.
What you'll end up with is a relish that tastes like summer in a jar, with vibrant colors and layers of flavor that keep it interesting bite after bite.
It's perfect for canning and storing for months, so you can enjoy that garden-fresh taste even when tomatoes are out of season. This recipe delivers restaurant-quality condiment results with simple pantry ingredients and just 45 minutes of active time.
Use it on sandwiches, as a topping for hot dogs, or as a dip for chips—this relish is as versatile as it is delicious. Once you make it, you'll never go back to store-bought versions again. Let's get started on preserving that perfect balance of sweet, sour, and savory flavors.
Ingredients for grandma's tomato relish
Fresh tomatoes, vinegar, and sugar create this tangy-sweet condiment that tastes like summer in a jar.
| Ingredient | Amount | Notes |
|---|---|---|
| Fresh Tomatoes 🍅 | 6 lb | Roma or vine-ripened preferred |
| Yellow Onions 🧅 | 2 whole | Medium size, chopped fine |
| White Vinegar 💧 | 1 ½ cups | White or apple cider vinegar |
| Granulated Sugar 🍚 | 2 cups | White or light brown sugar |
| Mustard Seeds 🌶️ | 1 ½ tbsp | Whole, not ground |
| Celery Salt 🧂 | 1 ½ tsp | Diamond Crystal preferred |
| Ground Allspice 🌿 | ½ tsp | Freshly ground preferred |
| Black Peppercorns 🌶️ | 1 tsp | Crushed lightly |
| Fresh Dill Weeds 🌿 | ¼ cup | Chopped, stems removed |
| Water 💧 | 1 cup | For thinning if needed |
Grandma always said the tomatoes make or break it. Roma tomatoes are my go-to—they're meaty and hold up to chopping, but vine-ripened works too. Grab the heaviest, firmest ones at the grocery store, and skip the soft or bruised ones. The onions? Yellow onions add the perfect depth—red onions can bleed too much color. I usually grab mine from the bulk bins at Whole Foods or Trader Joe's for freshness. For the vinegar, stick with white or apple cider—avoid balsamic or wine vinegar, which can overpower the delicate balance. And sugar? White sugar dissolves cleaner, but light brown adds a subtle caramel note if you're feeling fancy.
No fresh tomatoes? Canned crushed tomatoes work in a pinch—just drain them well. Swapping vinegar? Lemon juice at half the amount gives a brighter tang, but you'll lose some preservation power. Mustard seeds giving you trouble? Ground mustard at twice the amount is fine, but whole seeds add that signature crunch. Celery salt hard to find? Regular salt plus finely chopped celery gets you close. The dill is non-negotiable for that fresh, bright flavor—dried dill at one-third the amount works if you're fresh out, but it's not the same. For the allspice, nutmeg or cinnamon can add warmth if you're missing it, but keep it to a pinch.
This relish keeps for 6-12 months in the fridge or 12-18 months if canned properly. I always double the batch—one jar for the fridge, one for canning. For canning, use pint-sized jars and process for 15 minutes in a water bath. Store opened jars in the fridge, and it'll last 3-4 months. The flavor actually improves with time, so make extra while you're at it. I like to label mine with the date and what's in them—'Grandma's Relish 2024' makes it feel special.
Why You'll Love This Recipe
- No-Chop Nightmare: I swear by the "rough chop" method—just quarter the tomatoes and halve the onions, no fancy dice needed. The vinegar and sugar do the work of softening edges while you sip your coffee.
- Sweet-Tangy Magic: That balance of bright vinegar cutting through the sugar? Chef’s kiss. The mustard seeds add a tiny, satisfying pop—like a secret spice you didn’t know you needed until it’s there.
- Pantry Staple Power: Use it on hot dogs, slather it on grilled cheese, or toss it into a summer salad. Honestly, I’ve even eaten it straight from the jar (don’t judge). It’s the kind of thing that makes you feel like you’ve got a shortcut to flavor.
- Lasts All Summer: One batch stretches for months in the fridge—perfect for lazy weekends or when you forget to meal prep. And since it’s just tomatoes, onions, and pantry basics? Your wallet doesn’t even flinch.
Step-by-step instructions for grandma's tomato relish
Here's how to transform fresh tomatoes into that tangy, sweet-and-sour relish your grandma made.
Prepare the Tomatoes and Onions
Start by washing the 6 lb fresh tomatoes thoroughly, then cut them into quarters, leaving the cores intact. Place them in a large stockpot and bring to a boil over high heat. Once boiling, reduce the heat to medium and let them simmer for 10 minutes until they begin to break down and release their juices.
While the tomatoes cook, peel and finely chop the 2 whole yellow onions. Add them to the pot with the tomatoes and continue simmering for another 10 minutes. You'll notice the mixture softening and turning into a thick, pulpy consistency. This is where all that beautiful tomato flavor starts to develop.
Add Spices and Sweeteners
In a small bowl, combine the 1.5 tbsp mustard seeds, 1.5 tsp celery salt, 0.5 tsp ground allspice, and 1 tsp black peppercorns. Stir these spices into the tomato mixture. Then, gradually add the 2 cups granulated sugar, stirring constantly to dissolve it completely. This is where the relish gets its signature sweet-and-sour balance.
Let the mixture cook for another 15 minutes, stirring occasionally. You'll see the relish thicken up nicely, and the flavors meld together. The sugar will help draw out more juice from the tomatoes, creating that perfect consistency. If the relish starts to stick to the bottom of the pot, add a splash of the 1 cup water to keep it moving.
Finish with Vinegar and Dill
Once the relish has thickened to your liking, remove it from the heat and let it cool slightly. Stir in the 1.5 cups white vinegar and the 0.25 cup chopped fresh dill weeds. The vinegar will brighten up all the flavors, cutting through the sweetness just enough to make it tangy and complex.
Taste the relish and adjust the seasoning if needed. You might want to add a bit more sugar, vinegar, or salt to balance the flavors perfectly. Let it cool completely before transferring it to clean, sterilized jars. This cooling step is crucial—it allows the flavors to fully develop and the relish to reach its ideal texture.
Store and Enjoy
Once the relish has cooled, spoon it into sterilized jars, leaving about ½ inch of headspace at the top. Seal the jars tightly and refrigerate. This relish will keep for up to 2 weeks in the fridge, though I promise you'll go through it much faster than that!
Serve it on sandwiches, with hot dogs, or as a tangy topping for burgers. The flavors only get better as it sits, so let it mellow for a day or two before your first taste. Trust me, this is the kind of relish that becomes a family favorite in no time.
Pro Tips For Making Grandma'S Tomato Relish
- CHAR THE ONIONS FIRST: I learned this the hard way—skipping this step means your relish will taste raw and sharp. Cook the onions in the same pot until they’re translucent and just starting to caramelize (about 8-10 minutes on medium heat). This builds flavor that nothing else in the recipe can match, even if you’re in a hurry.
- PEEL TOMATOES AFTER COOKING: Sounds weird, but it works: skip peeling raw tomatoes and add them whole to the pot. Once everything’s simmering, let them cook uncovered for 15 minutes—the skins will slide right off. No more tedious peeling, and the tomatoes stay firmer in the final relish.
- STIR THE VINEGAR IN LAST: The acidity can make the sugar crystallize if you mix it too early. Wait until the onions and tomatoes are soft and the sugar’s mostly dissolved before adding the vinegar. Stir in slowly to avoid clumping, and let the whole batch simmer another 5 minutes to balance the flavors.
- TOAST THE MUSTARD SEEDS: Dry-toast the seeds in a separate pan for 30 seconds until they smell nutty—this prevents them from floating as tiny, bitter bits in the relish. Add them right before you pull the pan off the heat so they stay crisp and aromatic. (Your future self will thank you.)
Essential equipment for grandma's tomato relish
Stockpot Essentials
Your 6-quart heavy-bottomed stockpot is non-negotiable for this recipe—it needs to handle the 6 lb of tomatoes without scorching. I use my All-Clad stainless steel pot because it distributes heat evenly and prevents sticking.
If you're on a budget, a Lodge cast iron pot works beautifully too, but monitor it closely to avoid burning. Avoid thin, cheap pots—they'll warp under the heat and ruin your relish. 🔥
Measuring Tools
Precision matters with this recipe, so invest in a stainless steel measuring spoons set for your spices and a digital kitchen scale for the tomatoes (they should weigh exactly 6 lb). I love the OXO Good Grips set for its durable, easy-to-read markings.
For the sugar and vinegar, a liquid measuring cup with clear markings ensures accuracy. Never eyeball these ingredients—your relish's balance depends on it.
Canning Supplies
If you're canning, you'll need pint-sized mason jars with two-piece lids (I use Ball or Kerr brand). A canning rack for your water bath and a jar lifter are essential for safety.
For sterilization, I use a large pot with a steamer basket to boil jars and lids for 10 minutes before filling. Don't skip this step—proper sterilization prevents contamination and extends shelf life to 12-18 months.
Immersion Blender
For a smoother relish texture, an immersion blender (like the Ninja Professional) lets you blend directly in the pot. Pulse 3-4 times after cooking to achieve a chunky-smooth consistency without over-processing.
If you prefer fully smooth relish, transfer half the cooked mixture to a blender first, then blend and return it to the pot. This tool saves cleanup and keeps flavors intact. ✨
Fine-Mesh Strainer
A fine-mesh strainer (I recommend OXO Good Grips) helps remove seeds and skins if you prefer a smoother texture. Place it over a bowl and gently press the cooked tomato mixture through it.
This step is optional but creates a more refined relish perfect for spreading on sandwiches. For chunkier relish, skip this and leave the texture rustic—just stir well before serving.
Spice Grinders
Freshly ground spices make all the difference. Use a small spice grinder (like the Magic Mill) for the mustard seeds, allspice, and peppercorns right before adding them to the pot. Pre-ground spices lose potency quickly, and this recipe relies on their bright, fresh flavors.
If you don't have a grinder, lightly crush the peppercorns with a mortar and pestle—just don't grind them into powder. 💫
Nutrition facts
Frequently asked questions
Can I make this relish without fresh tomatoes?
Use 6 cups of canned crushed tomatoes instead, but drain them thoroughly first. For extra flavor, add 1 extra tablespoon of sugar and ½ teaspoon of salt to compensate for the canned tomatoes' different texture. The vinegar and spices will still work perfectly to create that same tangy balance.
How do I adjust the sweetness or tanginess?
Start with the recipe as written, then taste and adjust gradually. For more sweetness, add ½ cup sugar at a time while warm. For extra tang, stir in 1 tablespoon vinegar at a time until balanced. Remember: flavors meld as it cools, so don't overcorrect right away. Let it sit for 30 minutes before final adjustments.
Can I can this relish at home?
Yes, but only if you follow proper canning procedures! Process filled pint jars in a boiling water bath for 15 minutes for safe preservation. Use new lids and sterilized jars to prevent contamination. The relish will last 12-18 months when canned correctly. For best results, use Ball or Kerr brand supplies and check your altitude zone for processing times.
What's the best way to store leftover relish?
Transfer cooled relish to airtight glass jars and refrigerate. It keeps for 3-4 months this way, though homemade versions are usually gone in weeks! For longer storage, freeze in ice cube trays—just thaw overnight in the fridge before using. The texture may soften slightly after freezing, but the flavor stays vibrant.
Why did my relish turn out too thick or too thin?
Thick relish? You likely simmered too long or didn't add enough water. Thin relish? Either undercooked or overestimated the tomato juices. For next time, simmer for 35-40 minutes total and add 1-2 tablespoons water only if needed. The sugar helps thicken naturally—don't rush the process!