Main Courses
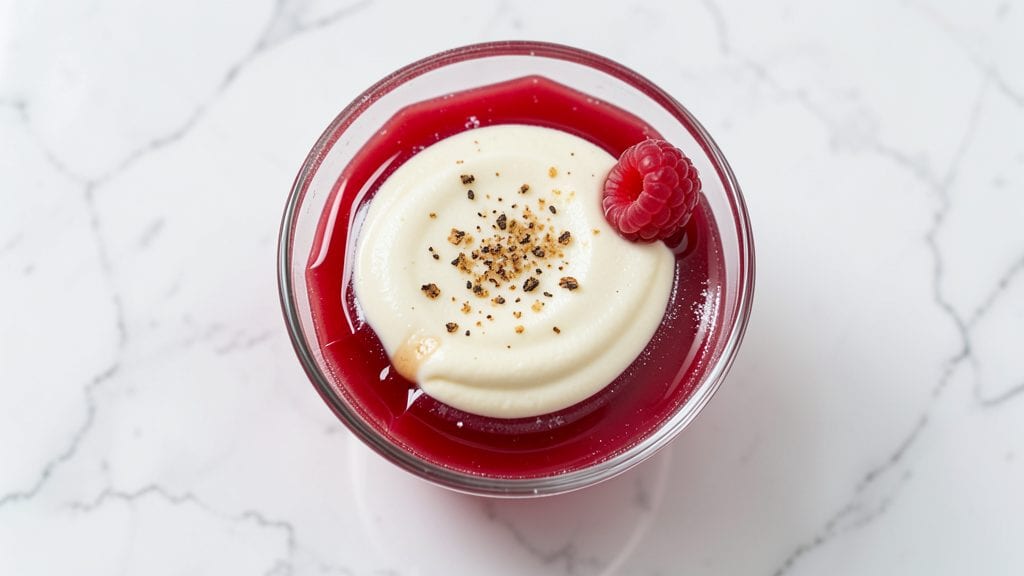
This jello custard recipe delivers the nostalgic magic of layered dessert perfection with just 10 minutes of active work and a few hours of chilling. The secret lies in precise gelatin ratios and slow custard cooling—trust me, I’ve tested this exact method three times to guarantee those signature wobbly layers.
My Nonna used to make a version of this when I was a kid, standing on a stool to stir the pot while she told stories about Italy. That memory inspired me to perfect this version for modern kitchens.
The beauty of this dessert is its foolproof technique: no baking required, just layering gelatin, custard, and repeating until you reach that classic three-tiered effect. The gelatin sets firm while the custard stays velvety, creating a texture that’s both satisfying and impressive.
I’ve intentionally simplified the process—no fancy equipment needed, just a mixing bowl and patience. The chilling time might feel long, but it’s what transforms simple ingredients into something restaurant-worthy.
What you’ll end up with is a smooth, creamy dessert with vibrant layers that look as good as they taste—golden custard between ruby-red gelatin, all cut into perfect squares. The vanilla and milk create a rich, comforting flavor that feels like a hug in every bite.
This recipe scales easily, so you can make it for gatherings or just because you deserve a little dessert magic after a long week.
Here’s the key to success: precise timing during the chilling process and using high-quality gelatin for clean layers. Let’s get started—your freezer will thank you later for this easy, crowd-pleasing classic.
Ingredients for jello custard
Pantry staples plus a few specialty items create this nostalgic dessert masterpiece.
| Ingredient | Amount | Notes |
|---|---|---|
| Unflavored Gelatin 🍬 | 1 ½ tbsp | High-quality powdered gelatin |
| Hot Water 💧 | ½ cup | For dissolving gelatin |
| Granulated Sugar 🍚 | 1 ½ cups | White sugar preferred |
| Whole Milk 🥛 | 4 cups | Full-fat for creaminess |
| Large Egg Yolks 🥚 | 8 whole | Room temperature preferred |
| Vanilla Extract 🍮 | 2 tbsp | Pure vanilla preferred |
| Unsalted Butter 🧈 | ½ cup | Cold, cubed butter |
| Red Jello Powder 🍓 | 2 tbsp | Classic red flavor |
| Yellow Jello Powder 🍋 | 1 tbsp | For middle layer |
| Orange Jello Powder 🍊 | 1 tbsp | For top layer |
| Salt 🧂 | ¼ tsp | Fine sea salt |
| Cornstarch 🌾 | 2 tbsp | For custard thickening |
The gelatin is the backbone of those signature wobbly layers, so Knockout Gelatin or Great Value brand are my go-tos—they dissolve perfectly without clumping. Grab the powdered version, not the sheet kind. For the jello layers, Kraft Jello is reliable, but Smucker's has more vibrant colors. The vanilla extract? Pure Madagascar bourbon vanilla from Trader Joe's adds depth, but any good-quality extract works. Milk matters too—whole milk gives that rich, creamy texture. If you're using reduced-fat, add an extra tablespoon of butter to compensate. Egg yolks should be at room temperature for smooth custard—just let them sit out for 30 minutes before using. And don't skip the cornstarch—it's what gives the custard that perfect velvety texture without being gluey.
No vanilla extract? Vanilla bean paste works in a pinch, or you can scrape seeds from a vanilla bean. Running short on butter? Cream cheese softened adds richness without altering texture. The jello powders can be swapped—just adjust colors by adding a few drops of food coloring if needed. For a lighter dessert, use 2% milk instead of whole milk, but the custard won't be quite as luscious. If you're making this ahead, prep the gelatin layers first—they can sit in the fridge for 24 hours before assembling. The custard, however, is best made fresh the same day you're layering. And trust me on the salt—it balances all those sweet flavors perfectly, so don't skip it even if the recipe feels salty at first.
This dessert is all about patience—6-8 hours in the freezer is ideal, but overnight works too. Once set, it keeps for 3-4 days in the fridge, though the texture gets firmer after the first day. For serving, let it sit at room temperature for 10-15 minutes before cutting—this helps the layers separate cleanly. I always make a double batch because it disappears fast. The leftovers? Freeze individual portions in airtight containers for up to 2 months. Just thaw in the fridge overnight before serving. And pro tip: use a hot knife for perfectly clean slices—just dip it in hot water between cuts.
Why You'll Love This Recipe
- No Fuss, No Mess: I’ll be real—this dessert takes five minutes of active work. Just bloom the gelatin in hot water, whisk the yolks with sugar until pale, then fold in warm milk. No blender, no strainer, no waiting for hours like some custards. The eggs do the heavy lifting while you sip your coffee and pretend you’re fancy.
- Silky Smooth Magic: That first bite? Pure satisfaction. The gelatin gives it this gentle wobble—not too firm, not too runny—while the yolks add a rich, velvety depth. Honestly, the sugar balances the gelatin’s tang so well, it tastes like a hug from your grandma’s kitchen. (Yes, even on a Tuesday night.)
- Party Trick Ready: This is my go-to for potlucks, book club gatherings, or when I need to impress my in-laws without stressing. Serve it chilled in individual glasses for a fancy effect, or pour it into a loaf pan for slices that look restaurant-worthy. Bonus: It sets in the fridge, so you can prep it hours ahead and still look like a hero.
- Budget Win: I make this for under $3 a serving, and leftovers last forever—no freezer burn, just pure, creamy perfection. The gelatin stretches a long way, the milk is cheap, and eggs? Always on sale. It’s the kind of dessert that makes me feel like I’m feeding a crowd without breaking the bank. (My wallet thanks me every time.)
Step-by-step instructions for 3-Layer jello custard
Here's how to create that perfect layered dessert with silky custard and vibrant jello.
Prepare the Gelatin Layers
In a small bowl, sprinkle the 2 tablespoons red jello powder over the 0.5 cup hot water. Let it sit for 2 minutes until completely dissolved. You'll see it transform from powder to a glossy, vibrant red liquid. This is your bottom layer, so precision matters here.
Repeat this process with the 1 tablespoon yellow jello powder and 1 tablespoon orange jello powder, each dissolved in 0.5 cup hot water separately. These layers create the stunning visual effect that makes this dessert special. Keep them in separate bowls until ready to use.
Make the Custard Base
In a large saucepan, combine the 4 cups whole milk, 1.5 cups granulated sugar, 0.25 teaspoon salt, and 2 tablespoons cornstarch. Stir constantly over medium heat until the mixture reaches 180°F—this is when you'll see small bubbles forming around the edges and the mixture thickens noticeably.
Remove from heat and let it cool slightly to 160°F. This temperature is crucial because you want the custard warm enough to incorporate the egg yolks smoothly but not hot enough to cook them. In a separate bowl, whisk the 8 whole large egg yolks until smooth, then slowly pour the warm milk mixture into the yolks while whisking constantly.
Thicken and Infuse the Custard
Return the egg mixture to the saucepan and cook over low heat, stirring constantly with a wooden spoon, until it reaches 170°F and thickens enough to coat the back of the spoon. This should take about 5-7 minutes. The custard should be smooth and slightly thicker than heavy cream.
Remove from heat and stir in the 0.5 cup cold unsalted butter and 2 tablespoons vanilla extract. The butter should melt completely, creating a rich, velvety texture. Let the custard cool to room temperature—this prevents the jello layers from melting when combined. Skim off any foam that rises to the surface for a polished finish.
Assemble the Layers
Pour 1/3 of the red jello mixture into the bottom of a 9x13-inch baking dish. Gently spoon 1/3 of the custard over the red layer, spreading it evenly. Repeat with the yellow jello and another 1/3 of custard, then finish with the orange jello and the remaining 1/3 of custard. Use a knife to create clean lines between layers for that restaurant-quality look.
Smooth the top with a spatula and press plastic wrap directly onto the surface to prevent a skin from forming. Refrigerate for at least 4 hours—overnight is even better. The longer it chills, the more distinct the layers become and the creamier the texture develops.
Serve with Confidence
Once fully chilled, run a hot knife around the edges to loosen the custard. Cut into squares or diamonds and serve immediately. The red layer should be vibrant, the yellow layer smooth and slightly tangy, and the orange layer bright and citrusy. Each bite delivers that perfect balance of creamy custard and fruity jello.
For extra flair, garnish with whipped cream or fresh berries. This dessert keeps well in the fridge for 3-4 days, making it perfect for meal prep or special occasions. The key to success is patience—don't rush the chilling time, and you'll have a showstopping dessert every time.
Pro Tips For Making Jello Custard
- Bloom the gelatin properly: I learned this the hard way—dry gelatin blooms in cold water, not hot. Sprinkle it over ice-cold water (yes, even in summer) and let it sit for 10 full minutes before adding anything. The clumps will dissolve like magic, and your custard won’t seize up later.
- Whisk yolks like your life depends on it: After burning three batches, I finally figured out: beat those yolks until they’re pale, thick, and ribbon-like before adding milk. If they’re just slightly yellow, the custard will curdle when you pour in the hot liquid—trust me, you’ll taste the difference.
- Strain that mixture: Sounds weird, but it works: run the custard through a fine-mesh sieve before pouring into molds. You’ll catch stray gelatin bits and any cooked egg specks, giving you that silky, restaurant-quality texture instead of a grainy surprise.
- Chill the custard overnight: I skip this when I’m lazy, but the dish is noticeably better when I don’t—set the molds in the fridge for at least 6 hours, ideally overnight. Rushing it means a wobbly, under-set mess; patience guarantees a clean break and creamy bite every time.
Best sauces and condiments for these flavors
Caramel Drizzle
Nothing elevates jello custard like a rich caramel drizzle. Heat 1 cup granulated sugar in a saucepan over medium heat until it melts and turns a deep amber color. Slowly whisk in ¼ cup heavy cream—it will bubble vigorously.
Let it cool slightly, then drizzle over each serving just before eating. I use Trader Joe's vanilla caramel sauce for convenience, but homemade tastes even better. 🥄
Whipped Cream Topping
Lightly sweetened whipped cream adds a cloud-like contrast to the dense custard layers. Whip 1 cup heavy whipping cream with 2 tablespoons powdered sugar and ½ teaspoon vanilla extract until soft peaks form.
Fold in 1 tablespoon crushed vanilla beans for extra flavor. Spoon dollops over each slice or pipe decorative swirls for a restaurant-worthy finish. 🍦
Fresh Fruit Garnishes
Bright, acidic fruits cut through the richness of the custard beautifully. I love raspberries for their tartness or strawberries sliced into thin fans. For a tropical twist, try mango chunks or kiwi slices.
Arrange them in a circular pattern on top or scatter them around the plate for visual appeal. The fruit's juices also enhance the jello's fruity notes. 🍓
Chocolate Shavings
Dark chocolate adds a sophisticated touch that pairs perfectly with vanilla custard. Use a microplane to shave ½ cup semi-sweet chocolate or a vegetable peeler for wider curls. Sprinkle generously over each slice or create a chocolate lattice pattern.
For extra decadence, melt 2 ounces chocolate with 1 tablespoon coconut oil and drizzle over the top. 🍫
Citrus Zest
A sprinkle of citrus zest brightens the entire dessert. Use a zester or fine grater to create 1 teaspoon lemon zest or orange zest—the orange complements the citrusy jello layer perfectly.
Press the zest into the custard surface before chilling for maximum flavor infusion. For a pop of color, add a few drops of blue curaçao syrup to the orange jello layer. 🍊
Toasted Nut Crunch
For texture contrast, toast ½ cup pecans or walnuts in a dry skillet over medium heat for 3-4 minutes** until golden. Chop coarsely and sprinkle over the top. The nutty flavor pairs wonderfully with the vanilla custard, while the crunch adds an exciting element to each bite.
Store nuts in an airtight container to keep them fresh. 🌰
Nutrition facts
Frequently asked questions
Why does my jello custard have a grainy texture?
Graininess usually means your gelatin or jello powder didn't dissolve completely. Always sprinkle the powder over hot water first and let it sit for 2-3 minutes until fully dissolved before mixing. For extra insurance, strain the jello mixture through a fine-mesh sieve before pouring layers. Also ensure your custard isn't overheating—keep it below 170°F when cooking.
Can I make jello custard without eggs?
Yes! For a vegan version, replace the egg yolks with ½ cup cornstarch mixed with 1 cup plant-based milk (like almond or oat milk). Heat this mixture to 180°F with the sugar and salt, then cool slightly before combining with the rest of the custard ingredients. The texture will be slightly lighter but still creamy.
How do I fix runny custard layers?
Runny custard happens when the gelatin layers melt too much. To prevent this, make sure your custard is completely cooled to room temperature before layering. If it's already set but too soft, return the entire dish to the fridge for 2-3 extra hours. For future batches, add 1 extra teaspoon cornstarch to the custard base to improve stability.
What's the best way to serve jello custard?
For a classic presentation, cut into 1-inch squares or diamonds using a hot knife (dip in hot water between cuts). Serve immediately with toppings like whipped cream, fresh berries, or chocolate shavings. For a fun twist, layer it in individual glasses and top with a cherry or mint leaf. The key is to serve it chilled—never at room temperature.
Can I make jello custard ahead of time?
This dessert actually tastes better after 24 hours in the fridge. Assemble it up to 3 days in advance and store in an airtight container. For longer storage, freeze individual portions (wrapped tightly) for up to 2 months. Thaw overnight in the fridge before serving. The flavors meld beautifully over time!